Import from Excel
Here we show you how simple it is to import a file from Excel. This process applies to all pages where we have made the Import from Excel action available. In this example, we will import customer transactions into a sales journal. This example assumes you have already created an Excel Mapping Template using the General Journal import type.
Importing a Sales Journal
Open the Import from Excel Page
In the sales journal page, select the Import from Excel action.

Select the Excel Mapping Template
Enter the Template Code or choose the Template Code by using the lookup. You could alternatively click Select a template to use for the import, which will open the Excel Importer Mapping List where you can choose a template.
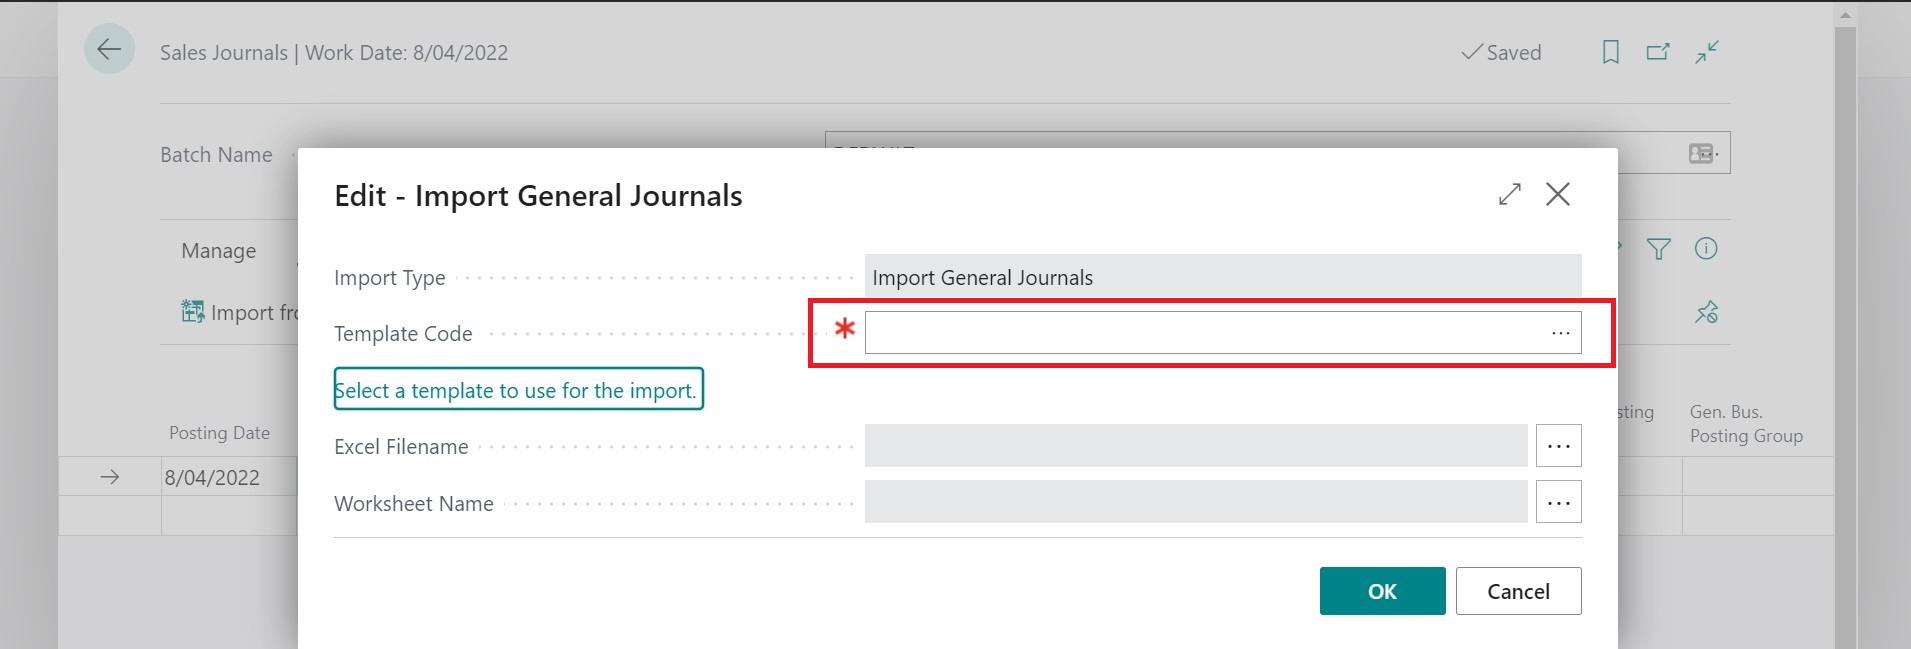
Choose the Excel file and Excel Worksheet
Browse to the Excel file by selecting the Assist Edit button next to the Excel file name.

If your Excel file only has one worksheet, the Worksheet Name will default. If the file has multiple sheets, you get prompted to select the sheet from a list showing all sheets in the Excel workbook. If you mistake and choose the incorrect worksheet, you can use the assist edit next to the Worksheet Name to select a different worksheet.
You will notice that the text highlighted by the blue rectangle has changed and now reads Click here to view or update template - CUSTOMER-OPENING. If you click this, the Excel Mapping Template page will open.
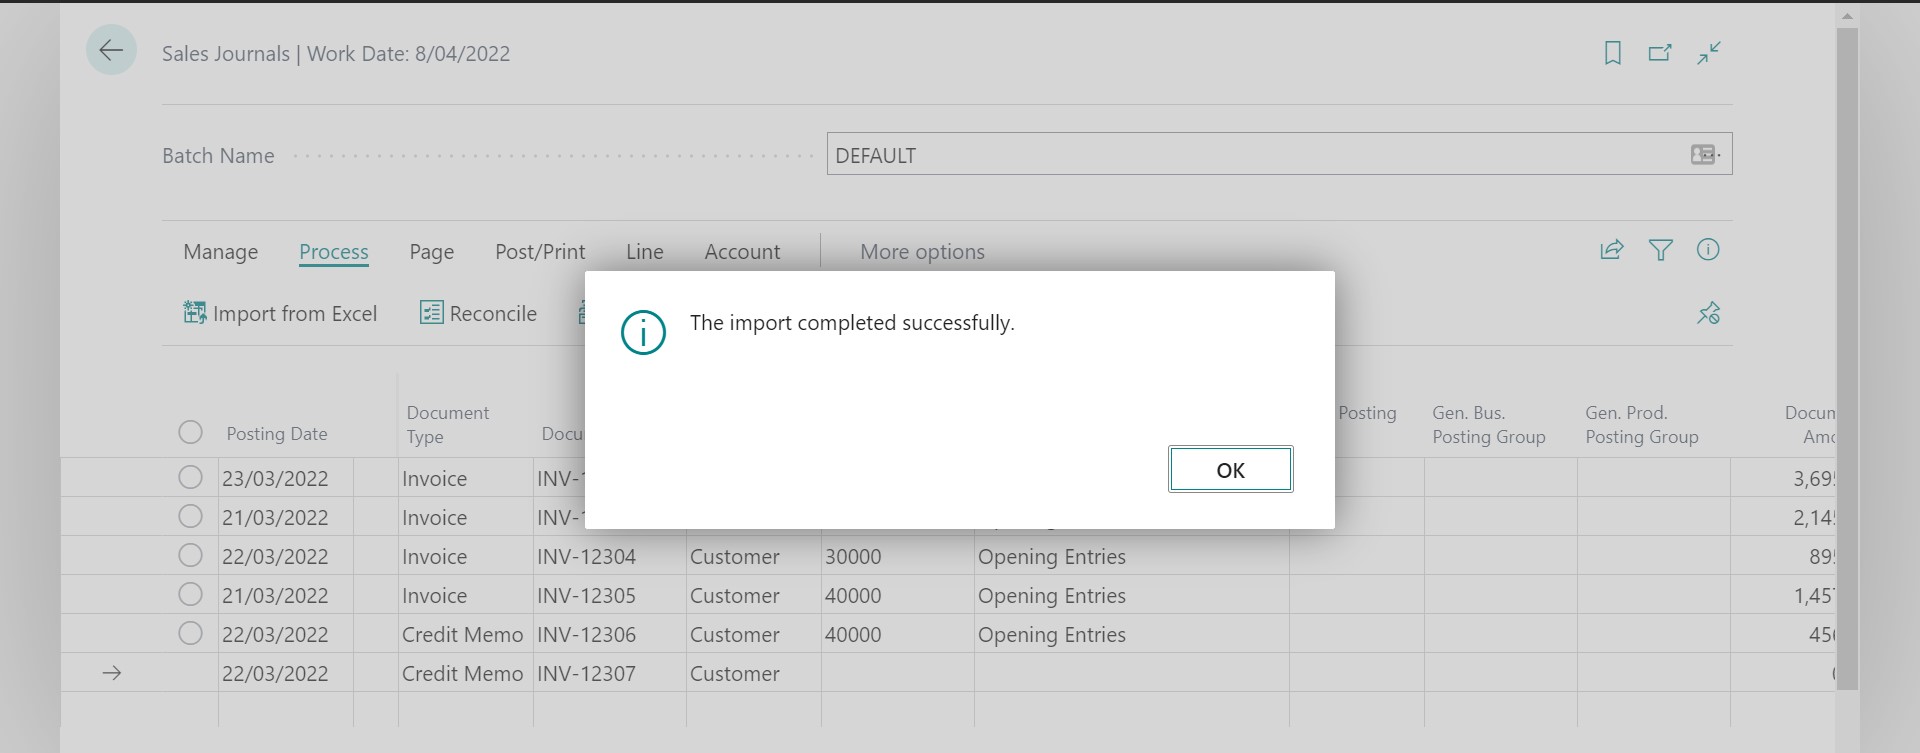
Click OK to import the file
Click OK to import the file. After importing the file, Excel Importer displays a message confirming that the import is complete. After clicking OK, Excel Importer will return you to the page where you started.
Importing a variable-length text file for the first time
Here we show you how to configure a template and them proceed to import it.
Multiple-Sheet Imports
This feature allows you to import multiple worksheets from the same Excel file in one upload or import the same sheet more than once using different templates. Scenarios where this could be useful include:
- Import different sheets from the same file to different entities. In the example below, we import customers and sales invoices.
- Use the same sheet to feed imports to different entities, such as importing dimension values from the sheet you will use to import sales invoices.
To use this feature, you must first have set up Import Definitions and Excel Mapping Template(s)
The feature supports pre-configured scenarios, and you can also perform an ad-hoc import of multiple sheets at once.
Pre-configured Multi-Sheet Imports
The Multi-Sheet Imports page is used to run the import and configure import scenarios.
Running the Import
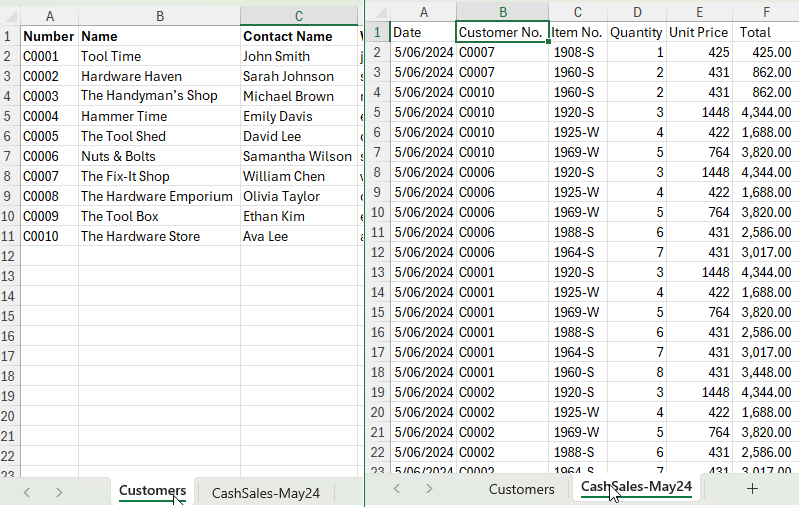
The image below shows an Excel file with two sheets containing customers and the associated sales. To avoid errors when the customers do not exist, we must import the customers before we import the sales invoices.
The animation below shows you how to run a Multi-Sheet Import that has already been configured. After the import is completed, the app opens the imported files page.
If any errors occur, the text will be red. Please note: The import stops processing after the first error. The import rolls back to the last successfully imported sheet. The fact box in the imported files page shows which sheets have been imported and which have not. After addressing the cause of an error, you can use the Process/Retry action to complete the processing.
Configuration
Select the New action on the Multi-Sheet Imports page to add a new template. The image below shows the template we used for the above animation.
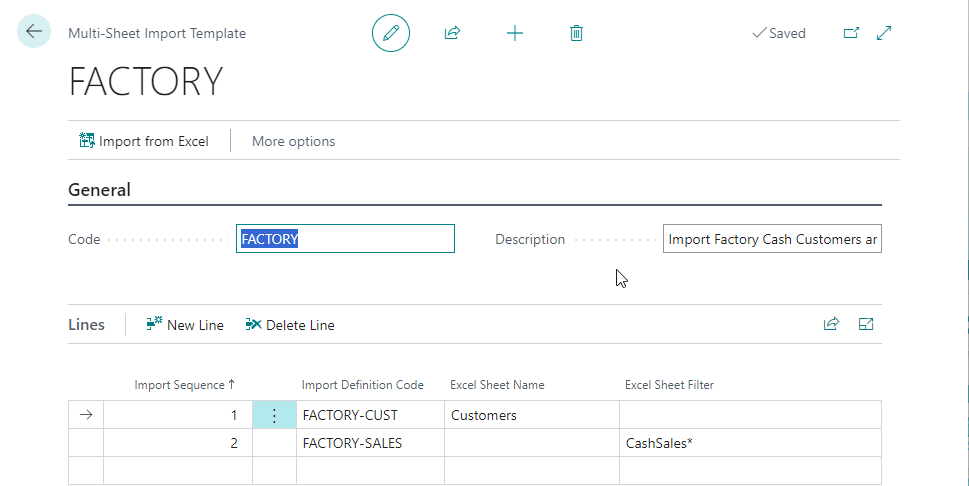
| Field | Purpose |
|---|---|
| Import Sequence | Specifies the sequence to process this sheet. In the example above, we want to import the customers before we import the sales invoices. |
| Import Definition Code | Specifies the import definition code the app will use to import the sheet. Read here for more information on how to set up an import definition. |
| Excel Sheet Name | Specifies the Excel Sheet Name. You should only select this if the sheet name never changes. In the example above, we were able to specify the sheet name for Customers because every file we receive will always have a sheet called Customers. |
| Excel Sheet Filter | Specifies a filter to identify the sheet. This is useful when the sheet name changes but has a similar name. In the above example, the invoice sheet name always starts with CashSales but will have a different month. |
This feature is not available to use with text files.
Data Validation on Imports
Excel Importer validates the template setup and the most common errors before importing the data. If errors occur at this level, the import gets cancelled, and a page showing the user the errors is displayed. Suppose there are no errors in the data. In that case, Excel Importer will start importing the data and perform the default validation on the data you import as if you were entering it manually.
Excel Mapping Template Setup Errors
If the template setup is incorrect or incomplete, it is impossible to process the file. The app checks all the mapping lines to ensure the mapping setup is complete. Any errors get collected and displayed once all mapping lines have been checked. The example below shows the behaviour if you select a template that is not correctly configured.

If you encounter this page, select Open Related Record to open the Excel Mapping Template so that you can correct the setup. You can find more information on the Excel Mapping Template here.
Data Errors
Data errors occur when the file does not contain valid data or when the data in the file contains references to entities that do not exist or entities that cannot be used (e.g. blocked customers). By default, Excel Importer will validate the most common issues before importing the data. This approach lets the app provide you with a list of errors rather than stopping on the first error. The validation done before importing will check the following:
- The data in the file can be imported into the fields defined in the template. For example, you cannot import text into a decimal field.
- The minimum information is specified - for example, a Sales Invoice must have a customer number, or a general journal line must have an account number specified.
- The entities (e.g. G/L Accounts) referenced in the file exist and are not blocked.
The app processes all rows in the file while performing this validation. If there are errors after the initial validation, processing gets cancelled, and the app displays a list of errors. The example below shows a combination of data issues in the file (red rectangle) and configuration issues (orange rectangle).
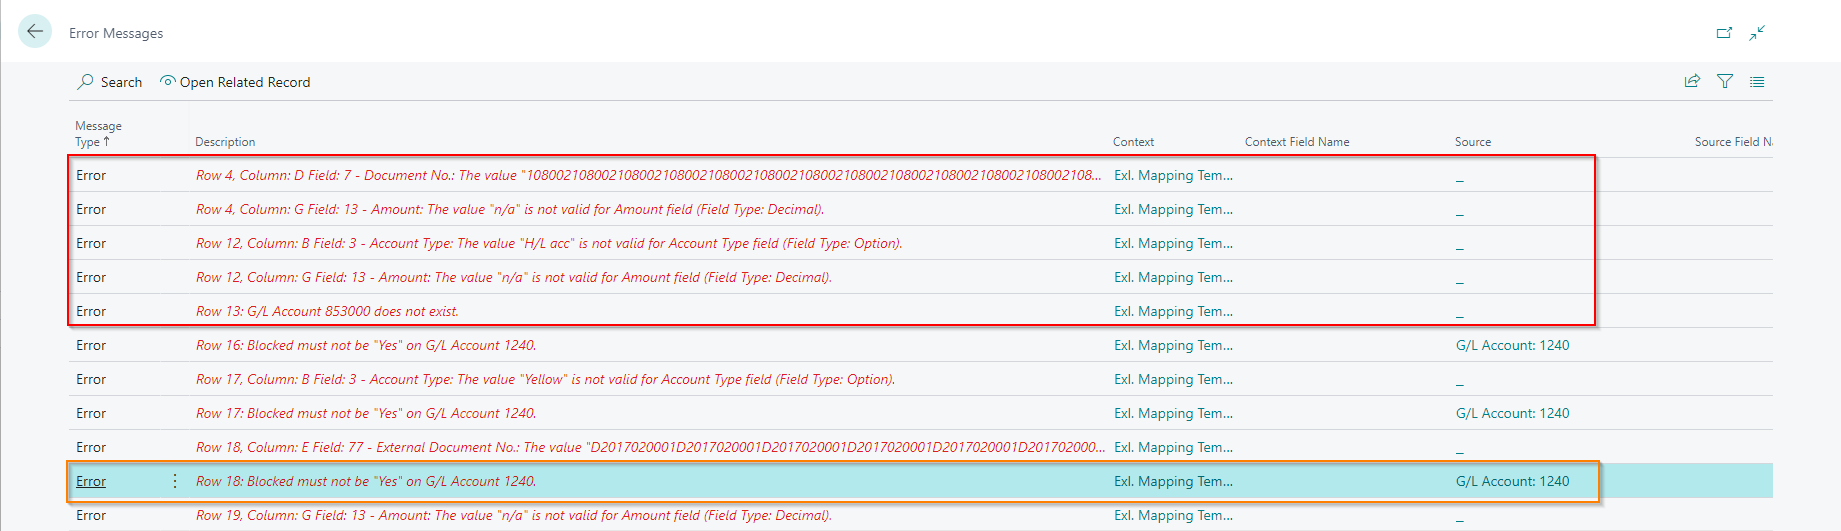
You will notice that the Source field is filled in for the errors related to G/L Account 1240 in the example above. You can select Open Related Record to open the G/L Account Card if you want to edit the account.