Setup
Overview
You only need to do some basic setup with Purchase Accruals. You must carry out the following steps:
- Activate Purchase Accruals
- Purchase Accrual Setup
- Posting Setup
Activating Purchase Accruals
All apps built by Theta get activated similarly. You can read about this here.
When you activate the extension, you will start your free trial. You do not have to enter payment details to start the trial. If you decide to purchase the extension, you can add payment details before your trial ends. Your trial will still run to the end before you get billed.
Purchase Accrual Setup
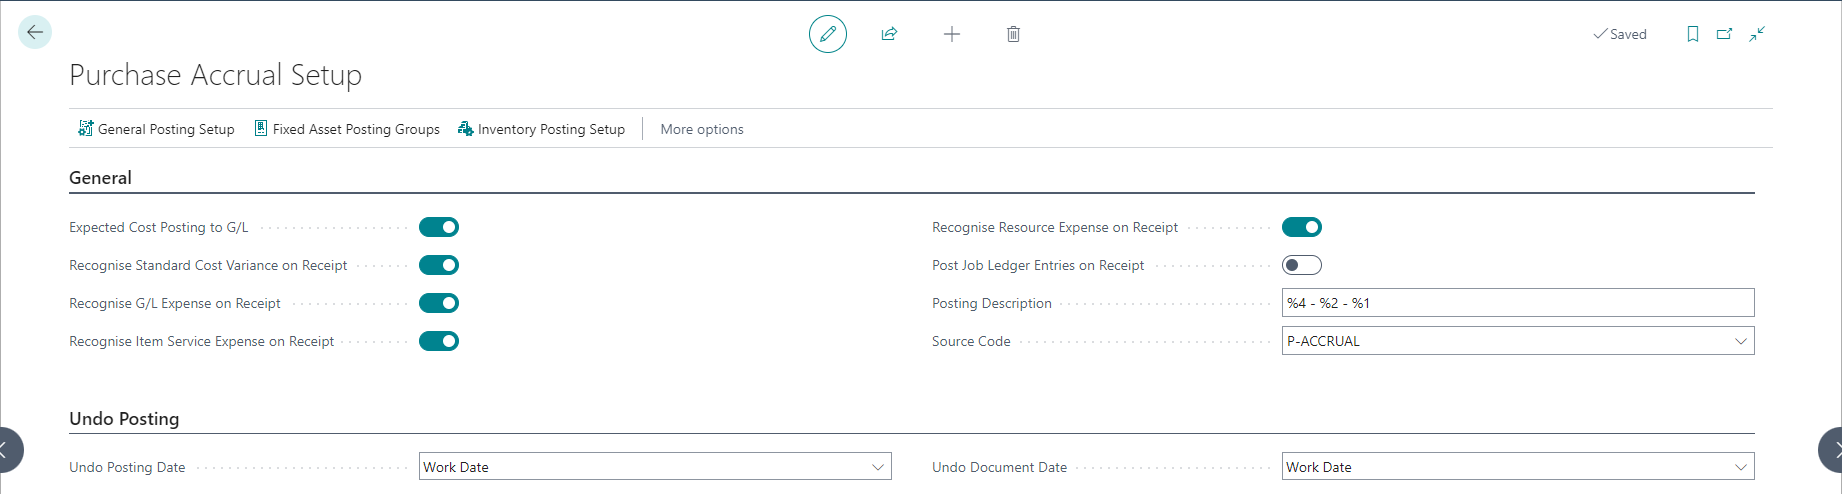
You can find the Purchase Accrual Setup page by searching for Purchase Accrual Setup using tell me.
General
| Field | Purpose |
|---|---|
| Expected Cost Posting to G/L | Specifies that expected costs will be posted for all Purchase Line types when the related purchase documents get received/shipped but not invoiced. When you activate this, the app also validates that you have activated this for inventory. |
| Recognise Standard Cost Variance on Receipt | Specifies that the app will recognise the variance to standard cost at the time of receipt. Note that this will only take effect if Expected Cost Posting to G/L is enabled on inventory setup. |
| Recognise G/L Expense on Receipt | Specifies that the expense will be recognised on receipt when the Purchase Line Type is G/L Account. Read here for more detail. |
| Recognise Item Service Expense on Receipt | Specifies that the expense will be recognised on receipt when the Purchase Line Type is Item and the related item has a type of Service or Non-Stock. Read here for more detail. |
| Recognise Resource Expense on Receipt | Specifies that the expense will be recognised on receipt when the Purchase Line Type is Resource. Read here for more detail. |
| Post Job Ledger Entries on Receipt | Specifies that job ledger entries get posted when a purchase order is received and not invoiced. |
| Posting Description | Specifies the posting description for interim entries. You can include: %1 = Description from purchase line, %2 = Buy-from Vendor Name, %3 = Pay-to Vendor Name, %4 = Order No., %5 = Posting Type, %6 = Buy-from Vendor No., %7 = Pay-to Vendor No., %8 = Value Type. |
| Source Code | Specifies the source code used on entries created from purchase accruals. |
Recognise or Accrue on Receipt
The app aims to accrue for expected liabilities and recognise expenses when they occur rather than only when we get the invoice. Therefore, the default setup recognises the expense when the receipt is posted, reverses the accrual, and replaces it with the actual when the invoice is posted. However, some organisations prefer only to recognise the expenses once the invoice is received and choose to accrue both the liability and the expense. The following fields are used to control this:
- Recognise G/L Expense on Receipt
- Recognise Item Service Expense on Receipt
- Recognise Resource Expense on Receipt
If you choose to accrue rather than expense on receipt, there are additional accounts to set up on the General Posting Setup.
Undo Posting
In Business Central, the Undo Receipt and Undo Return Shipment functions use the original posting to post the undo transactions. This is not ideal when the undo occurs in a different period. The app allows you to change this behaviour using the settings below.
|Undo Posting Date|Specifies when to process an undo receipt/shipment. The options available are - Original, Work Date, Today| |Undo Document Date|Specifies which date to use when processing an undo receipt/shipment. The options available are - Original, Work Date, Today|
The option Original refers to the Business Central default.
General Posting Setup
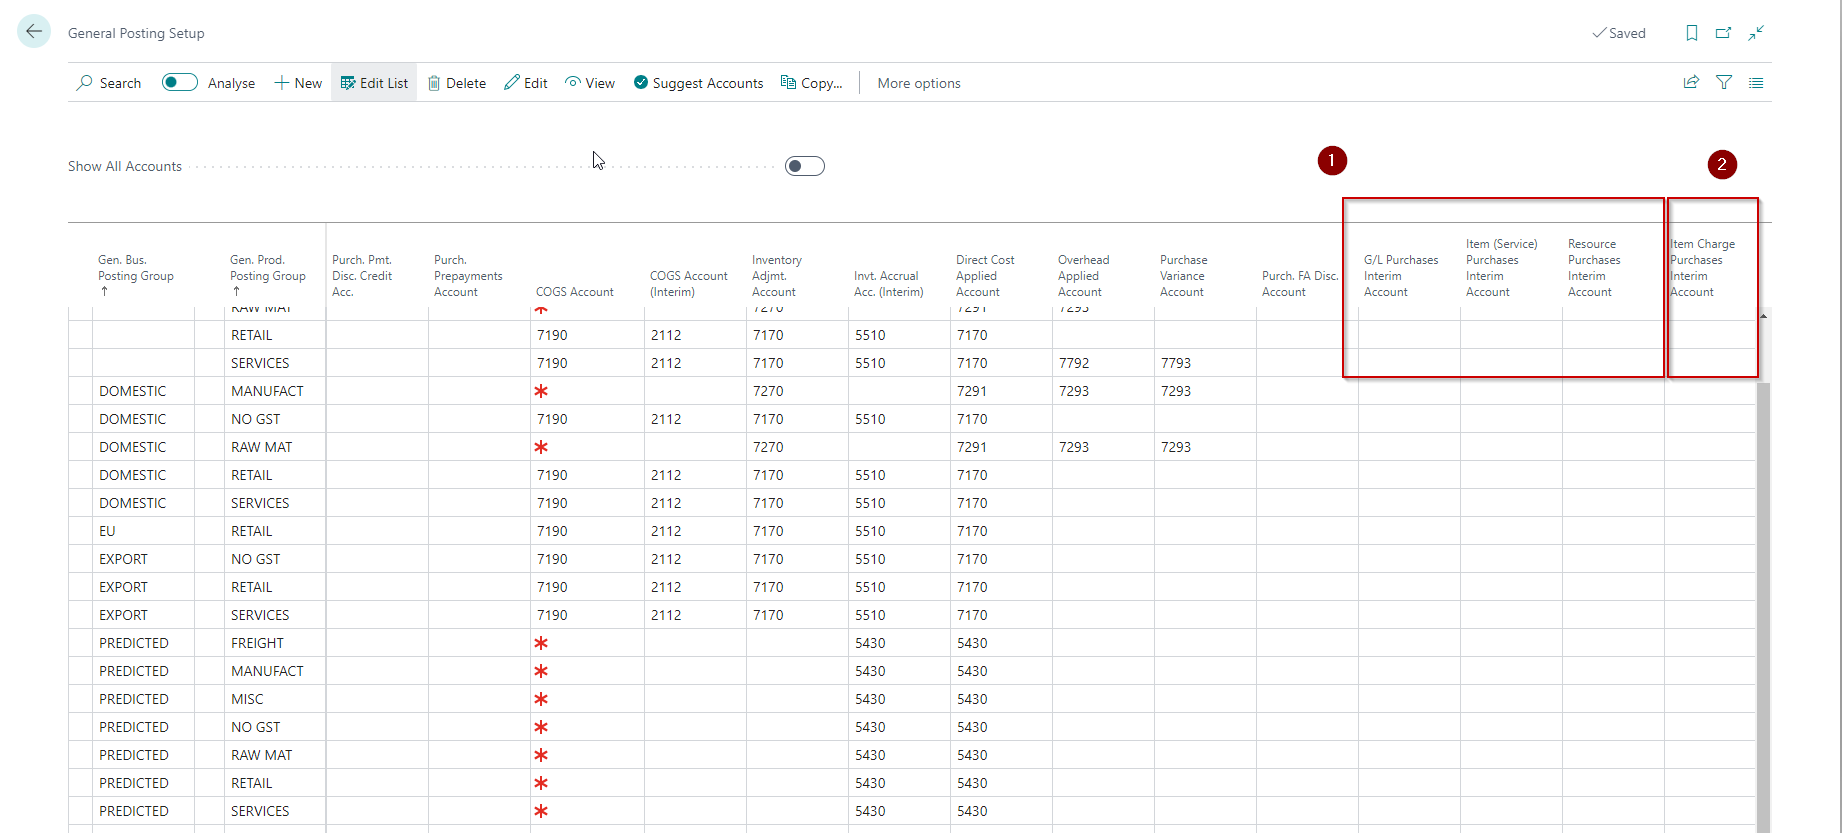
On the general posting setup, we need to specify where to post the liability and where to post the expense. For most types, you won't have to specify additional accounts if you choose to use the default method of recognising expenses on receipt.
Concerning the image below:
- These accounts must be specified if you do not want to recognise expenses on receipt and instead want to accrue them.
- This account must be specified if you wish to recognise expenses on receipt for Item Charges. Most organisations do not receive item charges (they only post the invoice); if this is true for you, you do not need to specify this.
- The app will accrue the liability (Goods Received, not Invoiced) in this account. You must always specify this account, regardless of whether you choose to recognise expenses on receipt or accrue them.
FA Posting Groups
The additional setup here gets used when you process a receipt against a fixed asset.
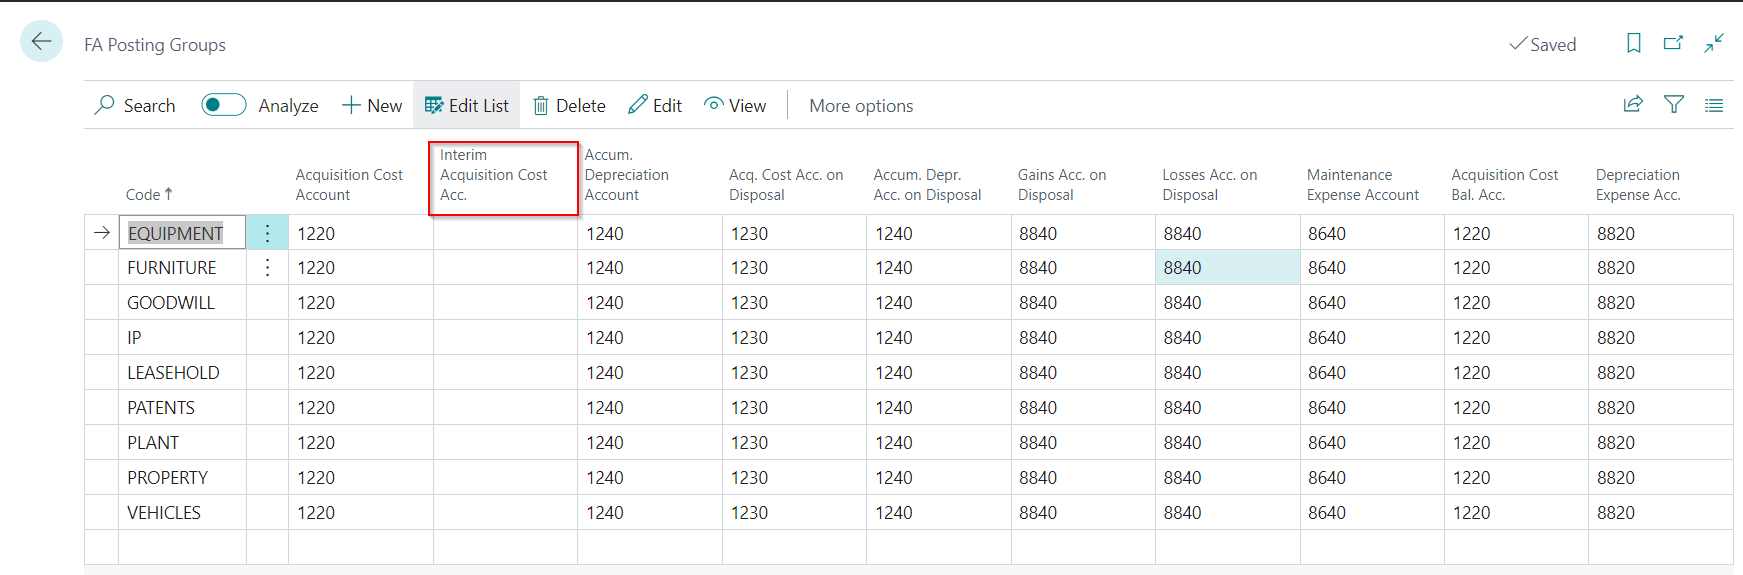
The app does not post fixed asset ledger entries when accruing for fixed assets. Therefore, you must not select an account you usually balance to the Fixed Asset Register.
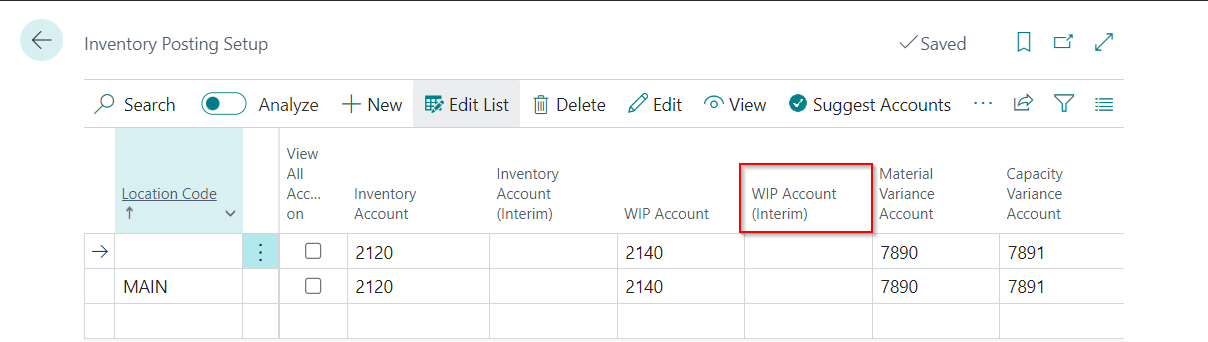
Inventory Posting Setup
You must complete this setup if you use the manufacturing module and want to accrue Subcontracting order receipts.