Setup
This section covers the setup required for the Master Data Synchronisation app.
The app can also assist with the initial setup. We recommend using the initial setup when you start because this already includes typical tables that organisations synchronise, and we have handled some exceptions on specific fields for these tables. You can read more about the initial setup here.
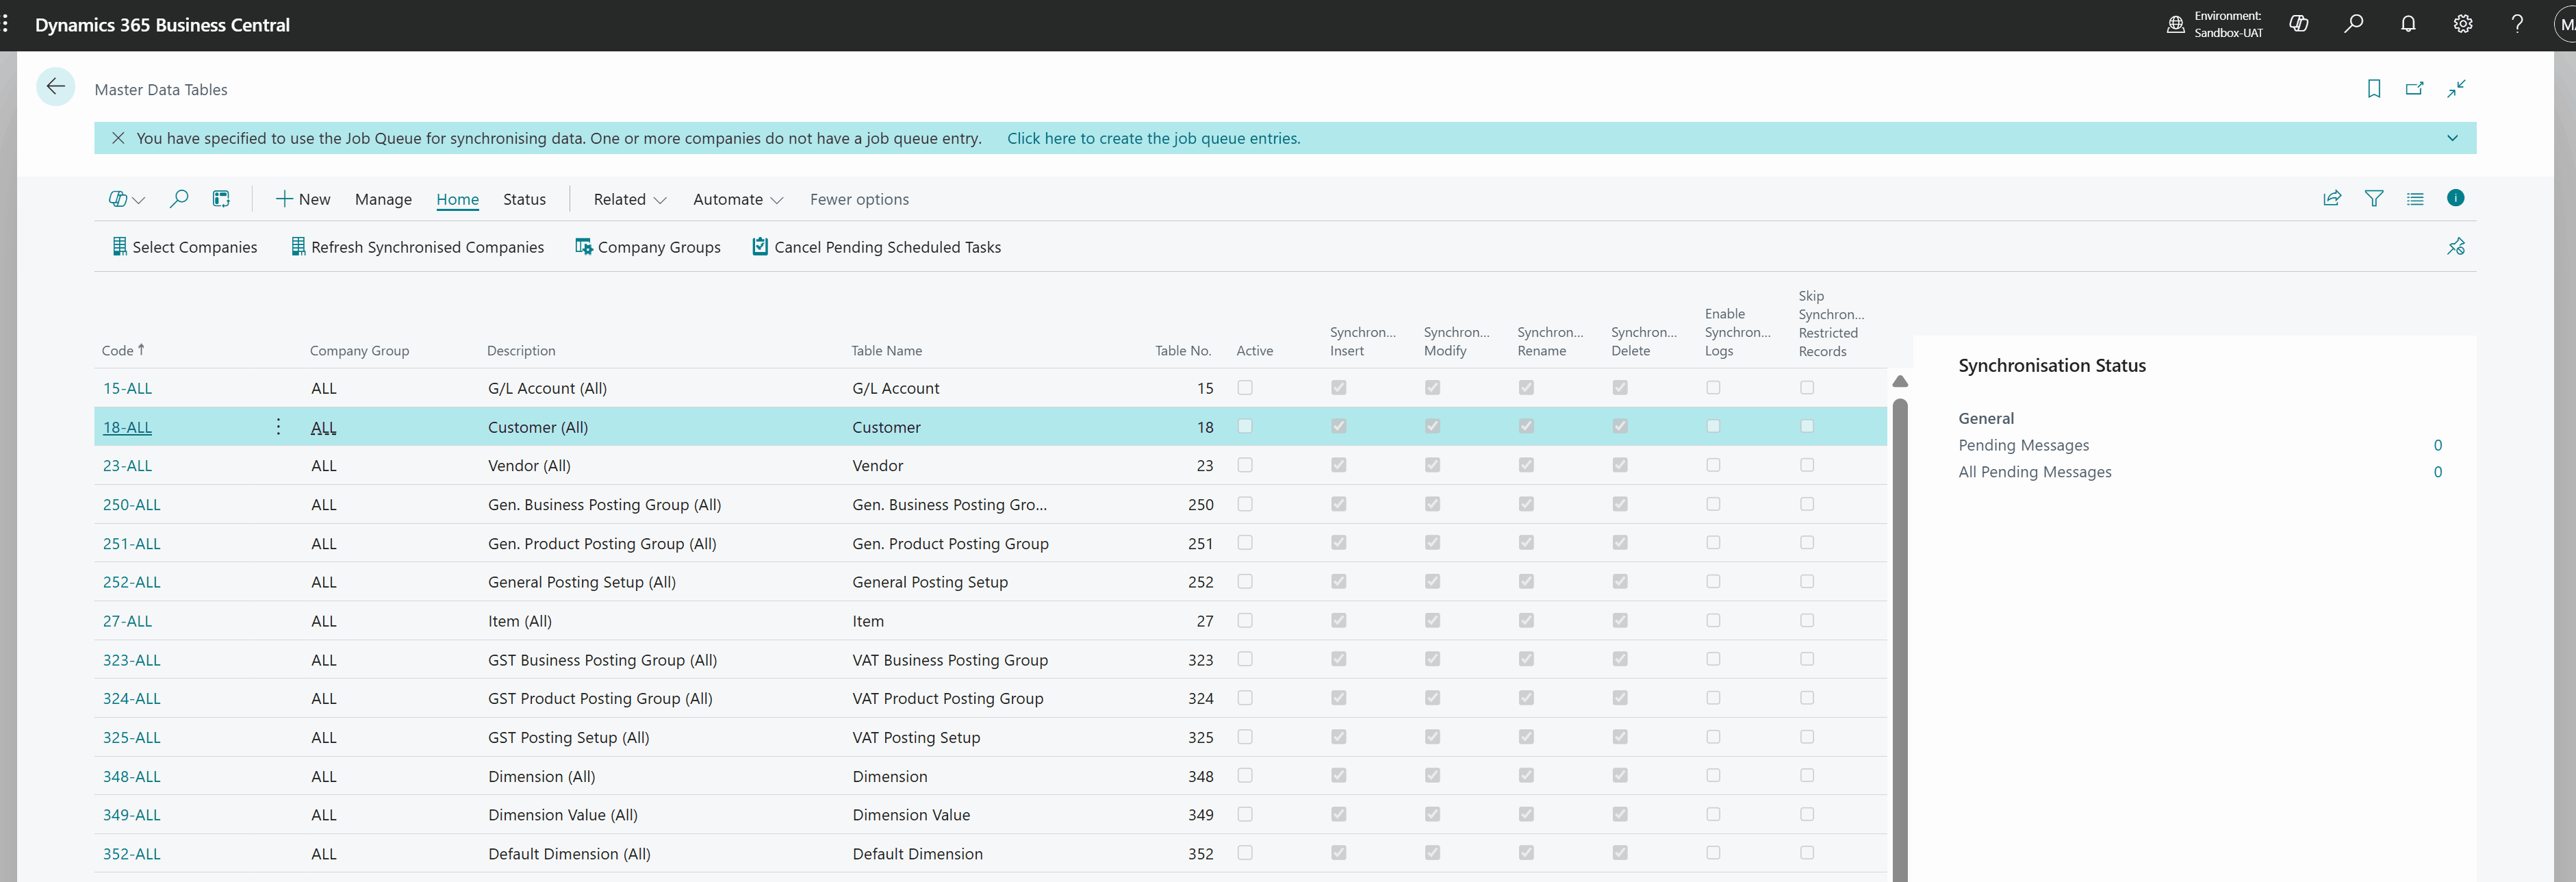
Master Data Tables
The Master Data Tables page lists all the tables that are configured to be synchronised from the current company. It is accessible from Tell Me by searching for Master Data Tables.
You only need to set up the master data tables in the company from which you want data synchronised. The app supports several scenarios, which will determine whether you need to do this setup in one or multiple companies.
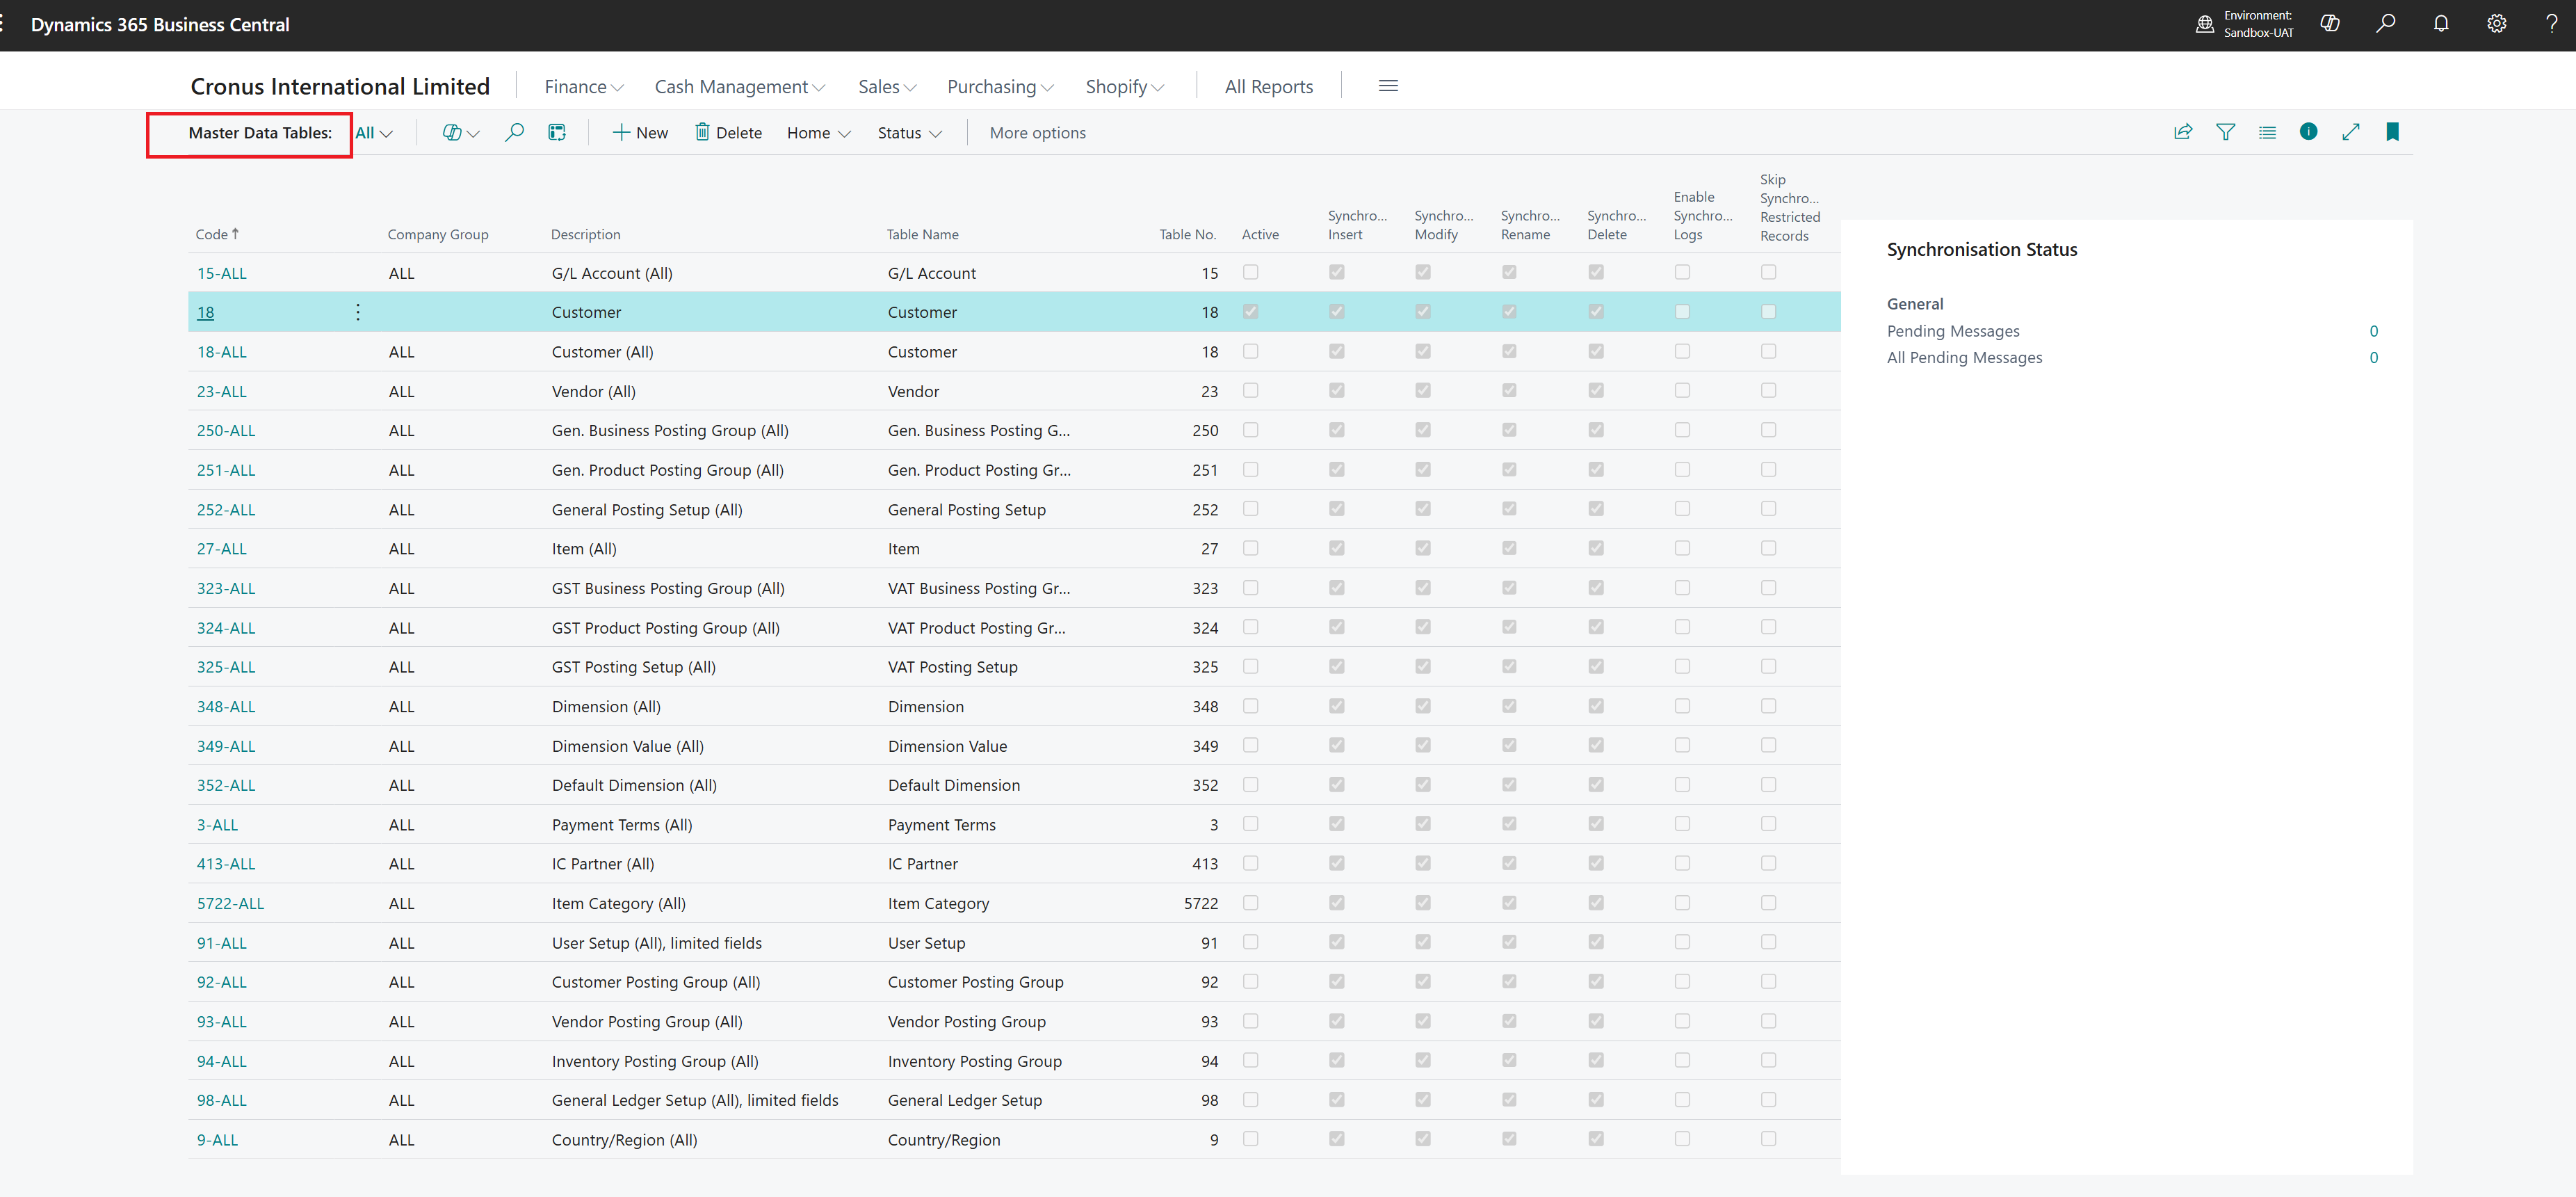
Select the master data table to open the master data table card, where you can edit the setup.
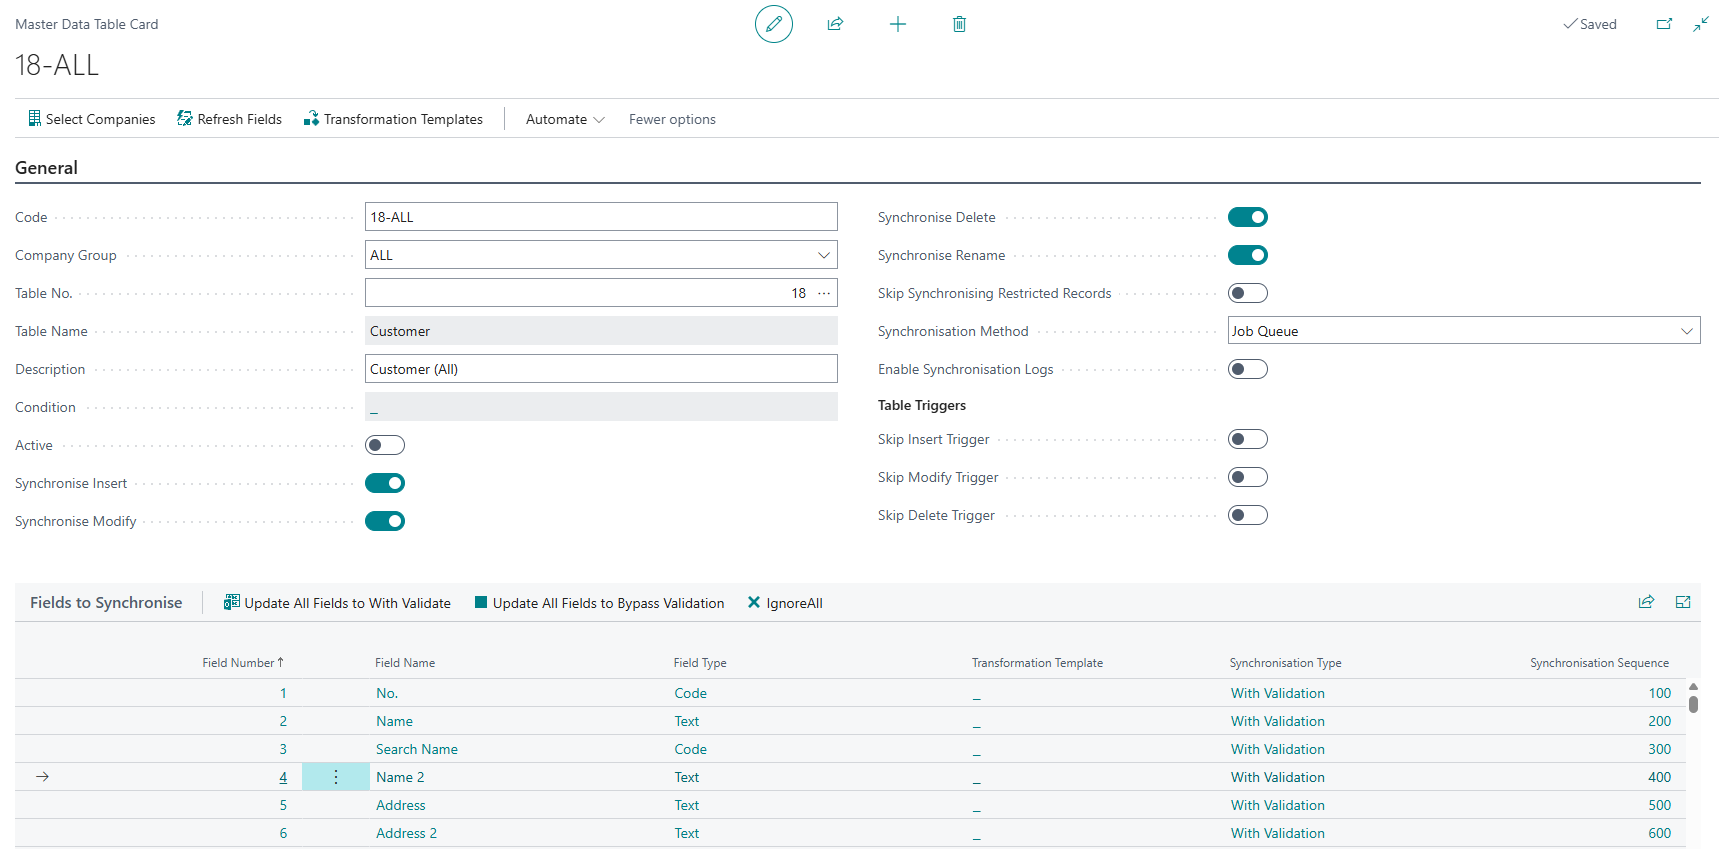
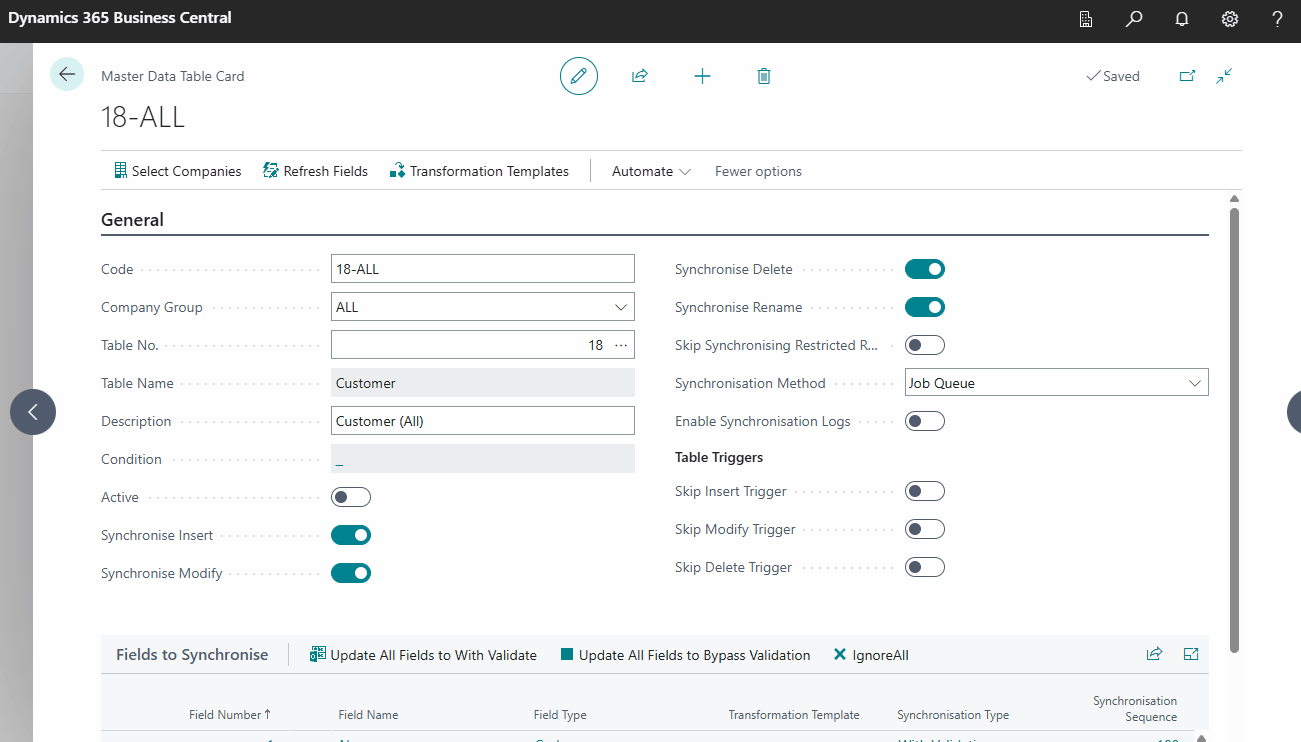
Master Data Table Card
Typically, you would have one record per table. However, the app can support more complex scenarios where you synchronise data differently under certain conditions.
Setting up a table for synchronisation involves the following steps:
- Specify the fields on the header.
- Review the settings for the fields
- Select/review companies to synchronise.
- Specify any specific conditions.
Header
| Field | Purpose |
|---|---|
| Code | Specifies the unique code representing this table configuration. |
| Company Group | Specifies the group representing the companies where this table will be synchronised. You can read about setting up company groups here and about our recommendations here. |
| Table No. | Specifies the table number of the record you want to synchronise. |
| Table Name | Specifies the table name. |
| Description | Specifies a detailed description of the table configuration. Use this to distinguish between configurations for the same table. |
| Condition | Specifies the condition that must be met for synchronisation of this record. |
| Active | Specifies whether the table is active for synchronisation. |
| Synchronise Insert Group | Specifies that inserts will be synchronised. |
| Synchronise Modify | Specifies that record updates will be synchronised. |
| Synchronise Delete | Specifies that deletes will be synchronised. |
| Synchronise Rename | Specifies that renames will be synchronised. |
| Synchronisation Method | Specifies the method of synchronising the data. We recommend only using the default Job Queue method to avoid running too many background tasks. |
| Skip Insert Trigger | Specifies whether the insert trigger should be skipped when the record is synchronised. Please seek advice from your partner before using this option. |
| Skip Modify Trigger | Specifies whether the modify trigger should be skipped. Please seek advice from your partner before using this option. |
| Skip Delete Trigger | Specifies whether the delete trigger should be skipped. Please seek advice from your partner before using this option. |
Select Companies to Synchronise
There are two ways to specify which companies to synchronise to:
- Selecting the Company Group on the header. This is recommended as it is easier to manage.
- Explicitly selecting companies against a table. While the app supports this, it is not recommended to use this approach because it is harder to manage and update.
Refresh Fields
If you have installed or removed apps since you configured this setup or are using the default setup shipped with this app, you must refresh fields to ensure that old fields are moved from the setup and additional fields are added. The animation below shows how to refresh fields and update the Synchronisation Type on some fields.
Specify Conditions
You can optionally specify conditions that will control which records get synchronised. The conditions are defined as a filter, and they are evaluated when you update a record to determine if it should be synchronised. In the animation below, we specify a condition to exclude customers with a Customer Posting Group of INTERCOMPANY.
Fields to Synchronise
| Field | Purpose |
|---|---|
| Field No. | Specifies the field number. |
| Field Name | Specifies the name of the field. |
| Field Type | Specifies the data type of the field. |
| Transformation Type | Specifies the transformation template for this field. This allows you to specify rules for transforming the data when it is synchronised. You can read more about this here. |
| Synchronisation Type | Specifies the validation method used for this field. This field has the following options: With Validation (default), Bypass Validation or Skip this field |
| Synchronisation Sequence | Specifies the order in which the field should be synchronised within the table. Usually, you only need to change this if the record does not synchronise as expected. |
You should use With Validation as the setting for Synchronisation Type and avoid using Bypass Validation.
- With Validation ensures data integrity by running the same business logic that would run when a user enters this value.
- Bypass Validation, on the other hand, does not run this logic. You should only use this setting for exceptions and seek advice from a Technical Consultant to confirm the implications.
- Skip this field is safe to use. Select this value if you do not want the value in this field to synchronise with other companies.
If the records do not synchronise as expected, it could be due to some business logic that runs and updates the fields. If this does occur, you can change the Synchronisation Sequence of the fields. As a general rule, if you change this, it should be in the sequence that you enter the fields on the page, and this will yield the same results as manually capturing the values.
Transformation Templates
The Transformation Templates allow you to define rules and mappings that convert source data into the desired destination format when synchronising in the destination company. You can access Transformation Templates from the [Master Data Table Card] or by searching for it with Tell Me. When you edit a transformation template, the following page is opened:
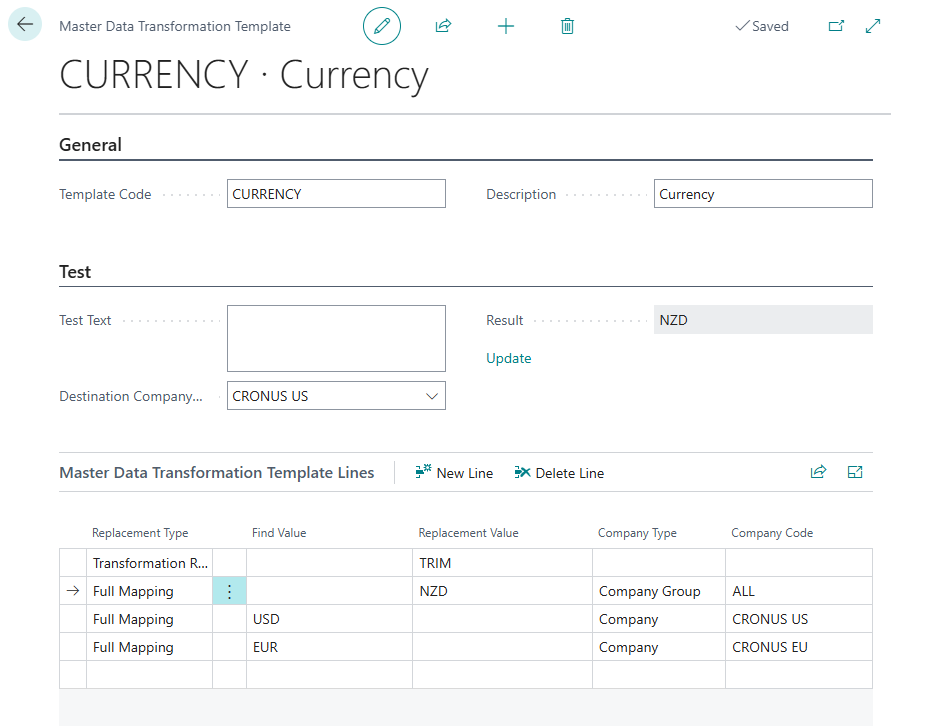
Replacement Type
| Option | Description |
|---|---|
| Full Mapping | Transforms the entire field into the desired value. |
| Partial Mapping | Transforms part of the field into the desired value. |
| Transformation Rule | This option uses the Business Central Transformation Rule to transform the field. Note: The Transformation Rule must exist in the destination company if you want to use this option. |
The transformation templates only need to be set up in the master company from which data is synchronised. However, if you want to use the option Transformation Rule, you must ensure the transformation rules exist in the destination company. To assist, you could synchronise transformation rules.
Company Type
You can specify the company to which you want to apply the replacement. This allows you to have different rules for different company groups or specific companies.
| Option | Description |
|---|---|
| Company Type | Specifies the type of company for the replacement. Options are blank, Company, or Company Group. Leave blank to apply to all companies. |
| Company Code | Specifies the Company or Company Group for the replacement. Leave blank to apply to all companies. |
Synchronisation Company Groups
Depending on the nature of your organisation, your Business Central environment could contain companies that operate differently from each other. This could be the nature of the company (e.g. trading companies, property companies, holding companies) or companies that operate in different territories that require different configurations. You use the company group to group similar companies when handling various scenarios.
You can access the Synchronisation Company Groups using Tell Me or from the Master Data Tables page.
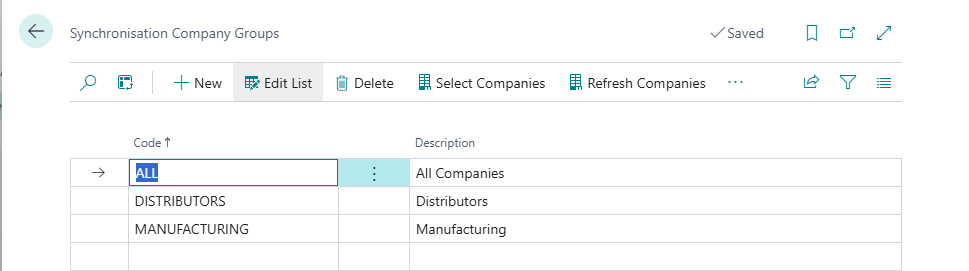
You will notice Select Companies action, which opens a page where you can select which companies are associated with the Synchronisation Company Group.
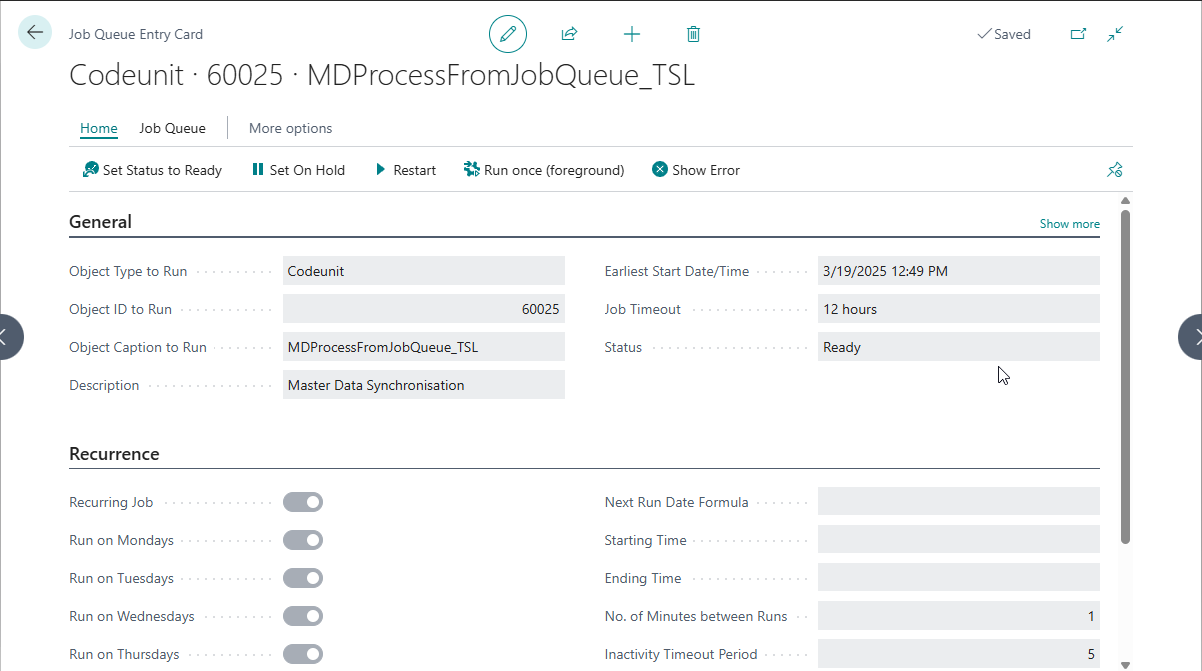
Job Queues
The app uses a job queue in each company to synchronise master data. The easiest way to configure this is described here.
Operational limits govern how many job queues can be running concurrently. You can read about this here. You might need to update the default settings of the job queues to meet the demands of your specific environment.
Initial Setup
You must perform the initial setup in a sandbox environment and test it before applying it to your production environment.
In this section, we will take you through the initial setup using a scenario where we have a master company called Cronus International Limited, and we want master data to flow from this company to two other companies called Cronus Group and MyCompany.
- You will notice we are only doing setup in Cronus International Limited as this is our master data company.
- You can only perform the initial setup if you do not already have master data setup.
Step 1: Master Data Tables
The steps for the initial setup are:
- In the master data company, open the Master Data Tables page.
- You will notice a notification when you open the page stating there are no tables configured to synchronise with a link to download the default setup. Select this link.
- The app will import the configuration package into the current company.
- Before applying the package, the app allows you to either use the package immediately or to review the configuration package. In our example below, we do not review the package as the configuration package only updates tables that are part of this extension.
The animation below shows you steps 1 to 4, as described above.
Step 2: Update Default Setup
Once the package is applied, you will notice that several tables have been set up. By default, these tables will not be active for synchronisation, and you will need to select the tables you want to synchronise explicitly. You should also update/refresh fields to include any additional fields not listed in the setup for each table.
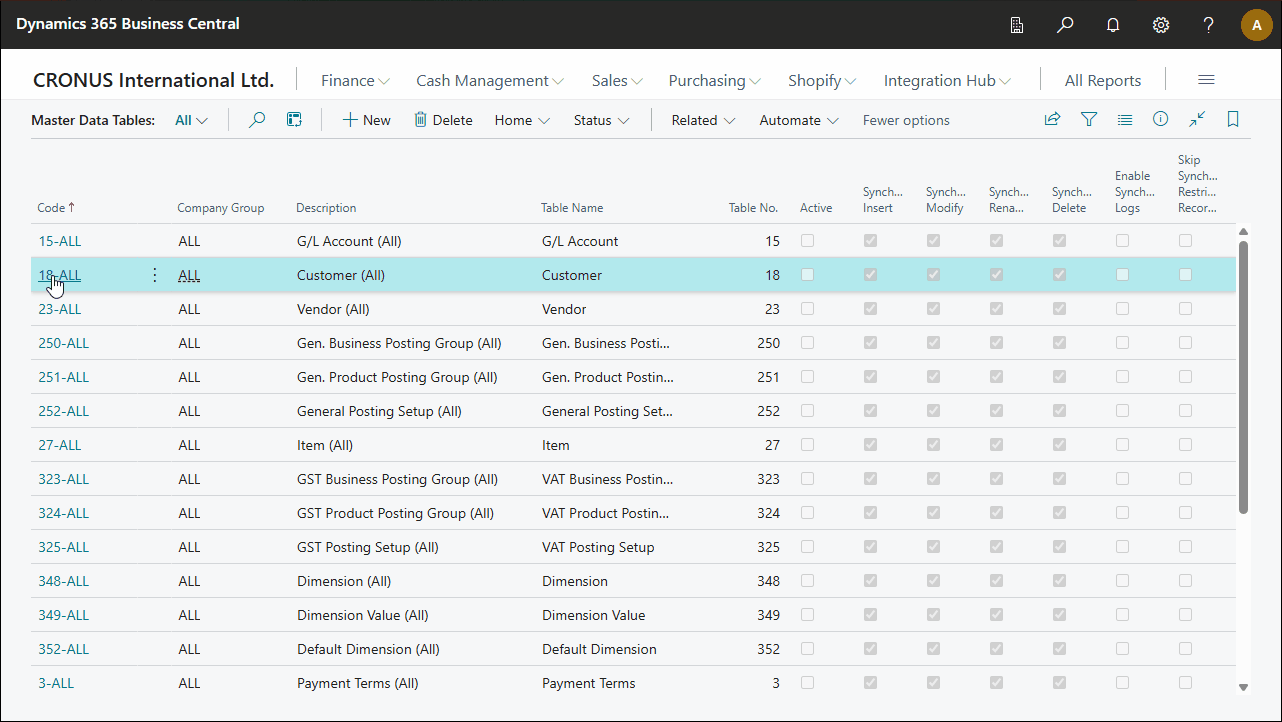
In this scenario, we select the Master Data Table for 18-ALLand open the card. We then do the following:
- Select Companies
- Refresh Fields
- Update the Synchronisation Type for some fields
This animation shows the above steps:
Step 3: Optional - Specify Conditions
You can optionally specify conditions that will control which records get synchronised. You can read more about this here.
Step 4: Activate the Table for Synchronisation
Once you have updated the setup, you need to activate the table. To do this, you specify Active on the Master Data Table Card.
Step 5: Setup Job Queues
When you open the Master Data Table page, the app checks if the job queue has been configured for all companies. If the job queue is not configured for all companies, a notification is displayed stating there is a missing job queue and providing a link to create the job queues. Selecting this link will create a job queue in each company and schedule it as per the animation below.
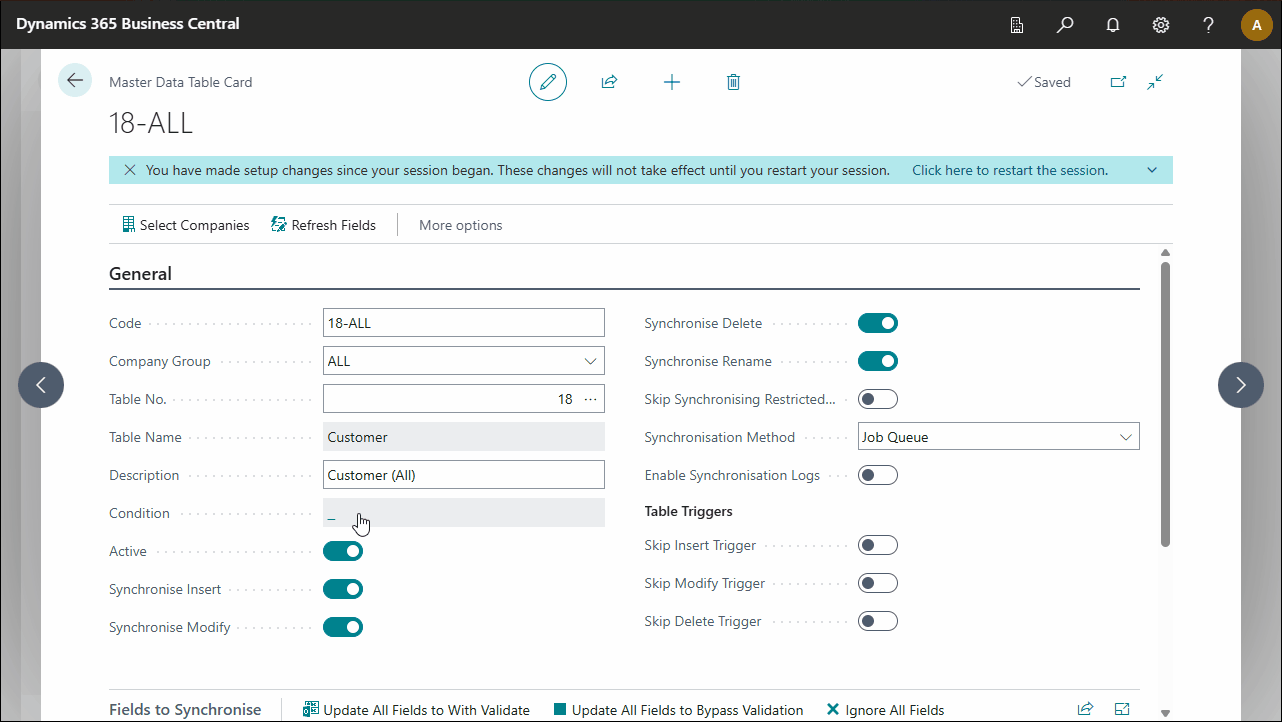
Step 6: Restart the session
After making any setup changes, you need to restart the session. You can do this by closing all browser windows and logging back in, or you can do so when the app prompts you to.
Retention Policies
The Master Data Synchronisation Log can grow quite large over time. To manage this, you can set up a retention policy to automatically delete old log entries. Refer to the Microsoft documentation for more information on setting up retention policies.
Migrating from the Per-Tenant Extension (PTE) Version
This section is only relevant if you have been using the PTE version of the app.
-
Install the latest version of Master Data Synchronisation (PTE).
Optional but recommended – Clear data from table 60019 MD Synch Log (in all relevant companies). This table may contain historical data that doesn’t need to be migrated and could significantly slow down the process if left intact. -
Install the App Data Management app (minimum version 24.0.0.0).
This is a PTE extension available from Theta. -
Download the configuration pack from this link.
-
Navigate to a company where Master Data Synchronisation has been configured.
Note: If Master Data Synchronisation is used across multiple companies, the migration will affect all of them. -
Open the Configuration Packages page, import and apply the package.
-
Open the Data Transfer Packages page (you can use Tell Me to search for this page).
-
Open the MASTERDATA package.
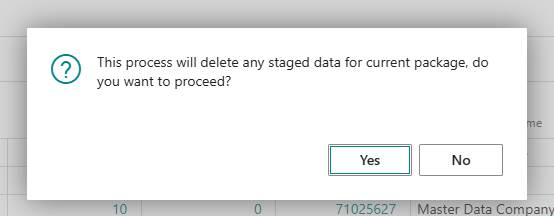
Stage Data
The following actions must be done with a domain user and will not work with a GDAP user.
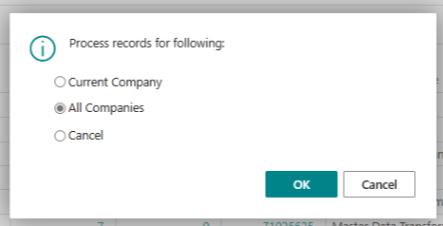
- Select the Stage Data action. This action will copy the data from the Master Data Synchronisation tables to a staging area.
Ensure All Companies are selected to transfer data from every company where the extension was used.
-
Select the Process Overview action to ensure all data is transferred.
-
Uninstall the Master Data Synchronisation (PTE) app.
Important: Do not unpublish the app at this stage. -
Install the Master Data Synchronisation app from AppSource.
-
Open the Data Transfer Packages page.
-
Open the MASTERDATA package.
-
Select the Transfer Data action. This action will copy the data from the staging area to the Master Data Synchronisation tables.
-
Select the Process Overview action to ensure all data is transferred.
-
Verify that all data has been moved to the Master Data Synchronisation tables.
Remove old extensions
-
Uninstall the App Data Management app. Select Delete Extension Data when prompted.
-
Unpublish the App Data Management app.
-
Reinstall and then uninstall Master Data Synchronisation (PTE), selecting Delete Extension Data during uninstall. Finally, unpublish the app.
Schedule New Sync Job(s)
- Schedule the new MDS sync job in all relevant companies.
This is easiest done via the Master Data Tables page > “Click here to create the job queue entries”.
![]()
-
Delete the old job queue entries related to Master Data Synchronisation (PTE).
-
Perform a smoke test using a relevant master data record. Revert any test changes once confirmed.