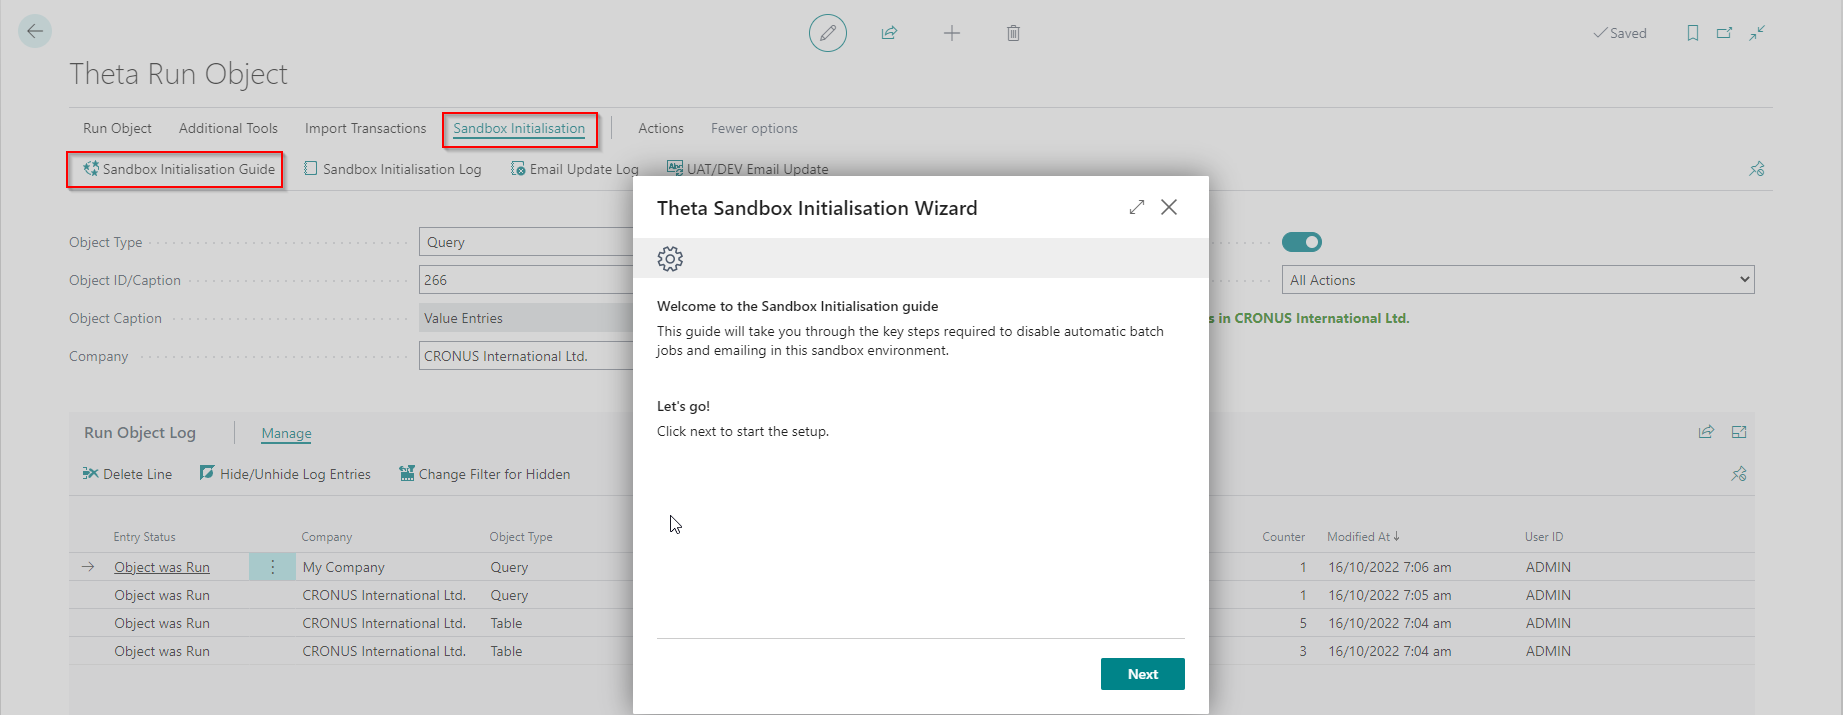
Sandbox Initialisation Guide
You must not use the Sandbox Initialisation Guide in a production environment. The updates made by the Sandbox Initialisation Guide cannot be reversed. There are cases where you might have a test company in a production environment. For this reason, the Sandbox Initialisation Guide can still run, but it is limited to processing in one company only.
If you are using this feature in an on-prem sandbox, you will need to toggle the environment type else you will have limited functionality. You can read about this here.
Sandbox environments usually get created by copying a production environment. When you perform testing in the sandbox environment, you want to be sure that these tests do not cause documents to get sent to customers or vendors, and you also want to be sure that production services do not get triggered from the sandbox.
The Sandbox Initialisation Guide assists you with the following:
- Updating Email accounts – e.g. configure a shared account with different permissions.
- Updating company information, display names and badges to distinguish the sandbox environment from a production environment.
- Disabling job queues will prevent unwanted processing in the sandbox environment and possible calls to production services when the job queues get used for integration purposes.
- Anonymising email addresses to prevent sending emails to your contacts while testing in your sandbox environment.
You access the Sandbox Initialisation Guide from the Run Object page, or you can search for it.
The Sandbox Initialisation Guide can process the above tasks in the current company or all companies.
Email Accounts
Email Accounts are configured in Business Central to send emails internally and externally. We recommend disabling shared, current user and SMTP email accounts in a sandbox environment and configuring a different shared email account that limits which users can send from the account.
The email accounts are protected and cannot be updated directly from the initialisation wizard. Therefore, this guide provides an easy link to open the email accounts in each company where you can make updates.
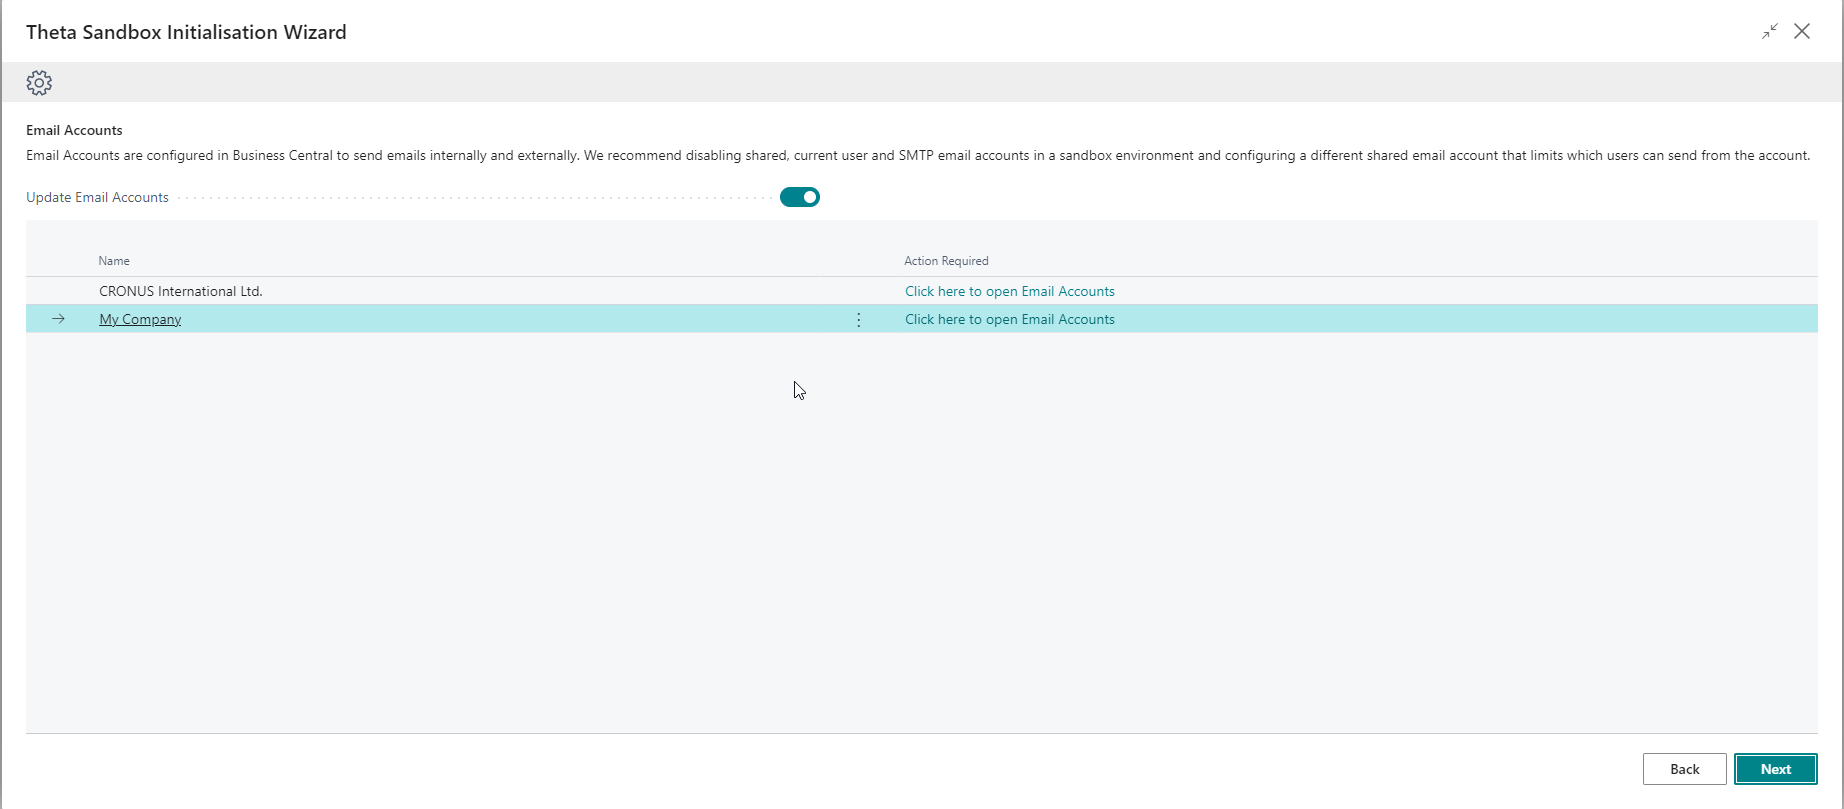
By selecting Update Email Accounts you can open the email accounts configured for each company to either disable the email accounts or set up a different account for your sandbox environment. If activated, you will see a list of the companies in the environment. You can select an option for each company in your sandbox environment in the actions required column.
Click here to open Email Accounts
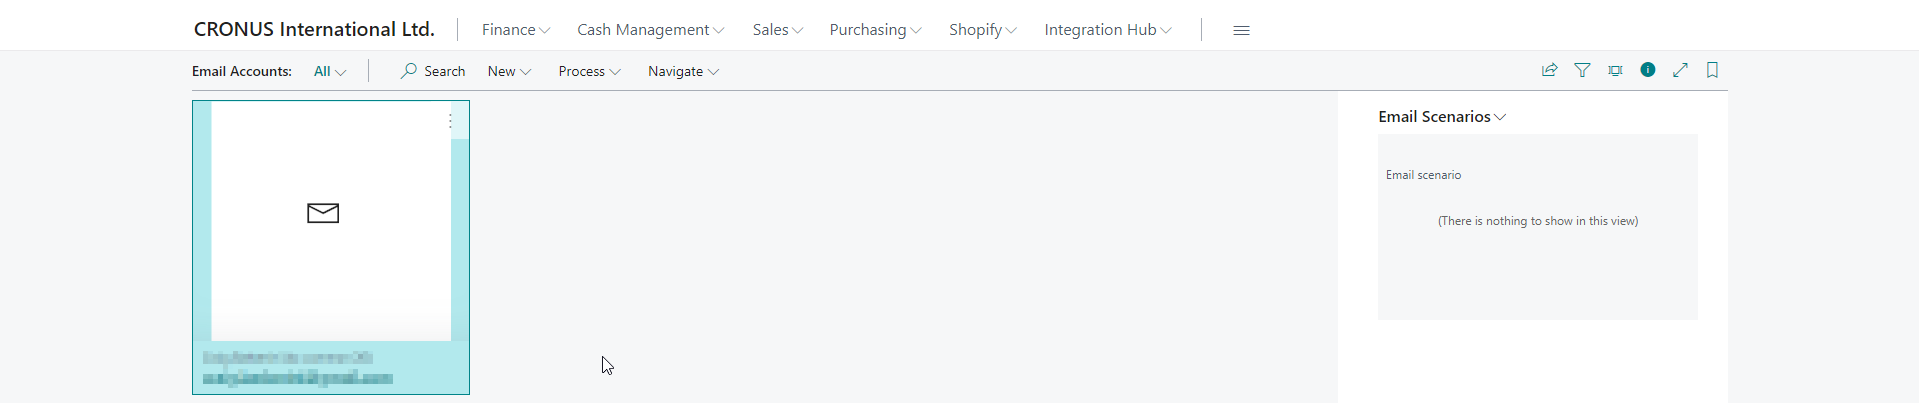
Select this to delete, update or add email accounts in the company, which will open a separate tab in your browser showing the email accounts configured for this company.
Confirm if you have updated the setup
Once you have updated the setup, you close the tab. When you return to the guide, you will notice that the action required for that line has now changed to Email Accounts opened. Click here to confirm if handled. If you select this, you get prompted with the following confirmation:
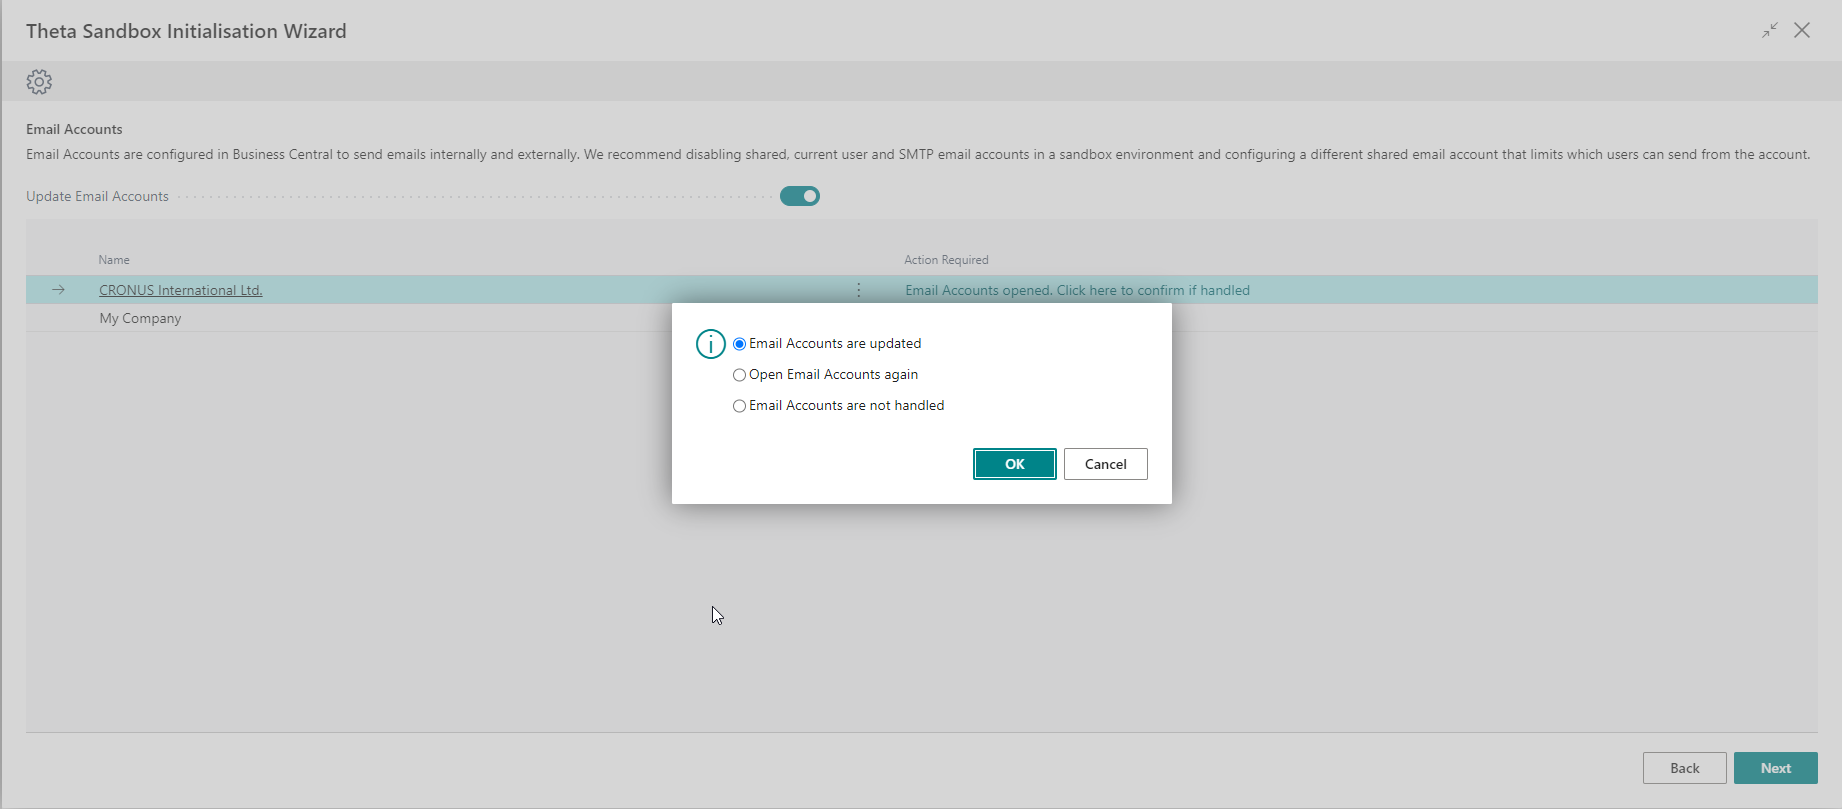
Choose from one of the following:
- Email Accounts are updated – select this if you are done editing your email accounts list.
- Open Email Accounts again – select this if you want to return to the email accounts page for this company.
- Email Accounts are not handled – select this to revert the action required status to its default value.
Repeat for each company
Repeat the above steps for each company. When you are done with all companies, click Next. If you have handled all accounts, the internal Email Account status gets updated, preventing notifications about email accounts from getting raised in the role centre.
Update Company Information and disable Job Queues
Here you can update company information so that the environment looks different to the production environment, and you can disable the job queues.
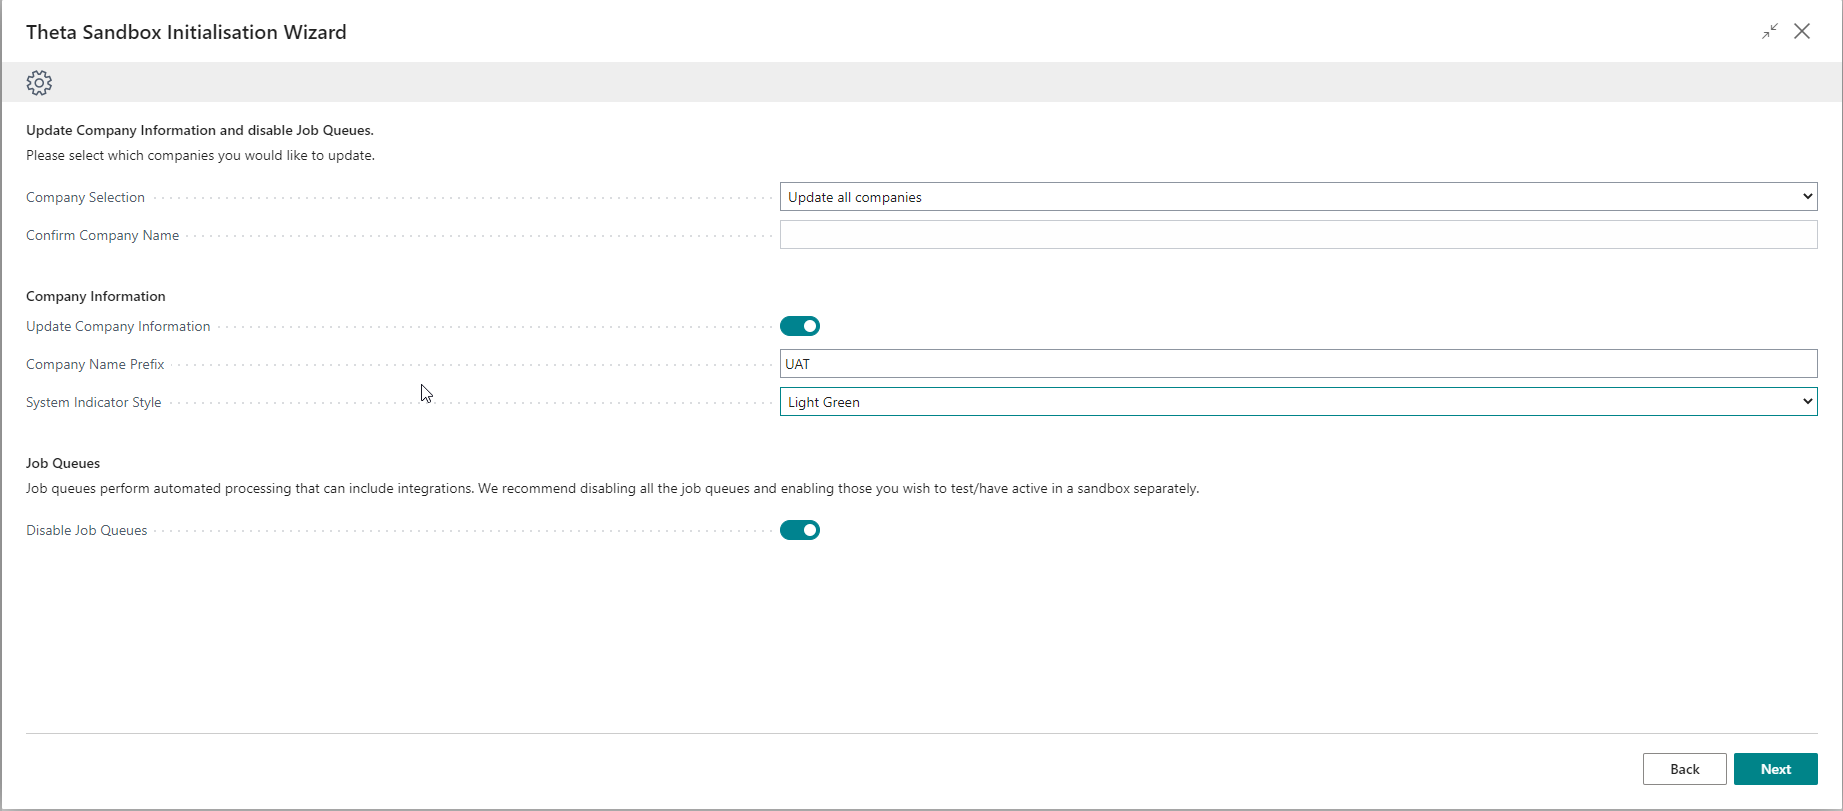
| Field | Description |
|---|---|
| Company Selection | Update all companies in this environment or only the current company. You can only select Update current company only in a production environment. |
| Confirm Company Name | Used for production environments only. Specifies the company name (not the display name). If you have a test company in a production environment, you can use this update if you confirm the company you wish to update so that you can proceed to the next step. |
| Update Company Information | Specifies that the app will update company information with the Company Name Prefix |
| Company Name Prefix | Specifies a prefix that the app will add to the company name in company information and the company display name. The first character of this field gets used as a prefix in the company badge. |
| Sandbox Refresh Date | Specifies the date on which the Sandbox got refreshed. The company name prefix and this date are copied to the front of each company's display name. If you don't want this date copied, you can clear this value. |
| System Indicator Style | Specifies the style the app will utilise for Company Badge Text in each company. |
| Job Queues | Specifies that job queues will get placed on hold. |
This image shows you the outcome after completing this step:

Click Next to proceed.
Delete Records
Here, you can delete records from tables in Business Central to reduce the size of your sandbox environments. Several tables get suggested by default, but you can add more tables to the list. You can skip this step if you do not want to delete any records.
For tables with fewer than 3 million records, consider using the Cleanup Sandbox tool, as this runs when you copy the environment.
Clicking next will delete the records from the tables you selected.
You cannot use this feature in a production environment.
Email Address/Phone Number Update
Here you can change all email addresses/phone numbers in Business Central to an invalid/temporary values to prevent emails /messages from being sent externally to your customers or vendors.
| Field | Description |
|---|---|
| Update Email Addresses | Specifies that you will update the email addresses. |
| Update Phone Numbers | Specifies that you will update phone numbers. |
| Company Selection | Specifies whether to update all companies in this environment or only the current company. You can only update the current company in a production environment. |
| Table No. Filter | Specifies the filter of tables in the update. You can change this if you only want to update specific tables. We recommend updating all tables (except system tables). The filter is includes other tables we commonly skip. |
| Update to Email Address | Specifies the value applied to all fields identified as containing email addresses. Any fields with blank email addresses are not updated. |
| Only update if contains email | Specifies that email addresses will only be updated when the field contains a valid email address. We recommend enabling this option to avoid unintentionally updating fields that match the filter by name but do not actually store email addresses. For example, a field named Email Subject is unlikely to contain an email address. |
| Email Field Name Filter | Specifies the filter to identify fields containing email addresses. You can check which fields will get updated by clicking the link below this field. |
| Update to Phone Number | Specifies the value applied to all fields identified as containing phone number. Any fields with blank phone number are not updated. |
| Phone No. Field Name Filter | Specifies the filter to identify fields containing phone no. You can check which fields will get updated by clicking the link below this field. |
| Confirm Company Name | Used for production environments only. Specifies the company name (not the display name). If you have a test company in a production environment, you can use this update if you confirm the company you wish to update so that you can proceed to the next step. |
| Run as background process | Specifies that the update will run in the background as a task. You can only select this option if the user processing the update is licensed. CSP and GDAP users, which get assigned to partners, cannot use this option. |
Clicking next will update the email addresses.
The user performing this update needs permission to update all tables in the environment. Any errors get ignored. You can view these errors in the Email Update Log. You must review this log to ensure all email addresses get updated as expected. The log includes successful and unsuccessful updates.
- If your sandbox environment is integrated with another system, such as Microsoft Dynamics 365 Customer Experience, ensure that email addresses are also updated in that environment. This prevents them from being reverted to real email addresses.
- The default table filter excludes Sent Emails and Email Outbox, as updating these tables can be time-consuming. We recommend deleting these tables in the previous step.
Finish
Here you can see the status of the updates made during this guide. If you select to update the email addresses in a background process, you will notice that the status of this step is In Progress.
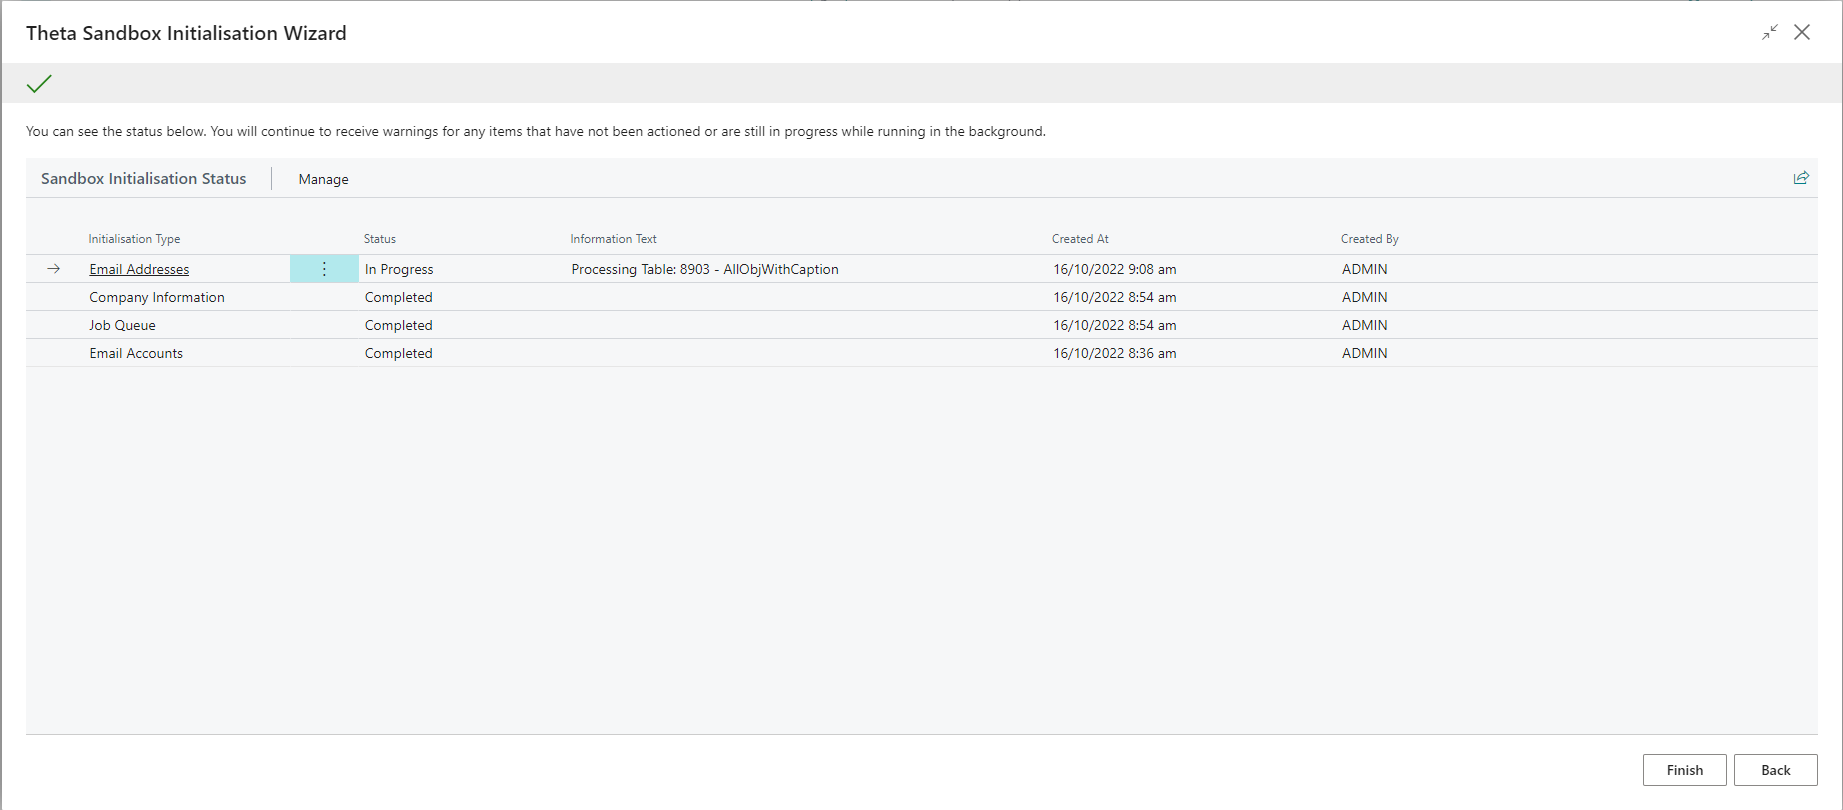
You will continue to receive notifications about email addresses not being updated until the background processing completes.
Sandbox Initialisation Log
This log shows you the actions that have been taken using the Sandbox Initialisation Guide.
Detailed Sandbox Initialisation Log
The Detailed Sandbox Initialisation Log shows a log of all tables that got updated by the Sandbox Initialisation Guide in respect of email addresses/phone numbers and record deletion. There are three pre-defined views that show All, Success and Errors. It is important to review this log after running the Sandbox Initialisation Guide. You can access this page from the Run Object page under Sandbox Initialisation.
The Total No. of Recs column Displays the total number of records in the table.
The No. of Recs Updated column shows how many records were successfully updated out of the total. Some records may be skipped for the following reasons:
- The field is empty.
- The new field value is identical to the existing value (no change needed).
- The Only update if contains email toggle is enabled, and the field does not contain a valid email address.
For errors, the Error Message column will provide you the reason why the update failed. Common errors relate to the CRM/CDS tables as well as the Microsoft Graph tables. These are virtual tables and will error if there is no connection configured. You can ignore these errors.