Most Popular Tools
This section covers the tools that get used most frequently.
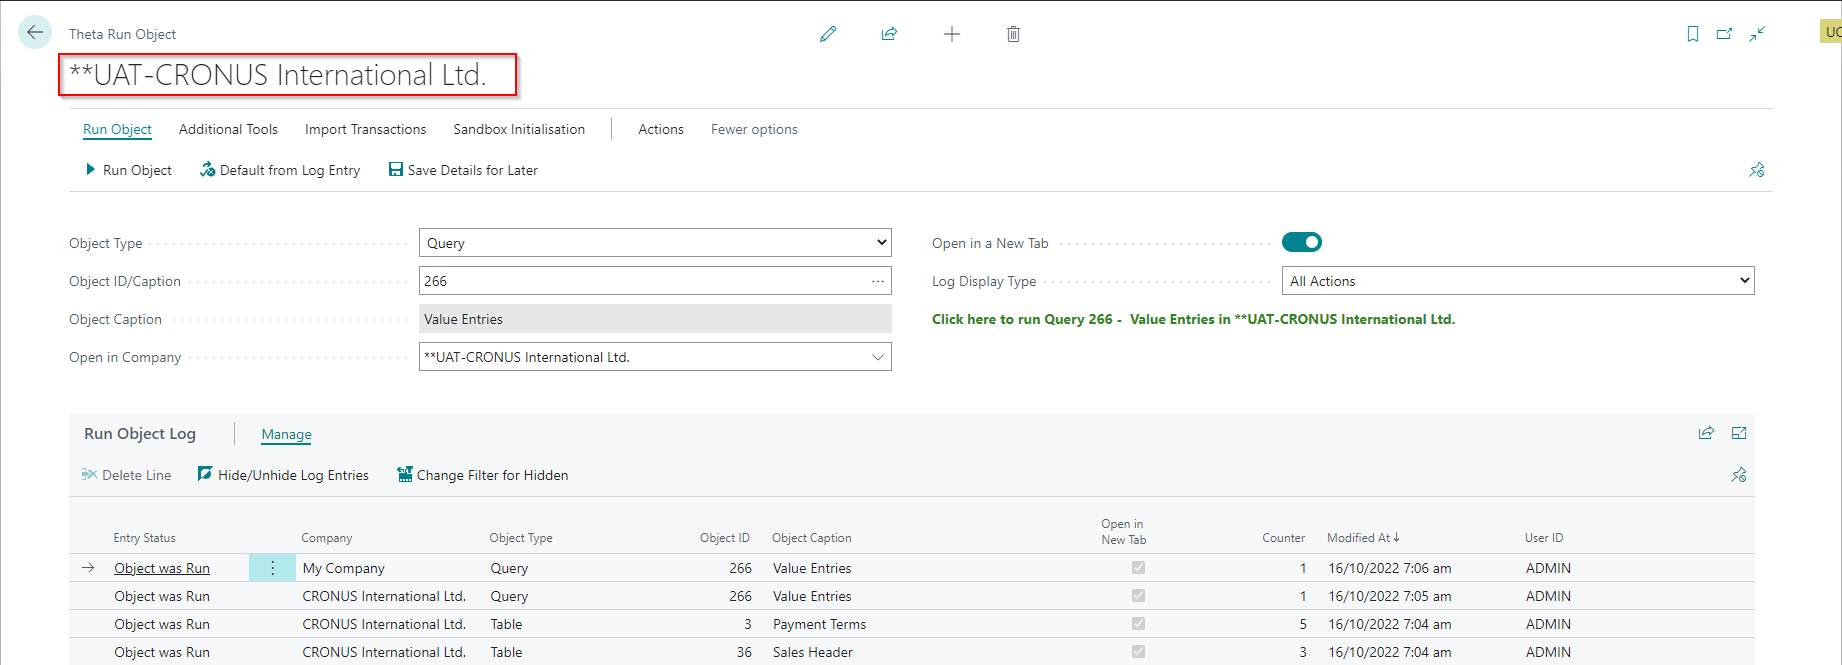
Run Object
This page allows you to run any of the following objects without having to access them from the front end:
- Table
- Page
- Report
- Codeunit
- Query
- Query - Download
- XML Port
| Field | Description |
|---|---|
| Object Type | Specify the type of object you would like to run. |
| Object ID/Caption | Specify the object ID or the object caption. If you specify the object caption (or part thereof), the program will replace it with the object id. If the text you specify filters to multiple objects, then a page is opened where you can choose the object. |
| Object Caption | The object caption of the selected object. |
| Run in Company | Specify the display name of the company where you want to run the object. When you open the page, this field will always default to the current company. |
| Open in a New Tab | Specifies that the app will open the object in a new tab. Objects running in a different company will always open in a new tab. The app can only run some objects in a different tab. |
| Log Display Type | Changes the filters on the Run Object Log below. |
The company name specified at the top of the page is the current company. The Run in Company is the company in which the app will run the object.
Run Object Actions
| Field | Description |
|---|---|
| Run Object | Runs the selected object. You can also click the green information text to run the selected object. |
| Default from Log Entry | Copies the object type, object id and company from the selected line. |
| Save Details for Later | Saves the object type, object id, and company so that you can use these details later. |
Run Object Log
This log gets created/updated when you run a selected object. The purpose of this log is to help you select objects you have used previously. The log is sorted by the Modified At date in descending order. The most recent usages show at the top of the list.
Run Object Log Actions
| Field | Description |
|---|---|
| Hide/Unhide Log Entries | Hides/Unhides the selected log entries. |
| Change Filter for Hidden | Change the default filters from showing only entries that are not hidden. |
Other Tools Accessible from this page
Most of the Administration Tools are only accessible from the Run Object page since administrators use them.
Additional Tools
| Feature | Purpose |
|---|---|
| Find & Replace | Use this feature to replace values in fields. The functionality allows you to view records before running the update. |
| Bulk Delete | Use this feature to delete many records. You must use this feature carefully, and generally, as a rule, you should not delete records that you cannot delete from the front end. This feature's main benefit is deleting documents so that you do not have to delete them individually. |
| Copy Data | Use this feature to copy data from other companies. This is useful when creating a new company or synchronising setups between companies. |
| Bulk Rename | Used for bulk renaming of records. Using this feature outside office hours would be best to prevent locking other users. |
| License Permission | Show license permissions based on the current license. |
| Set Default User Settings | Opens a batch job where you can specify default values for user settings. This app also adds an import/export feature on the User Settings page. |
| Access Control | Show the roles (permission sets) assigned to each user in the system. You can import/export these records from this page and move them between environments. |
| Generate API Page | Generates the AL source code for the fields used in an API page. |
The Users' Security Ids can differ between environments. The Import/Export features for User Settings and Access Control handle this by matching the users.
Import Transactions
| Feature | Purpose |
|---|---|
| General Journal Import | Used for bulk importing general journals (Customer, Vendor, G/L, Bank, etc.). |
| Fixed Asset Journal Import | Used for bulk importing fixed asset journals. |
| Item Journal Batch Delete | You can use this function to delete item journal batches that have lines with associated item tracking information. This feature is required because Business Central confirms the deletion of each line that has associated item tracking. |
We recommended using Excel Importer instead of these bulk imports because these bulk imports are not flexible. However, when importing high volumes (>100,000 lines), it might be better to use these XML Ports.
Sandbox Initialisation
You can find detailed help on the Sandbox Initialisation Guide here.
| Feature | Purpose |
|---|---|
| Sandbox Initialisation Guide | This guide will take you through the key steps required to disable automatic batch jobs and emailing in this sandbox environment. |
| Sandbox Initialisation Log | This log shows you the actions taken using the Sandbox Initialisation Guide. |
| Email Update Log | Shows a log of all tables that got updated by the Sandbox Initialisation Guide. |
If you don't know the object id, you can type in part of the object caption, and Business Central will display a list of objects with a caption that contains the text you have entered.
Reports
| Field | Purpose |
|---|---|
| Change Log Analysis | This page allows you to analyse the breakdown of the number of records in the change log entries by table and change type. |
| Detailed Field List | This page provides a list of all fields in an environment, including properties that are not available on the standard Business Central pages. |
Find and Replace
This feature allows you to find and replace values in fields within a table.
To prevent accidental/unauthorised use, a user must either be SUPER or have the Find and Replace permission set assigned (FINDREPLACE_IMP_TSL) to use this feature and have permission to update the tables.

- Disable Field Validate and Use CSP Permission for Modify can only be used by implementation consultants in a production environment.
- Specify Table Filters to limit which records get updated. Applying a filter improves performance and reduces the risk of updating records you did not want to update.
- If the implementation consultant uses a shared user from the customer's tenant, you can authorise this user as an implementation consultant.
- Clicking Show more in the General FastTab shows additional fields that might be useful for fine-tuning the update process. For example, field Commit Every X Records can be used to instruct the program to add a commit statement each time a user defined number of records is updated. If the field value remains unspecified, the program does not add commit statements.
Replacement Types
| Type | Purpose |
|---|---|
| Replace Entire Field | Replaces the entire field with the New Value. |
| Replace Part of Field | Replaces all occurrences of the value Replace Substring with the New Value. For example, you could replace all occurrences of Ltd. with Limited. Note that the match is case-sensitive. It will only update records where a match gets found on the selected field. |
| Apply Transformation Rule | Allows you to select a transformation rule and apply that rule to the selected field on all records within the filter. For example, you might want to remove trailing spaces from the end of your customer names after you have imported them using a configuration package. |
| Replace based on PK-Value Pair List | Allows you to select specific records to be updated with new values. For example, you might want to update External Document No. in the specific sales orders and sales invoices with external document numbers provided by the customer. The animation below demonstrates how to use the replacement based on PK-Value Pair List. |
Set Default User Personalisation
Often the User's default region and language get set to "English - United States". With this setting, many fields will show the incorrect captions and the date formats will be different. For example "Amount Including GST" might read as "Amount Including VAT" and the 1st of September 2022 will show as 9/1/2022. You can use this batch job to update these settings for all users.
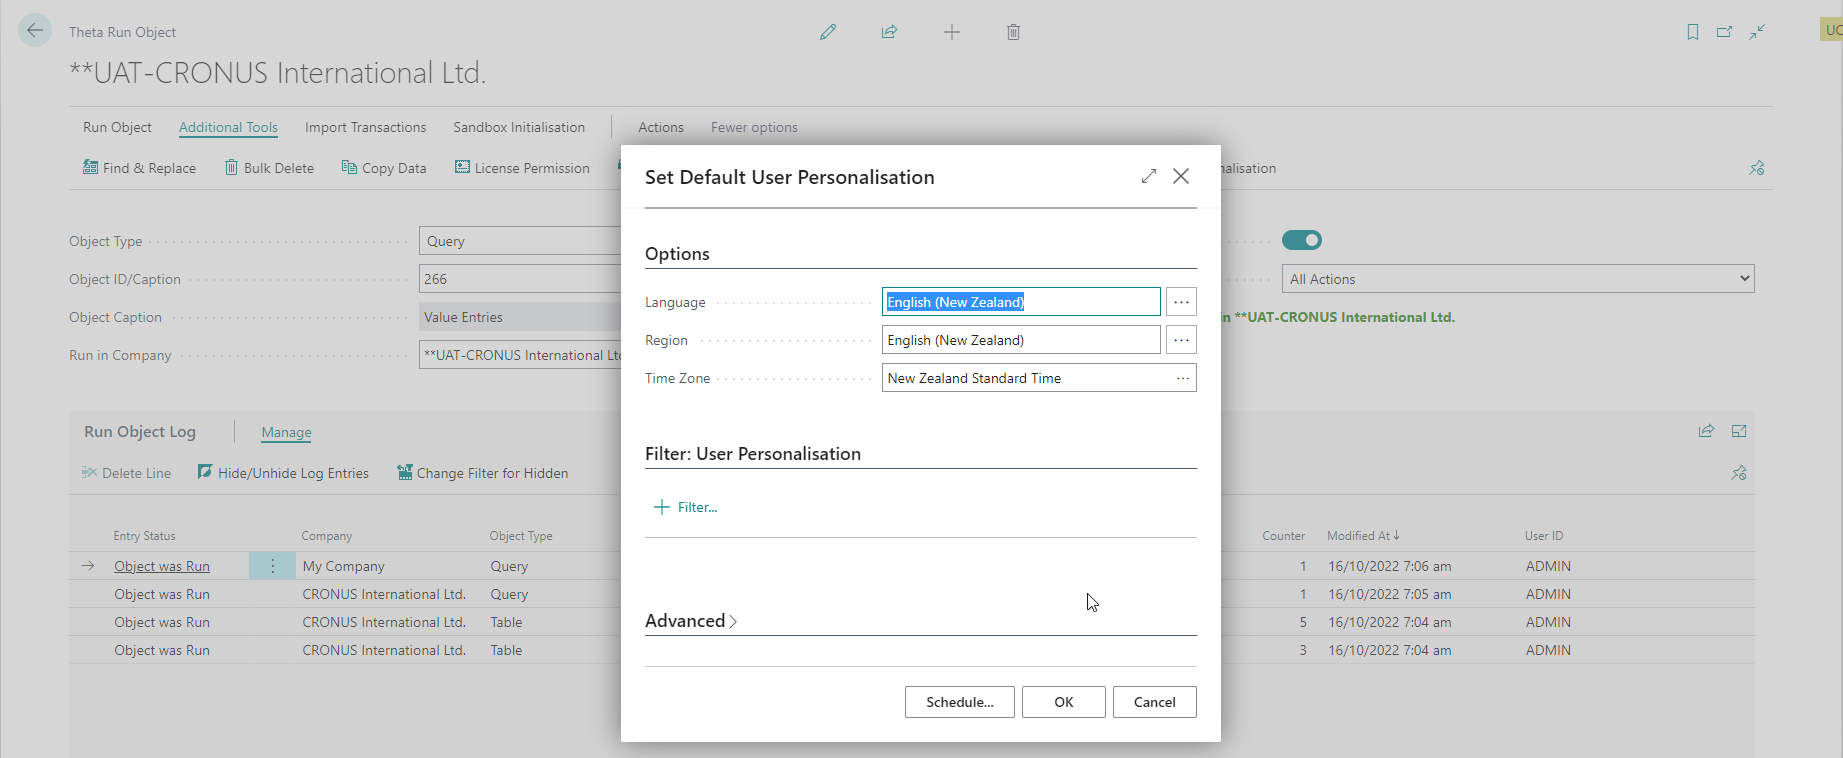
Some users might have legitimate reasons for using different settings - for example they could be users working in a different region.
You can schedule this report to run automatically in a job queue - just remember to exclude users that should not get updated with filters.
Automatically Update User Posting Date Ranges
This feature allows you to schedule a batch job that can update the General Ledger Setup and User Setup allowed posting date ranges.
General Ledger Setup
The allowed posting date range specified here usually applies to most users in a company, who are only allowed to post in one accounting period. This setup usually gets updated on the first day of a new month.
To update the General Ledger dates create a Job Queue Entry:
| Field | Value |
|---|---|
| Object | Codeunit 70254654 - UpdateAllowPostingDate_IMP_TSL |
| Parameter String | GLSETUP |
| Recurrence | You can run this once per month - specify 1M for the Next Run Date Calculation. |
User Setup
The allowed posting date range here is usually only updated for finance users who must post entries in the previous period and the new period around the start of the month. These dates then get updated after the previous accounting period gets closed.
To update the User Setup dates create a Job Queue Entry:
| Field | Value |
|---|---|
| Object | Codeunit 70254654 - UpdateAllowPostingDate_IMP_TSL |
| Parameter String | USERSETUP |
| Recurrence | You can run this once per month - specify 1M for the Next Run Date Calculation. |
- If you do not specify a Parameter String, the app will update the General Ledger Setup and the User Setup.
- Only users that already have a posting date range specified will be updated to the new period.
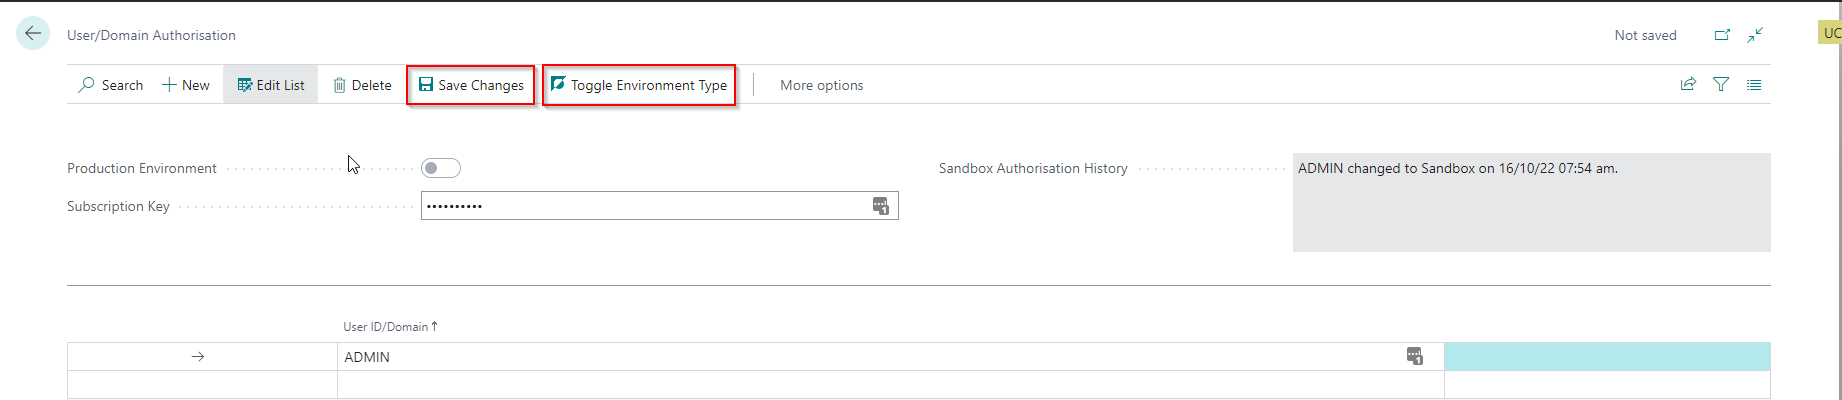
Authorising Users/Domains as Implementation Consultants
When the implementation consultant has a user account that does not get automatically recognised as an implementation consultant, you can explicitly authorise the user account. You can also toggle the environment type if this is an on-prem sandbox.
From the Run Object page, select User/Domain Authorisations:

The following page gets opened:
Enable access for GDAP and users assigned to Implementation Consultants
- Add the user(s) you want to enable to the list. The following actions can be used to assist you:
- Add my User - this action will add the current user to the list.
- Add all GDAP Users - adds multiple users to the list. The app will only include Delegated Admin Users who have already logged into this environment.
- Enter the subscription key - this key is only available to Implementation Partners.
- Select the Save Changes action.
The app now also allows you to include users who do not exist in the environment. This allows you to authorise all members of your team - even before they log in. The app still warns you if you enter invalid users.
Toggle Environment Type
Some features can only get used in a sandbox. Other features, a restricted to be used only by implementation consultants in production environments. These restrictions get relaxed in a sandbox environment. However, On-premises sandboxes are sometimes incorrectly tagged as production environments. To overcome this, you can toggle the environment type.
- Enter the subscription key
- Select the Toggle Environment Type action. You will notice that the Sandbox Authorisation History field gets updated.
- You cannot change the environment type of a SaaS environment.
- BC Docker containers always get classified as sandboxes. You must ensure that the text "BC" (uppercase/lowercase) gets included in the container name.
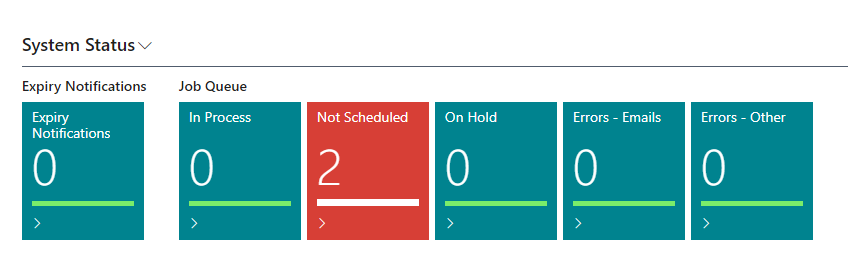
System Status
This activities part provides information about Expiry Notifications and the Job Queue Status. This part is always available but has limited functionality if the developer subscription plan is selected.

The Dataverse integration errors and coupled data errors will only show in companies where a dataverse connection is enabled.
Reset Failed Job Queue Entries
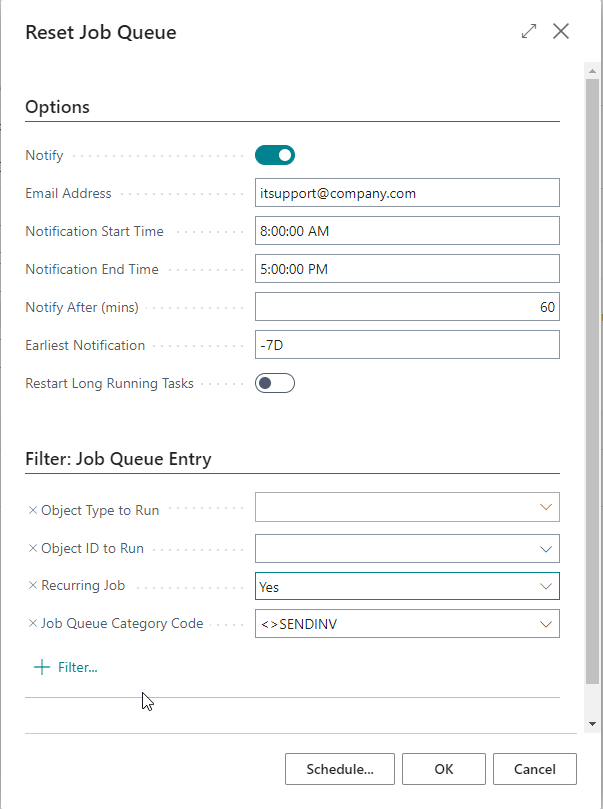
You can use this batch job to reset job queues that can get transient errors that may persist longer than usual. You can either run this job manually from the Run Object page or you can schedule this job - report 70254656. The batch job has some additional settings that can be applied:
The job queue entry has a built-in mechanism to specify how many times a job queue task should be rerun after a job queue fails to run. This may be sufficient for most job queue tasks to handle transient errors and we recommend that you try this first before include the job task in the scope of this process. Use the fields Maximum No. of Attempts to Run and Rerun Delay (sec.) on the Job Queue Entry Card.
| Field | Purpose |
|---|---|
| Notify | Send email notifications when the job queue fails for longer than the time specified in the notification settings. |
| Email Address | Specify the email address to notify. You can separate multiple email addresses with a semi-colon. |
| Notification Start and End Times | Specify the notification business hours. The app will only send notifications if this report runs between the notification start and end times. |
| Notify After (mins) | Specifies the time that should have passed after the job failed before sending a notification. The purpose of this setting is to have the option only to send email notifications when the job queue entry remains failed for an extended period. |
| Earliest Notification | Specify the earliest notification date formula. For example we can set up < - 7D > to ensure we only get the notification for failing job queue from 7 days ago. |
| Restart Long Running Tasks | Specify a value here if you want the app to restart long-running job queues. The app calculates the average runtime to determine if it is a long-running job queue. The app will only consider tasks that have exceeded the average runtime by more than one hour to avoid restarting job queues that can sometimes, for valid reasons, run longer than their average runtime. |
Run Adjust Cost per Item
This batch job allows you to schedule the Adjust Cost - Item Entries batch job and run it per item. We created this process to assist customers in reducing locked times when they have high volumes of adjustments. The app batch job automatically calculates the low-level code upfront and then runs per item in low-level code sequence to ensure that the lowest levels are adjusted first. After each item is finished, the app commits the changes. This process is also useful for catching up when you have a backlog of adjustments.
We recommend scheduling this job (codeunit 70254641) to run outside of office hours to prevent locking other users.
Expiry Notifications
This feature allows you to configure an email notification group of recipients. The app will send the notifications out a period before the expiry date. Here are the steps for setting this up.
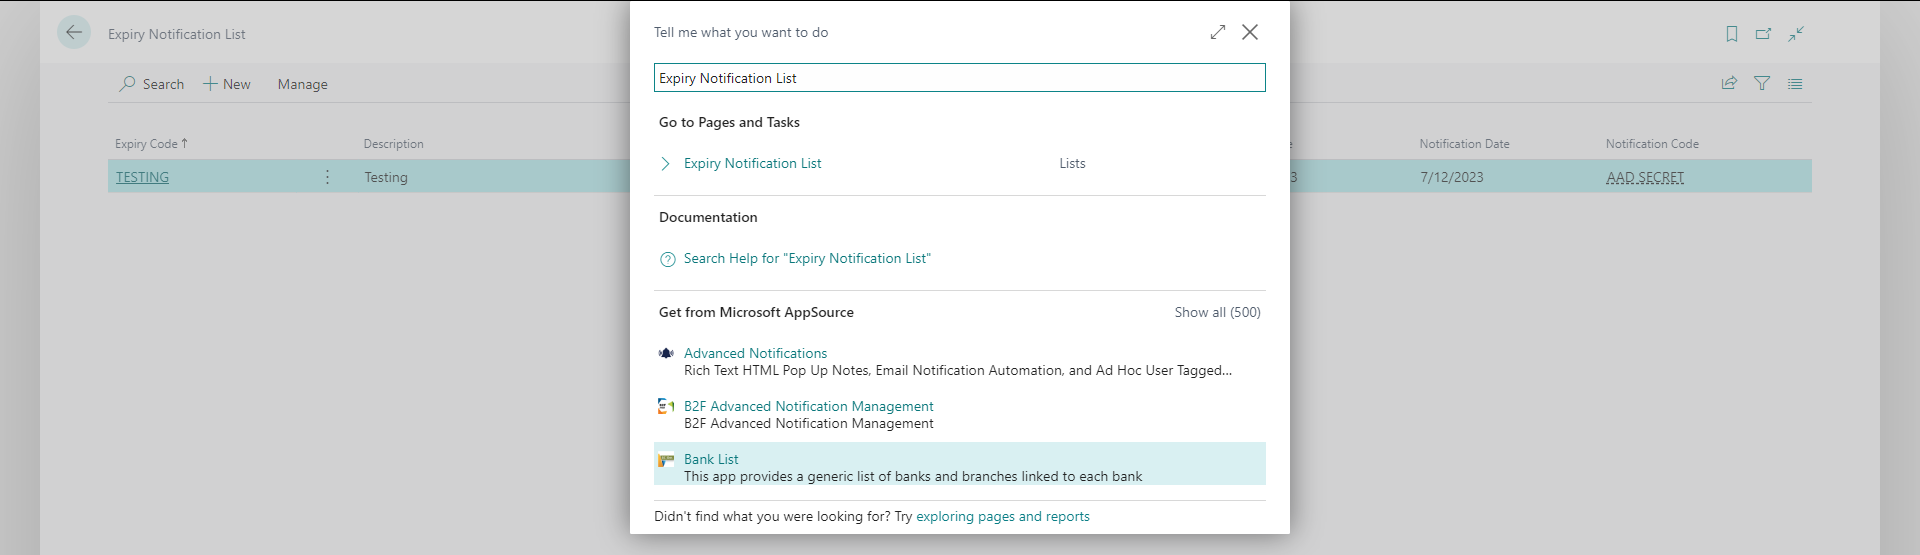
-
Search the function from Tell Me.
-
From the Expiry Notification Card, specify the field values. Notification Date should be set prior to Expiry Date.
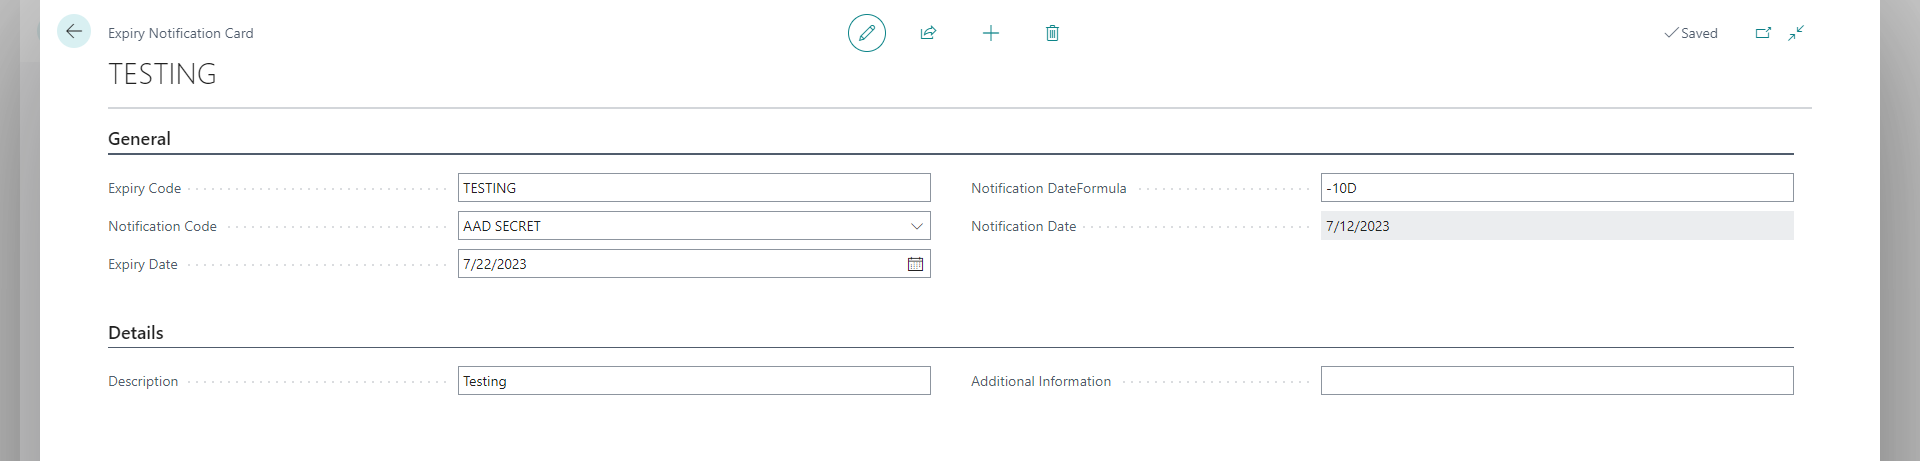
-
You can set up the notification type From the Notification Code field.

-
Once you finish off the notification configuration, next is setting up Notification Recipient.
When you select the User ID field, the email will be populated automatically on the Email field. By default, the value of the email is the same as the one configured on the User Setup page for the specific user. If you wish to designate another email address as the notification recipient, you can easily replace the current one with your preferred one.
Users will only receive Business Central notifications if the Notification Only box is checked. If the box is unchecked, the user will receive notifications on both Business Central and email.

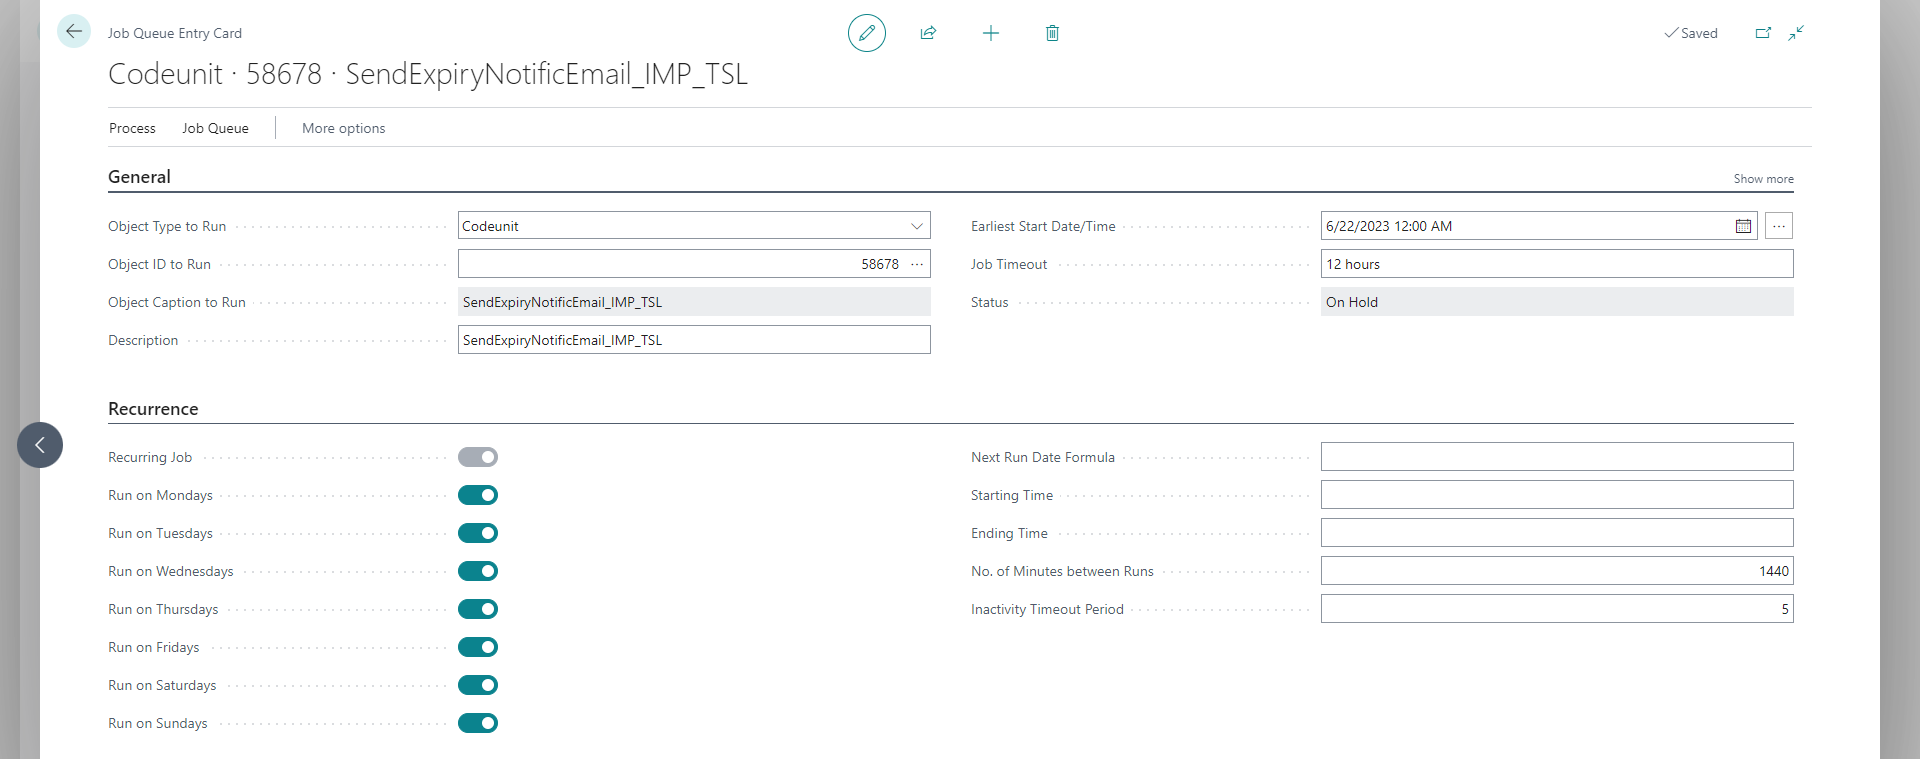
-
Schedule a job queue to activate the notification. Object ID is 70254648.
-
In the Role Center, you will see the notification in the headline.

-
You will also see the notifications from System Status cues.
Change Log Analysis
This page allows you to analyse the breakdown of the number of records in the change log entries by table and change type. We typically use this to help customers optimise their change log settings. The change log can be a significant performance overhead, especially in large databases, so we want to ensure we do not generate too many records. Also, the change log holds a lot of data, and we often want to manage the available space in an environment.
You can access this page from the Run Object page and the Change Log Entries.
Detailed Fields List
This page provides a list of all fields in an environment. The page includes additional details about the fields unavailable on the standard pages. This information is useful to power users who want to access the Business Central data externally. This information is also available if you run the Field table, but you cannot open this in Excel. You can find this page using Tell Me and the Run Object page.
This page can take some time to open if you have a high number of change log entries in your database.
Cleanup Sandbox Setup
You can find detailed help on the Cleanup Sandbox here.
Migrating from Implementation Tools (PTE)
This section is only relevant if you have been using the Implementation Tools per-tenant extension from Theta.
We initially built this app as a per-tenant extension (Implementation Tools). As the app's features grew and customers requested access to some of the tools, we decided to migrate the app to AppSource. The last version of Implementation Tools was 24.0.2.0.
If you want to retain configurations and other history, you can follow the process below:
- Note - You need to use an account which allows creating scheduled tasks.
- Install the latest version of Implementation Tools.
- Install the App Data Management app (minimum version
24.0.0.0). This is a PTE extension available from Theta. - Download this configuration pack.
- Open the Configuration Packages page, import and apply the package.
- Open the Data Transfer Packages page (you can use Tell Me to search for this page).
- Open the ADMINTOOLS package.
- Select the Stage Data action. This action will copy the data from all the Implementation Tools tables to a staging area.
- Select the Process Overview action to ensure all data is transferred.
- Uninstall Implementation Tools. Do not unpublish the app.
- Install the Administration Tools app from AppSource.
- Open the Data Transfer Packages page.
- Open the ADMINTOOLS package.
- Select the Transfer Data action. This action will copy the data from the staging area to the Administration Tools tables.
- Select the Process Overview action to ensure all data is transferred.
- Verify that all data has been moved to the Administration Tools tables.
The animation below demonstrates how to use App Data Management:
 _
_
Remove old extensions
Only perform these steps once you have verified that all data has been transferred successfully. These steps remove all data related to Implementation Tools and App Data Management.
- Uninstall App Data Management - Select Delete Extension Data to remove all the staging data and setup related to the App Data Management app. - Unpublish the app.
- Uninstall the Administration Tools app.
- Install Implementation Tools - this will still be published.
- Uninstall Implementation Tools - Select Delete Extension Data to remove all the staging data and setup related to the Implementation Tools app. - Unpublish the app.
- Install the Administration Tools app from AppSource.