Data Masking
The admin centre lets you copy a production environment to a sandbox. However, this copy may contain sensitive information that should not be exposed to developers or testers. The data masking feature helps you anonymise sensitive data in sandbox environments to protect personal or confidential information.
Configure your data masking rules in your production environment so you don't need to recreate them after refreshing a sandbox. You can't run data masking in a production environment. You can also configure some rules that update fewer than 1 million records to run automatically during the environment copy.
Manage Data Masking Rules
The Data Masking Rules page lists all the rules you've defined. You can create rules for different scenarios—for example, to mask customer names. Open this page by searching for Data Masking Rules using Tell Me.

Create a New Rule
To create a new rule, select the New action.
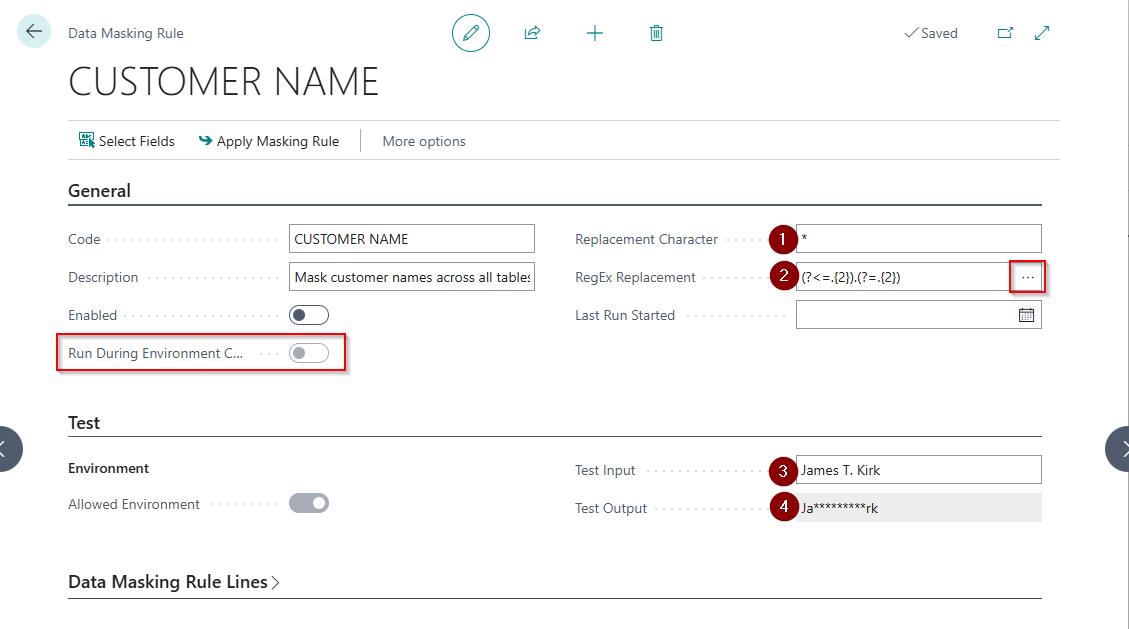
In the example shown:
- Enter the Replacement Character.
- Select or enter the Regular Expression. You can choose from predefined expressions using assist edit or type your own.
- Replace the Test Input to preview how the data will be masked.
- The Test Output shows the result of the masking logic.
Run during Environment Copy
You can configure data masking to run automatically during an environment copy. However, this is only supported for rules that are expected to update fewer than 1 million records, due to throttling limitations during the copy process.
There may be scenarios where you choose not to run data masking during an environment copy. This could be because you need to perform specific testing using unmasked data, or you've encountered an error and want to temporarily disable data masking. Data masking can be disabled or enabled globally through the Environment Cleanup Setup, which you can access by searching for it using Tell Me.
Select Fields to Mask
Select Select Fields on the Data Masking Rule page to open a tool that helps you add multiple fields across tables.
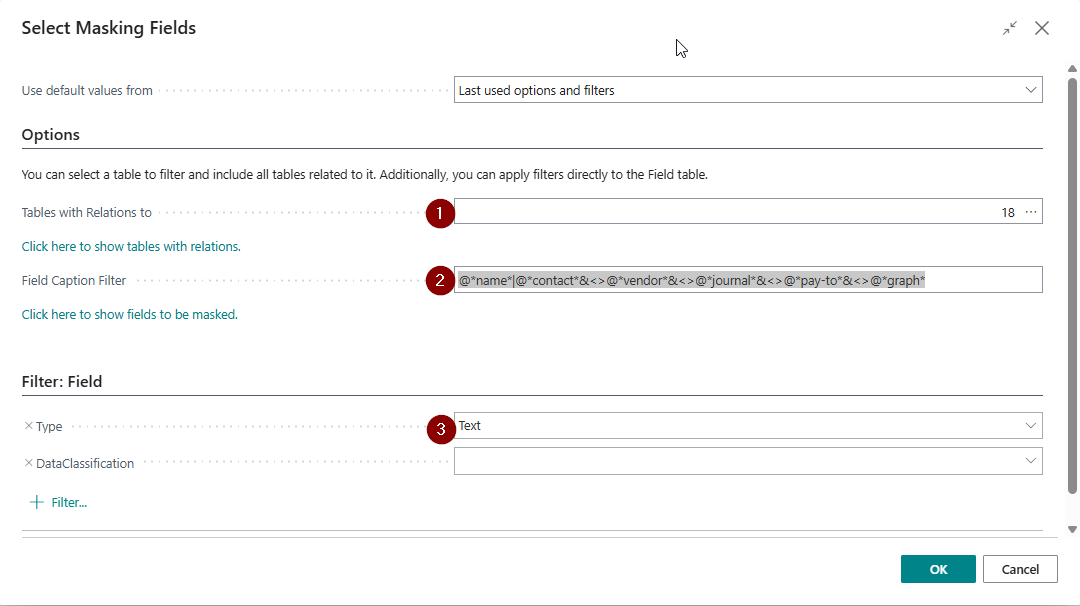
In the example shown:
- Tables with Relations to is set to 18, which includes table 18 (Customer) and any tables related to it.
- The Field Caption Filter
@*name*|@*contact*&<>@*vendor*&<>@*journal*&<>@*pay-to*&<>@*graph*includes fields with "name" or "contact", but excludes fields with "vendor", "journal", "pay-to", or "graph". The@prefix makes the filter case-insensitive. - Additional filters can be applied. In this example, only Text fields are included by filtering by Field Type.
- Select Show tables with relations to preview all included tables.
- Select Show fields to be masked to view the fields that match your filters.
After selecting OK, the system generates lines for each field based on your filters.
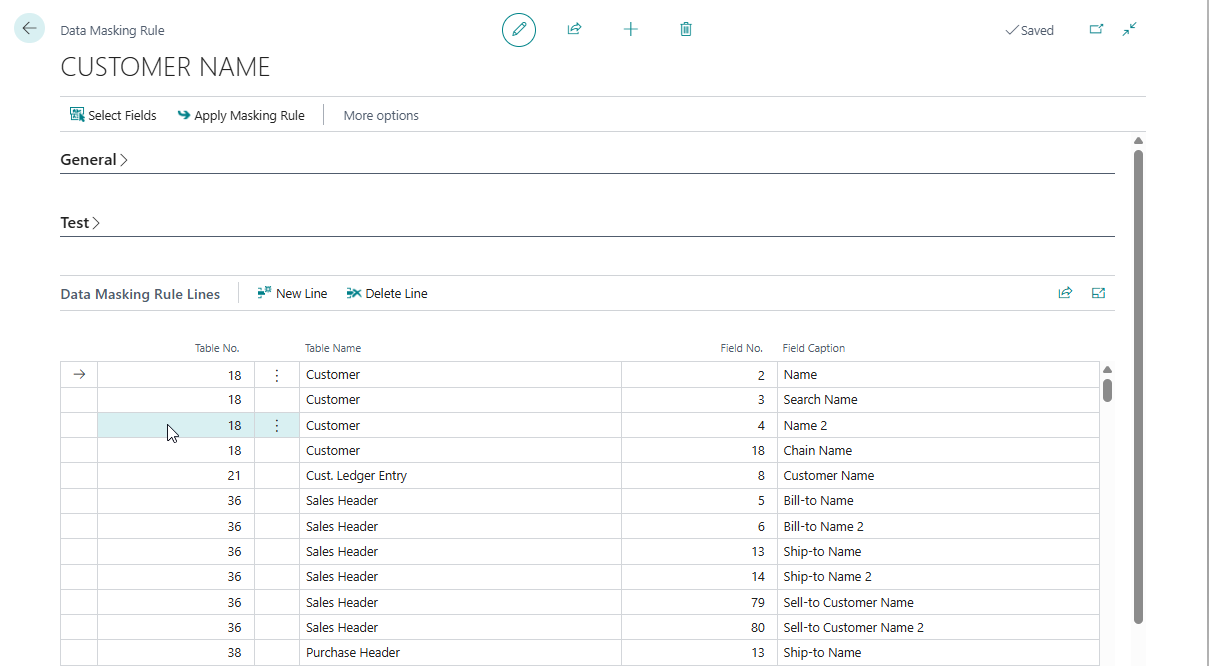
- Review the selected fields and remove any you don't want to mask.
- Manually add any fields that are missing.
Enable the Rule
After you finish editing a rule, please enable it. Once enabled, the rule becomes read-only to ensure consistency during masking.

Apply Data Masking Rules
- Data masking rules can only be applied in a sandbox.
- The process may take several hours, especially if applied to posted data. This may cause locking.
- The system commits updates every 1000 records to minimise locking.
You can apply data masking rules in two ways:
- Manually from the Data Masking Rule card.
- Automatically using a Job Queue Entry (recommended for larger data sets or regular runs).
Apply Rules Manually
Only use this option for small data sets to avoid timeouts.
- Open the Data Masking Rules page.
- Select the rule to apply.
- Ensure the rule is enabled.
- Choose Apply Masking Rule.
Use a Job Queue Entry
Use this method for significant updates or to run masking on a schedule.
All enabled data masking rules will run when the job queue entry is executed.
- Open the Data Masking Rules page.
- Select Setup a Job Queue Entry.
- Modify the job queue entry if needed, then select Set Status to Ready.
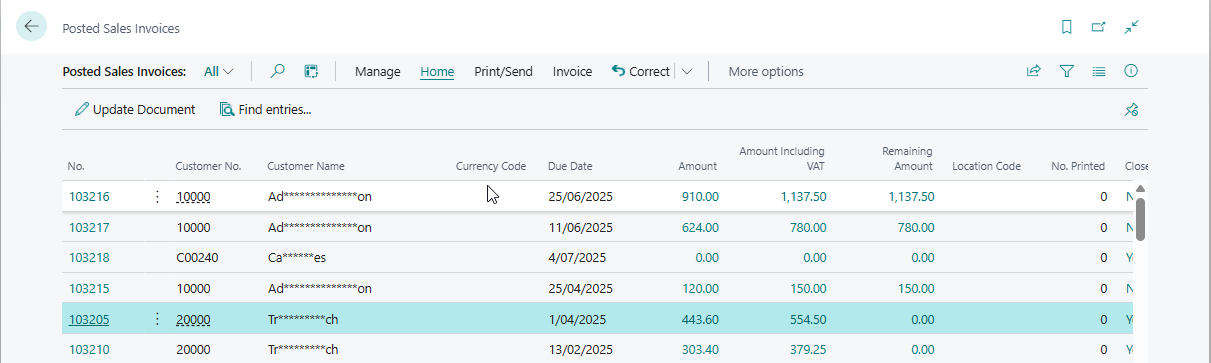
Result
The image below shows the posted sales invoices after the data has been masked:
See Also
- Request a New Feature — Submit feature requests or feedback.
- Sandbox Initialisation — Set up your sandbox for development.
- Cleanup Sandbox — Clear and reset data in your sandbox.