Document Layout Setup
Theta Document Template Setup
This setup allows you to adjust settings related to all the Theta Document layouts.
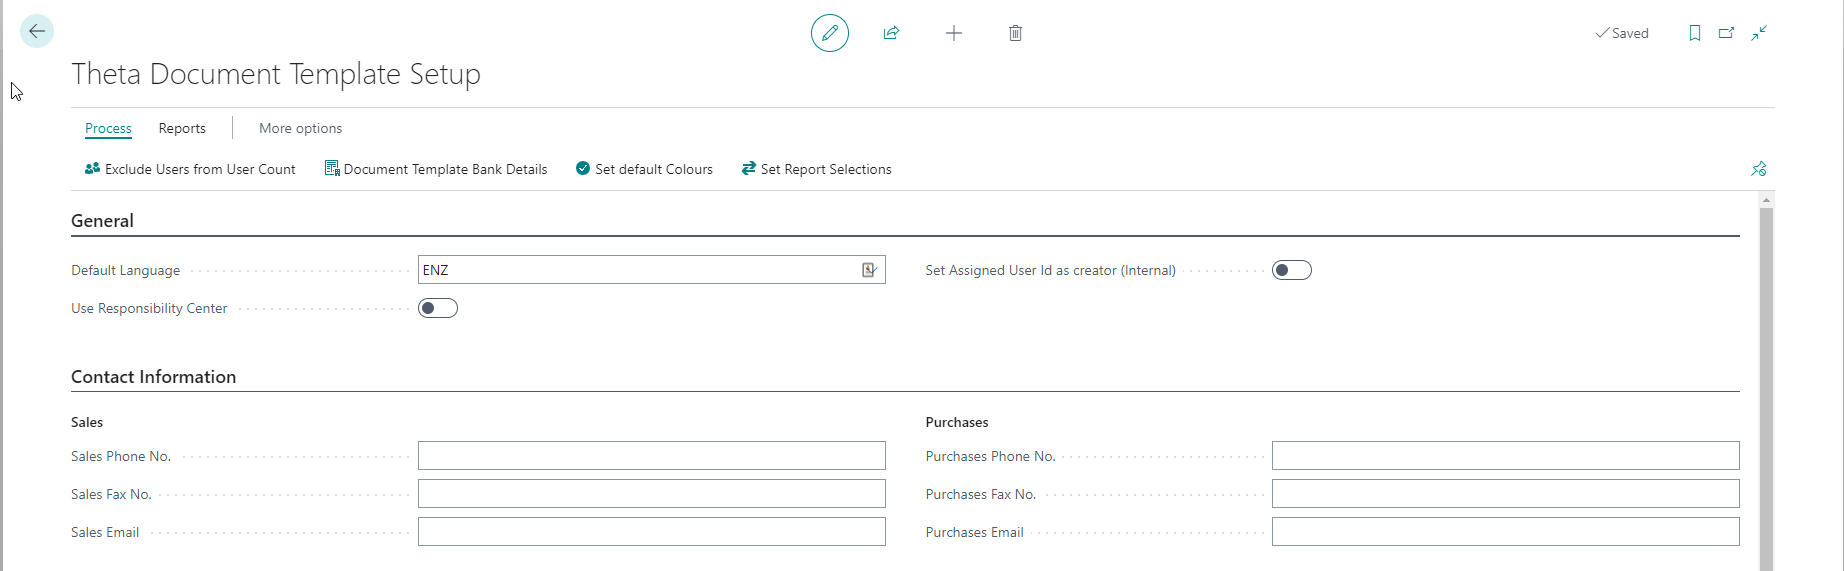
General
| Field | Description |
|---|---|
| Default Language | Specifies the language code for documents to use as a default. Supported languages: ENZ, ENA and ENU. You will generally select this if you are an NZ or AU user that needs to print documents in a different company that is a foreign entity. If a customer or vendor has a language code specified, this will be copied to their related documents and used instead of the value specified here. |
| Use Responsibility Center | Specifies that the documents will use the Responsibility Center's details instead of the company information. Read here for more information. |
| Set Assigned User Id as creator (Internal) | Specifies that the Assigned User ID defaults to the creator for Transfer Orders, Production Orders and Assembly Orders |
Contact Information
| Field | Description |
|---|---|
| Sales Phone No. | Specifies the phone no. that should be printed on sales documents. |
| Sales Fax No. | Specifies the fax no. that should be printed on sales documents. |
| Sales Email | Specifies the email address the app should print on sales documents. |
| Purchases Phone No. | Specifies the phone no. that should be printed on purchase documents. |
| Purchases Fax No. | Specifies the fax no. that should be printed on purchase documents. |
| Purchases Email | Specifies the email address the app should print on purchase documents. |
If you do not specify values for any of the above fields, the app will use the values from the company information. You only need to specify values that are different to the company information.
- If you specify to use Responsibility Center details, the contact details are sourced from the Responsibility Center.
- You can also specify the Phone, Fax and Email on the Theta Document Settings for the report.
Document Formatting
| Field | Description |
|---|---|
| Log Position on Documents | Specifies the Logo Position on printed documents. |
| Show GST/ABN No. | Specifies whether to print the company's GST Registration No. or ABN on documents. |
| Date Format Text | Specifies the long date format to be used in Documents like the Sales Invoice etc. |
| Short Date Format Text | Specifies the short date format for documents. The short-date format gets used on the lines of documents where space is limited. |
| Display LCY Symbol | Specifies if the app should display the local currency symbol with amounts shown on the documents. |
| LCY Symbol | Specifies the symbol that the app uses to represent local currency amounts. |
In Australia, the ABN must be displayed on all invoices and credit notes. Similarly, the GST Registration number must be included in all invoices and credit notes in New Zealand. The field Show GST/ABN No. is set to GST Registration No. by default. This default setting should be updated to ABN when the entity is based in Australia.
Here's a link to the Microsoft help on date formats.
Sales and Purchase
This app also provides some additional features in sales and purchase document processing.
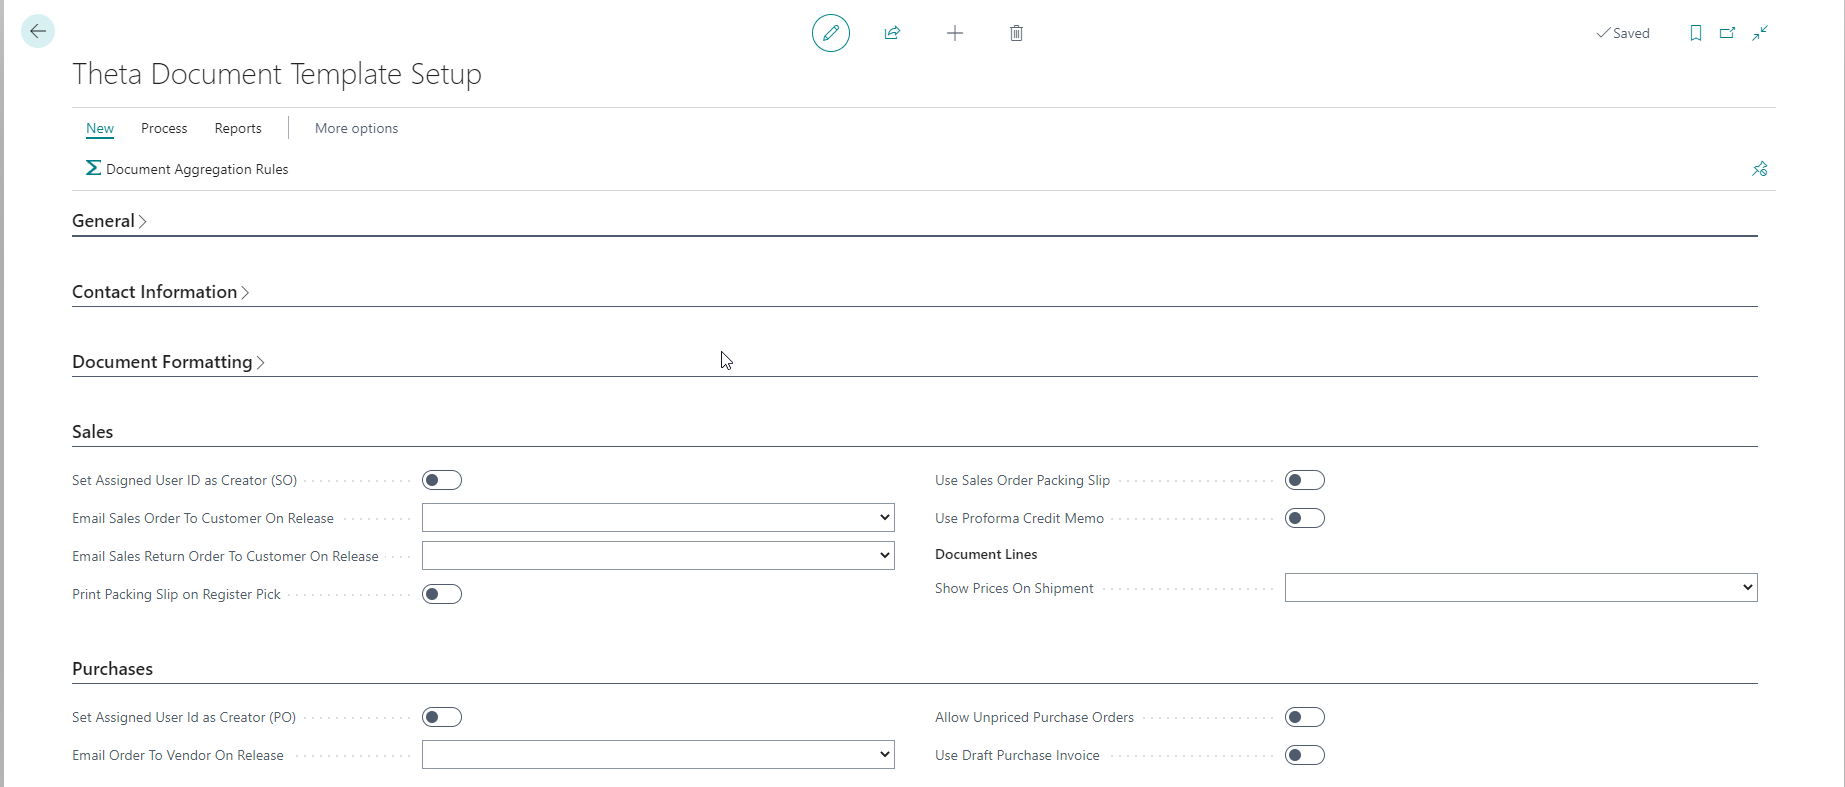
Sales
| Field | Description |
|---|---|
| Set Assigned User ID as Creator (SO) | Specifies that the Assigned User ID field defaults to the creator in sales documents |
| Email Sales Order To Customer On Release | Specifies that the sales order will be emailed to the customer when it is first released (or approved if workflows are configured). |
| Email Sales Return Order To Customer On Release | Specifies that the sales return order will be emailed to the customer when it is first released (or approved if workflows are configured). |
| Print Packing Slip on Register Pick | Specifies that a packing slip should be printed when a warehouse pick is registered. |
| Use Sales Order Packing Slip | Specifies that you can print or email a packing slip from the sales order before the sales order is shipped. This feature is not enabled by default because most companies prefer to produce packing slips based on posted shipments. |
| Use Proforma Credit Memo | Specifies that you can print or email a Proforma Credit Memo from the Sales Credit Memo page. Most companies prefer to provide details of the credit only after it is posted, so this is not enabled by default. |
| Attach Invoices to Reminders | Specifies that you want to attach invoices to the email that gets sent when you send out Issued Reminders. |
| Show Prices On Shipment | Specify if prices should be shown on the sales shipment/packing slip. You can also change this for individual customers on the customer card. The setting here will be used as a default but is overridden by the customer setting. |
Email Sales Return Order To Customer On Release Options
| Option | Description |
|---|---|
| - | The app will not send Emails automatically. |
| Send to External Emails | The email gets sent to the external email configured for the sales document in the following priority: The document layout (if specified), else the Email field from the sales document (if specified), else the customer email address (if specified) else the contact email (if specified) |
| Send Internally When External Emails Not Found | The email gets sent emailed to the customer if the email address can be determined (as above); else, it is sent internally in the following priority: Salesperson, Assigned User, Created by User. |
The app will only even send the document automatically once. If you reopen and re-release the sales order, the program does not send it again.
Purchases
| Field | Description |
|---|---|
| Set Assigned User Id as Creator (PO) | Specifies that Assigned User ID field defaults to the creator in purchase documents |
| Email Order To Vendor On Release | Specifies that the purchase order will be emailed to the vendor when it is first released (or approved if workflows are configured). |
| Allow Unpriced Purchase Orders | Specifies that it is possible to select to print an unpriced purchase order. The default is to print a priced order even when set, but you can change this on the purchase order. A scenario where you could use this is for repair services where the provider can only determine the cost after the service has been delivered |
| Use Draft Purchase Invoice | Specifies that you can print or email a Draft Purchase Invoice before posting it. You could use this in scenarios where you raise the purchase invoice based on the information you hold, and you want to share this with your vendor before posting the invoice (e.g. Consignment Inventory or Buyer-Created Tax Invoices). |
Email Order To Vendor On Release Options
| Option | Description |
|---|---|
| - | The app will not send Emails automatically. |
| Send to External Emails | The email gets sent to the external email configured for the purchase document in the following priority: The document layout (if specified), else the Email field from the purchase document (if specified in the buy-from section), else the contact email (if specified), else the vendor email address (if specified). |
| Send Internally When External Emails Not Found | The email gets emailed to the vendor if the email address can be determined (as above). Else, it is sent internally in the following priority: Purchaser, Assigned User, Created by User |
| Send to Internal Emails | The email gets sent internally only. |
| Send to External and Internal Emails | The email gets sent externally if possible and internally. |
The app will only even send the document automatically once. If you reopen and rerelease the purchase order, the program does not send it again.
Email Address Validation
Business Central includes basic validation to check for valid email addresses. This app contains additional verification to ensure email addresses get entered correctly.

| Field | Description |
|---|---|
| Enable Enhanced Email Check | Specifies that you want to use the enhanced email validation provided by this app. |
| Regular Expression for Email Check | Specifies the regular expression for checking the email addresses. You will notice that this field defaults to the recommended expression when you enable the feature. |
Exclude Users for Subscription Purposes
There is often a requirement for implementation consultants to have licensed users in your environment. These users can be excluded from the user count by your partner. This can prevent you from being pushed into a different pricing tier when your total user count is close to the threshold. Your partner can specify the users that should be excluded. To do this, click the Exclude Users from User Count action. The following page gets opened:
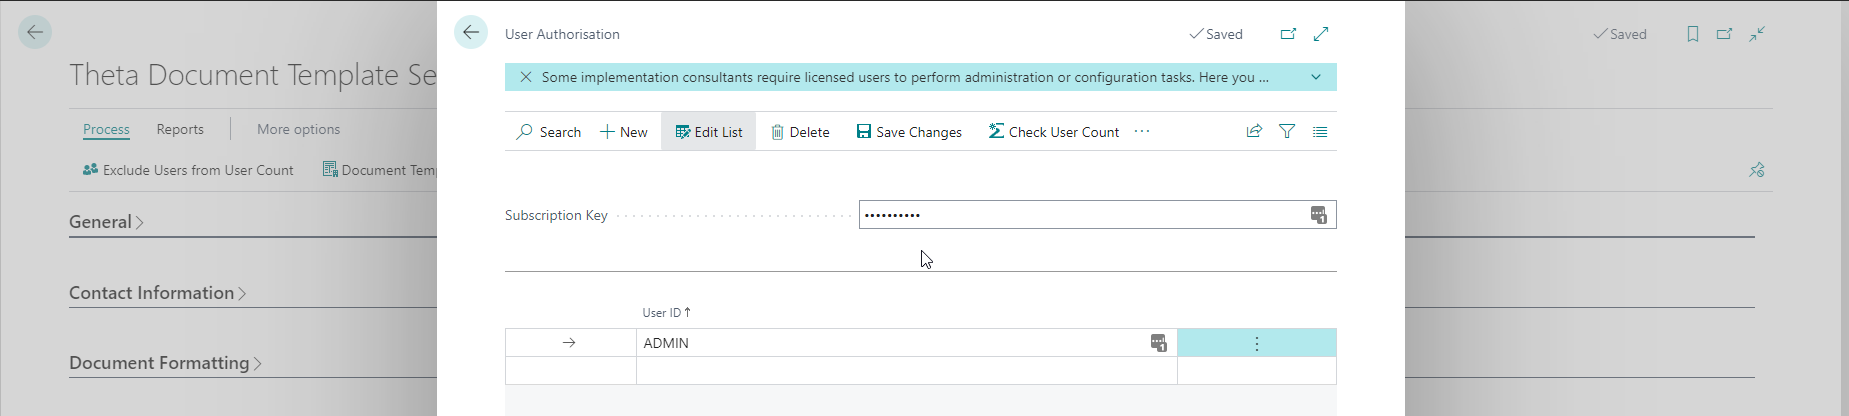
- Select the users that should not be counted towards the total user count.
- Enter the subscription key. The subscription key is only available to implementation partners.
- Click the Save Changes action.
Clicking the Check User Count action will display a message confirming the user count.
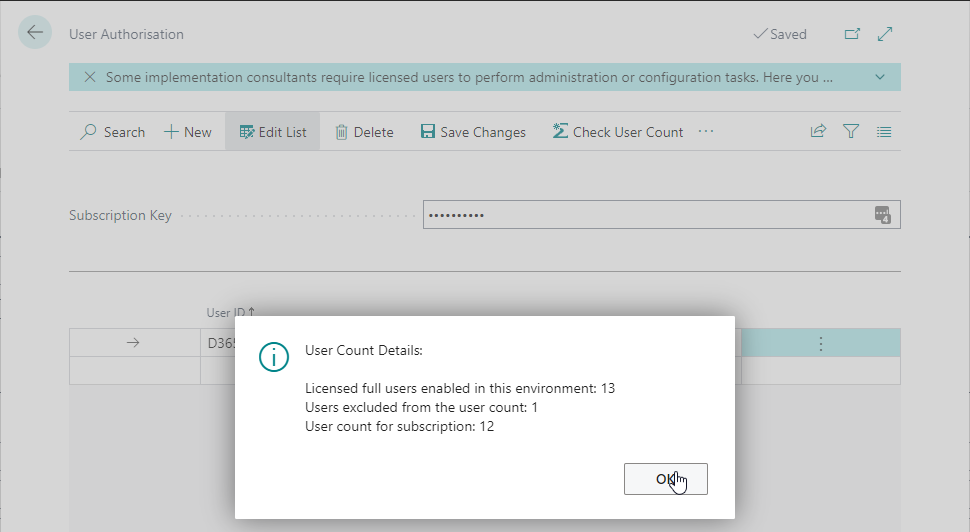
The user count only includes enabled users with an Essentials, Premium or Device license. The users specified in this list only get excluded if they are enabled and have an Essentials, Premium or Device license. GDAP or CSP users get excluded from the user count and do not need to be specified here.
Responsibility Centers with different company details
The Australia/New Zealand Accelerator can use responsibility centres to change the company information shown on documents, including logos. Enable Use Responsibility on Theta Document Template Setup to enable this feature.
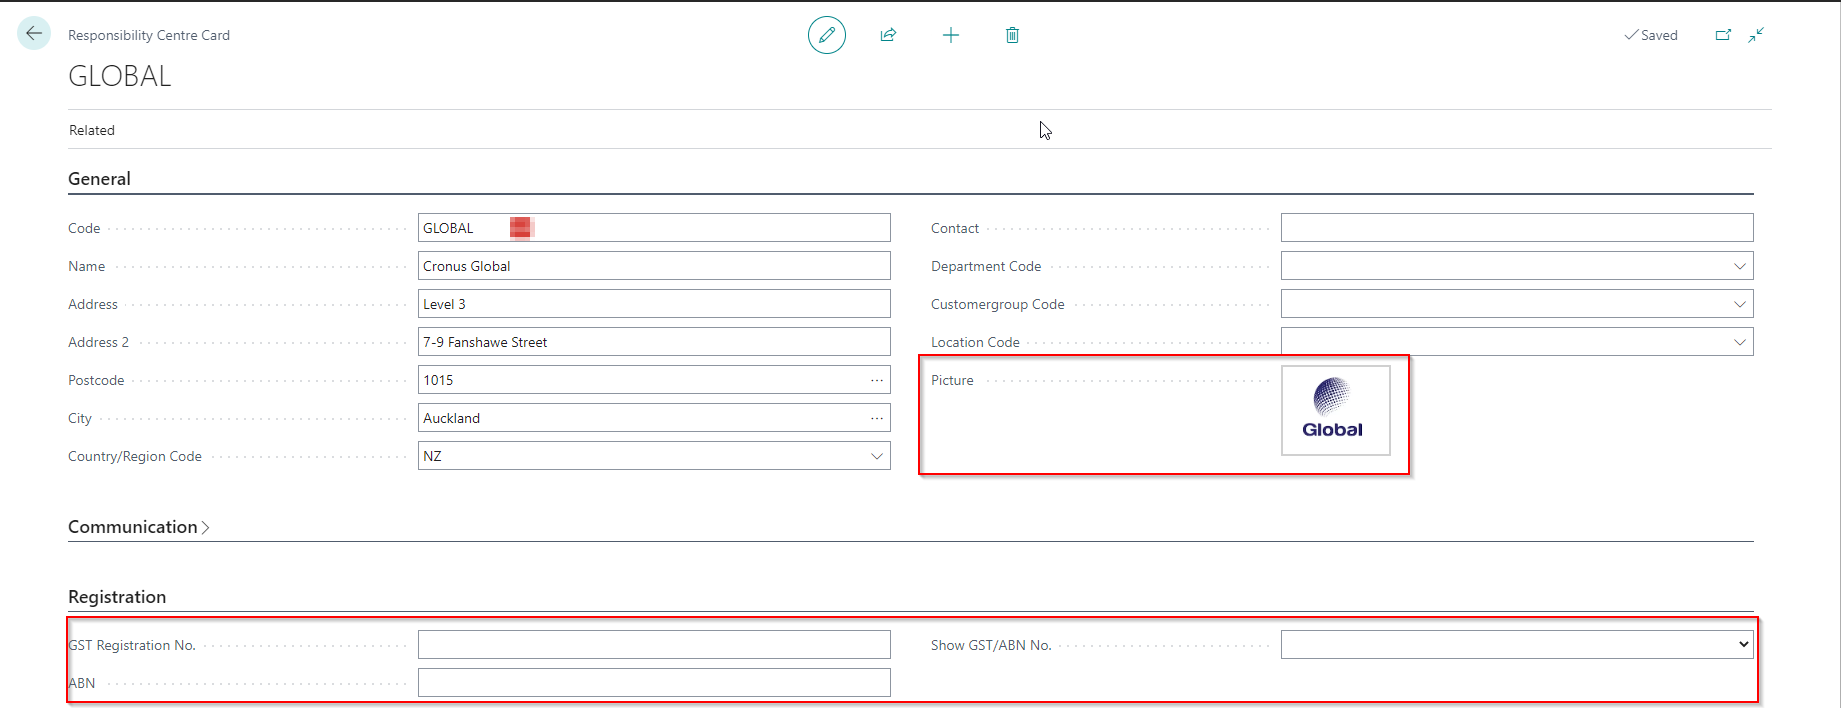
Additional Fields
| Field | Purpose |
|---|---|
| Picture | You can load a different logo for the responsibility center, which the app can use for your documents. |
| GST Registration No. | You can specify a different GST Registration number here if the entity the responsibility centre represents has a different GST Registration No. Do not specify a value here if you only have one registration number. |
| ABN | You can specify a different ABN here if the entity the responsibility centre represents has a different ABN. Do not specify a value here if you only have one registration number. |
| Show GST/ABN No. | This field overrides the setting specified on Theta Document Template Setup. |
Changing the document layout
Business Central allows you to create different document layouts for reports. The standard Business Central functionality allows you to change the layouts without doing any customisation. However, you cannot add additional fields without first doing customisation. The Theta Document Layouts allow you to add custom fields to the layouts without having to do customisation. To change the layouts you will need to be familiar with the Business Central help on this topic.
Theta Document Settings
Here you can adjust settings for the different document layouts. You can also configure custom fields, which you can add to the document layout.
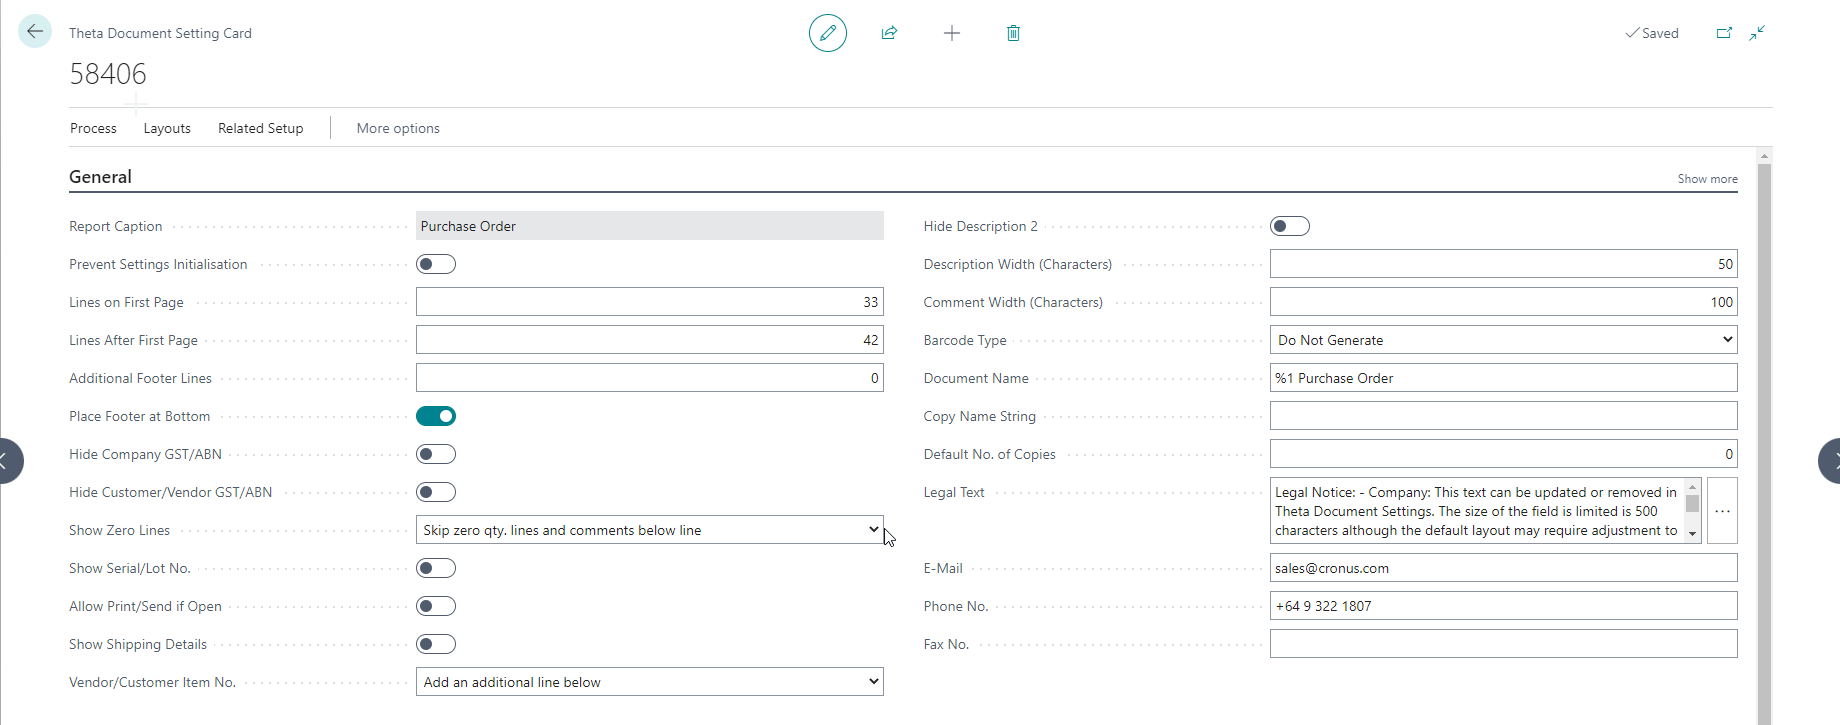
Fields - General
| Field | Purpose |
|---|---|
| Report Type | Specifies the report type concerning Document Extended Text. This only relates to sales documents. |
| Prevent Settings Initialisation | Specifies that the document settings and custom fields will not be updated automatically from defaults defined in a custom extension. You can do this if a specific company significantly differs from the default values and do not want this to change. |
| Lines on First Page | Specifies the number of lines that can print on the first page of a report. As the Theta document templates usually print additional header information on the first page, this number is usually lower than what can print on subsequent pages. |
| Lines After First Page | Specifies the number of lines that can print on subsequent report pages. |
| Additional Footer Lines | Specifies an additional number of lines taken up by a custom footer on the report layout. |
| Place Footer at Bottom | Specifies if the footer should always print at the bottom of the document. When this is selected, the report will print additional blank lines to accommodate the additional lines. The default setting is Yes. |
| Hide Company GST/ABN | Specifies that the document will not show your Company GST/ABN number. |
| Hide Customer/Vendor GST/ABN | Specifies that the document will not show your Customer or Vendor GST/ABN number. |
| Show Zero Lines | Specifies if the lines and their relevant comment lines (comments under the actual line) are printed if the quantity or the amount on the line is zero. |
| Show Serial/Lot No. | Show Serial/Lot details on the document. Not all documents support this feature. |
| Allow Print/Send if Open | Specify if you wish to allow documents that are not released to be printed or sent. This feature is used for unposted documents such as purchase orders or sales order confirmations. |
| Show Shipping Details | Specifies if the document should display the shipments/returns details on the sales invoice and credit memo. |
| Vendor/Customer Item No. | Specify if the Vendor or Customer Item number gets shown as an additional line or column. Note that the default layout does not have a column for the vendor/customer item number, so you must apply a custom layout if you want an additional column. |
| Hide Description 2 | The value from the Description 2 field will be appended to the description. Select this if you do not wish to print the Description 2. |
| Description Width | Specifies the width of the description field on this document. If not specified, the default of 50 characters gets used due to space limitations in the default layout. |
| Comment Width | Specifies the width of the description field for comment lines on this document. If not specified, the default of 50 characters gets used due to space limitations in the default layout. |
| Barcode Type | Specify if you wish to generate a barcode on the report. Not all documents support this feature. Read here for more detail. |
| Document Name | Specifies the document name that will print on the report. Note: remember to specify %1 as a placeholder for the word "Copy" if you want to show when the document is getting reprinted. Alternatively, you can remove the %1 placeholder if you do not wish to print the word 'Copy'. |
| Copy Name String | Allows you to optionally specify a copy name for each copy that gets printed. When printing more than one copy at a time, you can also specify a comma-separated string to assign a different name to each copy (e.g. Sales Shipment - Internal Copy,Sales Shipment - Customer Copy) |
| Default No. of Copies | Default No. of Copies |
| Legal Notice | Specifies a legal notice that will print on the document if the layout provides this. Use the assist edit button if you wish to make changes. You can use HTML in this field to include hyperlinks and other formatting. |
| Specify the email address the app should use for this document's company information instead of the default. | |
| Phone No. | Specify the phone number the app should use for this document's company information instead of the default. |
| Fax No. | Specify the fax number the app should use for this document's company information instead of the default. |
Barcodes on documents
When you specify the Barcode Type, the app generates either a standard barcode supported by Business Central or a more complex barcode using a privately-hosted Azure function. The privately-hosted Azure function is available from Theta and we can also assist in deploying this function. The Azure function can GS1 barcodes, including a GS1 data matrix.
By default, the app uses the document number as the barcode, but you can change this using the OnBeforeGenerateDocumentBarCode event.
The default document layouts do not show the barcode, but the encoded barcode text or image and barcode font is available in the report datasets. Read here to see how to add the barcode to a report layout.
If you need to generate a GS1 barcode, then deploying a privately-hosted Azure function in your tenant is required because the Azure function is not available as a managed service. While the function is available at no additional cost, there is an additional cost for deploying the Azure function. Supporting this function is also not covered by the app support model.
Responsibility Centers
If you want to show different company details for responsibility centers, you can also show other contact details, legal notices and email bodies. On this sub-page on the Theta Document Settings, you can add a record per responsibility center and record this information.

- You need to enable Use Responsibility Center on Theta Document Template Setup to show different company details for responsibility centers.
- Creating a record here will replace the same values from the document settings when the document relates to the current responsibility center.
- If the customer/vendor has an email body selected on a custom layout, then the app will use this in preference to the one specified on the responsibility center.
Custom Fields
Here you can select additional fields you want to display on your document. You can then add these fields to the document layout using the corresponding values in the dataset. You can add up to 90 custom fields.
In an extension, you can also specify default custom fields. This lets you publish the default custom fields when you deploy your extension. You can also use the sample extension as a starting point or use the code snippets.
You can access the Custom Fields from the Document Settings list or card by selecting the Custom Fields action.
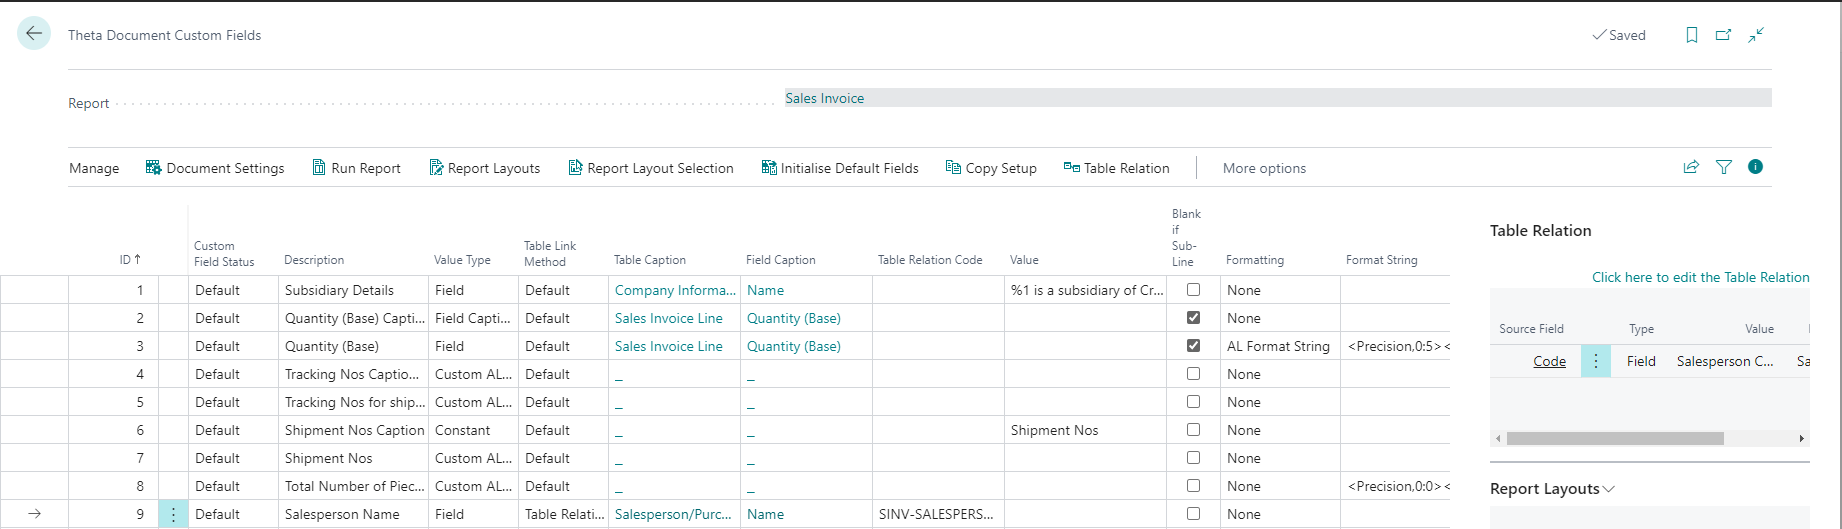
| Field | Purpose |
|---|---|
| Id | Specifies the custom field number, which can be between 1 and 60. The Id corresponds to the Custom Field Number in the report dataset. For example, Id 1 will be assigned CustField1 in the report dataset. |
| Custom Field Status | You can lock this custom field to prevent the record from being overwritten when synchronising changes between companies or when a custom extension updates default values. This field will also indicate if the custom field was defaulted from an extension. |
| Description | Specifies a description for this custom field to assist others that need to maintain this setup. |
| Value Type | Specifies the type of value that should be displayed. Read here for more information. |
| Table Link Method | Specifies how to find a related record. For example, when using the customer or vendor table as a source table, you can identify whether the app should use the Bill-to Customer or Pay-to Vendor instead of the default (Sell-to Customer or Buy-from Vendor). Alternatively, select Table Relation Code to define a custom table relation. |
| Table Caption | Shows the table caption, which is the source of the custom field. Note: The list of tables is limited unless you select Table Relation Code as the Table Link Method. Read here for more information. |
| Field Caption | Shows the field caption of the selected custom field. |
| Table Relation Code | Specifies the table relation code the app should use to find the related record. This field only gets used when the Table Link Method is set to Table Relation Code. Read here for more information. |
| Value | This is optional for when the Value Type is Field, but needs to be specified when the Value Type is Dimension or Constant Value. When the Value Type is Field, you can fill in optional free text to be combined with the field value using %1 to indicate the position of the field value. When the Value Type is Dimension, use this field to specify the dimension you wish to print. When the Value Type is Constant, you enter the free text value that will print. |
| Blank if Sub-Line | Specifies that the value will be blank if the line being displayed is a sub-line. A sub-line is a line that prints below the actual document line and contains information such as Description 2 or tracking information. A line is only considered a sub-line if it's parent line has a value in the No. field. |
| Formatting | Specifies the type of formatting that the app should apply to the value before it gets assigned to the corresponding dataset field. |
| Format String | Allows you to specify a format string that the AL Language recognises. You can get more information here. |
Value Type and Value
The Value Type determines what you need to specify in the Value field.
| Value Type | Purpose | Example Value | Output Example |
|---|---|---|---|
| Field | Get the value of a field from the selected table. You can combine the field value with free text or specify the field only. The token %1 is a placeholder for the field value. You only have to specify %1 when you combine the field value with free text | %1 is a subsidiary of Cronus International Ltd. | Cronus NZ is a subsidiary of Cronus International Ltd. |
| Field Caption | Get the caption of the field from the selected table. | ||
| Dimension Code | Get a specific Dimension Code from the selected table. | DEPARTMENT | ADM |
| Dimension Name | Get the Dimension Name for a specific dimension from the selected table. | DEPARTMENT | Administration |
| Constant | Show free text (e.g. for a caption on the report) | Shipment Numbers | Shipment Numbers |
| Custom AL Code | Specifies that Custom AL Code will construct the value. | Not required | Depends on the Custom AL Code |
You can use AL Code for any of the Value Types. Specifying the Value Type Custom AL Code prevents the report from generating if the extension is not installed. This is important if the value would otherwise be incorrect.
Table Relations
You can use the default relations defined in Business Central or you can define custom table relations. The table relation is defined using the Table Link Method and the Table Relation Code.
| Table Link Method | Purpose | Has Limited List of Tables |
|---|---|---|
| Default | Use this option when there is no table relation. | Yes |
| Use Bill-to/Pay-to No. | Use this option when using the Bill-to Customer No. or Pay-to Vendor No. from the document. This is only used to link to the Customer or Vendor. | Yes |
| Header Relationship | Use this option when you want to use the relationship defined on the document header. | Yes |
| Line Relationship | Use this option when you want to use the relationship defined on the document line. | Yes |
| Use Document Line Buffer | Use this option when you want to use the relationship defined by the temporary dataset that gets created when running the report. | Yes |
| Table Relation Code | Use this option to define the table relationship yourself. When you select this option, you also need to create a table relation. This is the most flexible option when you want to display data from another table. | No |
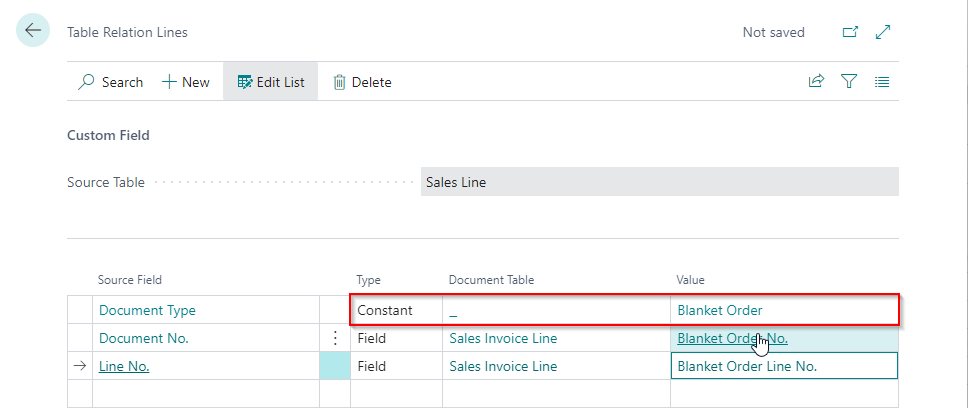
Creating a Table Relation
Here is an example showing how you can create a table relation:
You can also specify a filter or constant when you define the table relation when you need to define a more complex table relation:

Format String Examples
| Field Type | String | Example |
|---|---|---|
| Decimal | <Precision,0:5><Sign,1><Integer Thousand><Decimals> | 1.300005 becomes 1.30001 |
| Decimal | <Precision,0:2><Sign,1><Integer Thousand><Decimals> | 1.3 becomes 1.3 |
| Decimal | <Precision,2:2><Sign,1><Integer Thousand><Decimals> | 1.300005 becomes 1.30 |
| Decimal | <Precision,0:0><Sign,1><Integer Thousand><Decimals> | 1.300005 becomes 1 |
| Date | <Day> <Month Text> <Year4> | 31/03/2023 becomes 31 March 2023 |
Here is a link to the Microsoft help for more information about formats.
System Fields
The system fields feature allows you to change the format of fields that print on the document. The different documents have different system fields that can be changed. Here is an example of the Customer Statement's system fields:
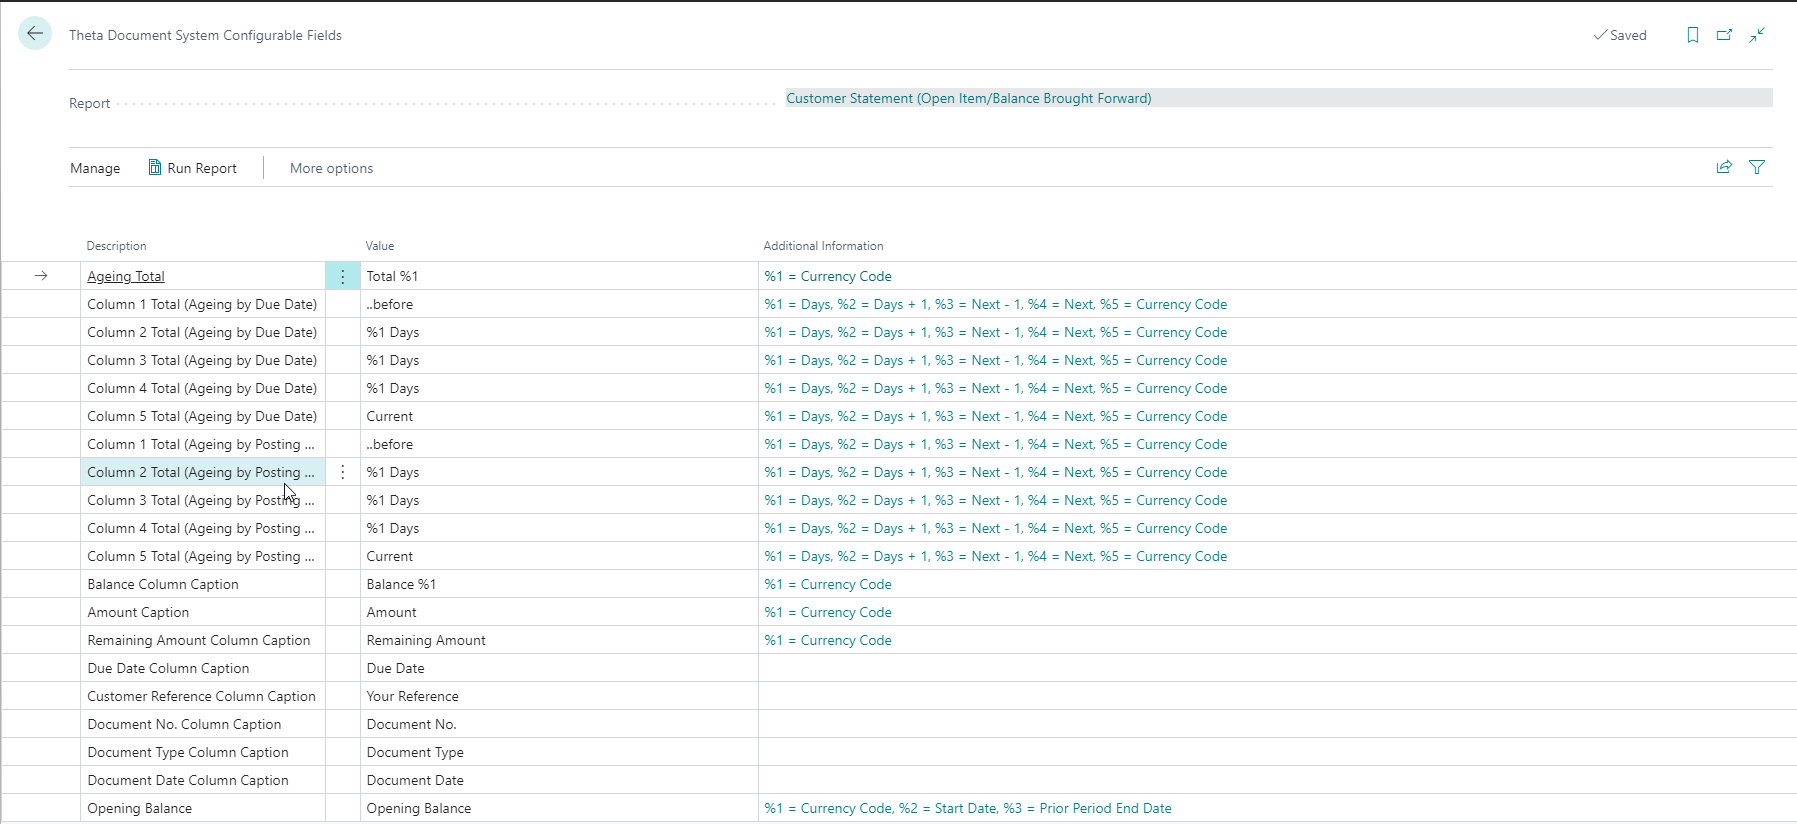
For the Customer Statement, you can change the captions of the fields and columns that display on the report.
Copy Setup
This function allows you to:
- Copy the setup from one report to another report within the same company. For example, copy the setup from the Sales Invoice to the Sales Credit Memo.
- Copy the setup from the same report in a different company. For example, copy the setup from the invoice in a different company.
- Specify more than one destination company. For example, copy the setup from the invoice to all other companies.
| Field | Description |
|---|---|
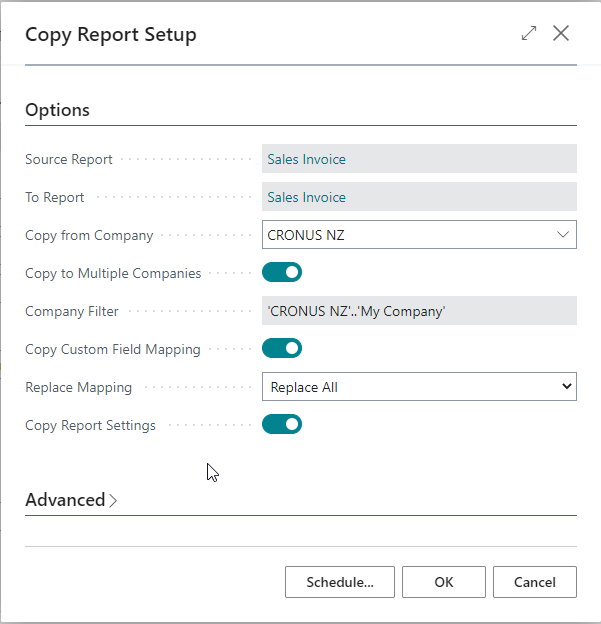
| Source Report | This is the report from which you want to copy the setup. |
| To Report | This is the report to which you want to copy the settings. The Source Report and To Report can be different (for example, you want to copy the settings from an invoice to a credit memo). |
| Copy from Company | Specifies the company from which the app will copy the settings. |
| Copy to Multiple Companies | Specifies that you wish to copy the settings to multiple companies. When you select this, the companies page gets opened. You can select one or more companies here by highlighting the companies. |
| Company Filter | This shows a filter representing the companies to which the app will copy the setup. |
| Copy Custom Field Mapping | Specifies that the app will copy the custom field mapping. This will result in the To Report's custom field mapping and system field settings getting replaced by the source report's settings. |
| Replace Mapping | Specifies that the app will replace the custom field mapping. You can choose not to replace data, replace only copied IDs or replace All. |
| Copy Report Settings | Specifies that the app will copy the document settings. |
You can also specify default custom fields in an extension. This allows you to publish the default custom fields when you deploy your extension. You can also use the sample extension as a starting point or use the code snippets.
Bank Details on Documents
This feature allows you specify scenarios in which you want different bank details to be used by your customers.
Email Name Formats
This feature allows you to configure the subjects of the emails and the attachment file names when sending documents.
As of version 24.0.4.0, the app now supports multiple formats based on the source document table ID for each usage type. For example, Vendor Remittances can be sent from both EFT Transfers and Vendor Ledger Entries. Each source can have unique tokens to update the email subject and attachment file names based on the table fields.
Fields
| Field | Description |
|---|---|
| Usage | Specifies the report usage for which the email name format is defined. |
| Enable | Specifies that this setup is enabled. This setup will only be used if the setup is enabled. |
| Subject Format | Specifies the format of the string that gets generated for the subject. This field can include free text and use tokens that you can map to fields from the table related to the document. |
| Attachment Format | Specifies the format of the string that gets generated for the attachment filename. This field can include free text and use tokens that you can map to fields from the table related to the document. If you do not specify this field, then Business Central will use the default name. |
The email name formats for remittance advices get created when the app gets installed to provide more meaningful details than the Business Central standard for these reports.
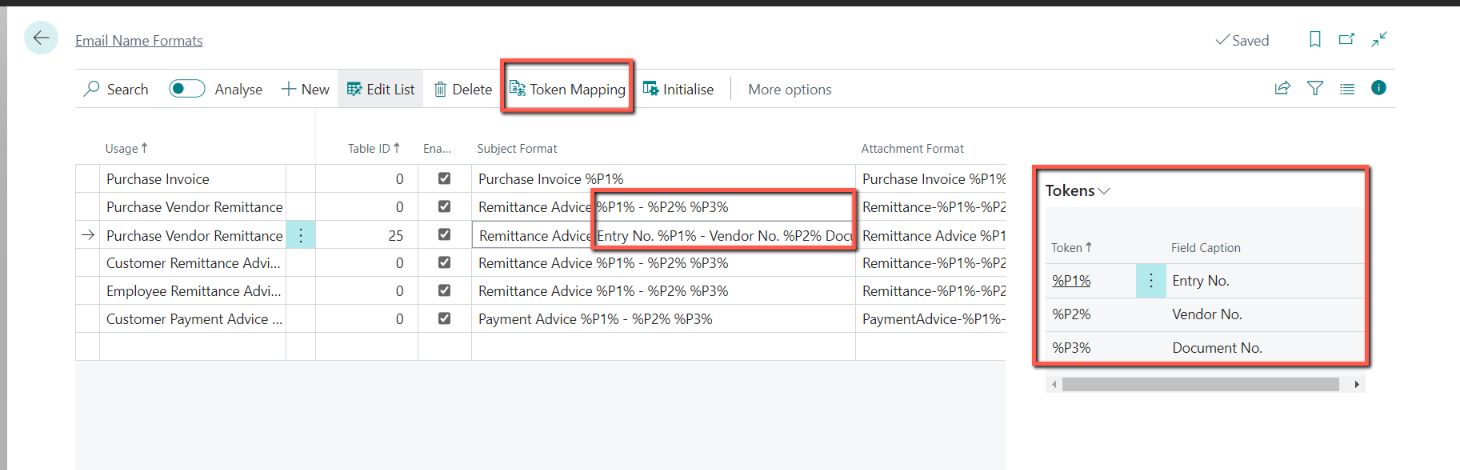
Token Translations
The Token Translations are used to map fields to place holders in the subject and attachment filenames.
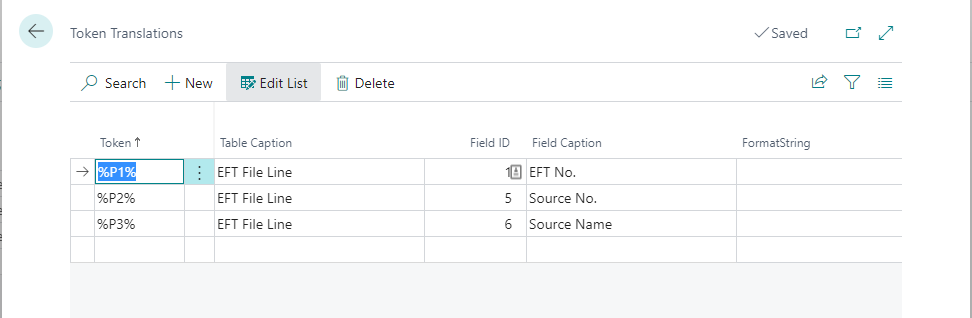
In the example above, the following applies
- %P1% gets replaced with the EFT No. of the EFT Transfer.
- %P2% gets replaced with the Source No. of the EFT Transfer. The Source No. on the EFT Transfer is the Vendor, Customer or Employee number.
- %P3% replaced with the Source No. of the EFT Transfer. The Source No. on the EFT Transfer is the Vendor, Customer or Employee name.
Document Email Log
The records on this page get created when a document gets successfully sent. From this page, you can see when Business Central sent an email and to whom Business Central sent it. The document email log provides more structured data tailored for document sending. We use this data for our automated send posted documents batch job to prevent duplication of sending.
The Sending Status indicates if the document is queued to be sent or if it has been sent already. The Send Posted Documents batch is the only process that creates records with a Sending Status of Pending.
Indirect Read, Insert and Modify permission is required to be assigned to all users sending documents. While it was always necessary to update this log, users will now get an error if they do not have the required permission. The app extends the System App - Basic permission set to add the necessary permissions.
Report Selections
Different report selections for different Order Types
Sometimes, you require more than one document format for a specific document. For example, you may need different invoice layouts when your organisation has several revenue streams. The app allows you to specify different report selections based on the Order Type of the document. The purpose of this feature is to enable you to have different document templates for different order types.