Advanced Landed Cost Setup
The Advanced Landed Cost setup allows you to configure the app to meet your requirements. It is flexible to configure this setup manually or using a setup guide.
Below are the detailed steps that guide you through the setup configuration:
Using Setup Wizard
Opening Setup Wizard using Assisted Setup
Run the Advanced Landed Cost Setup wizard to configure Advanced Landed Cost.
Using tell me, enter Assisted Setup, and choose the related link.
Choose Set up Advanced Landed Cost to start the assisted setup guide.

Basic Setup
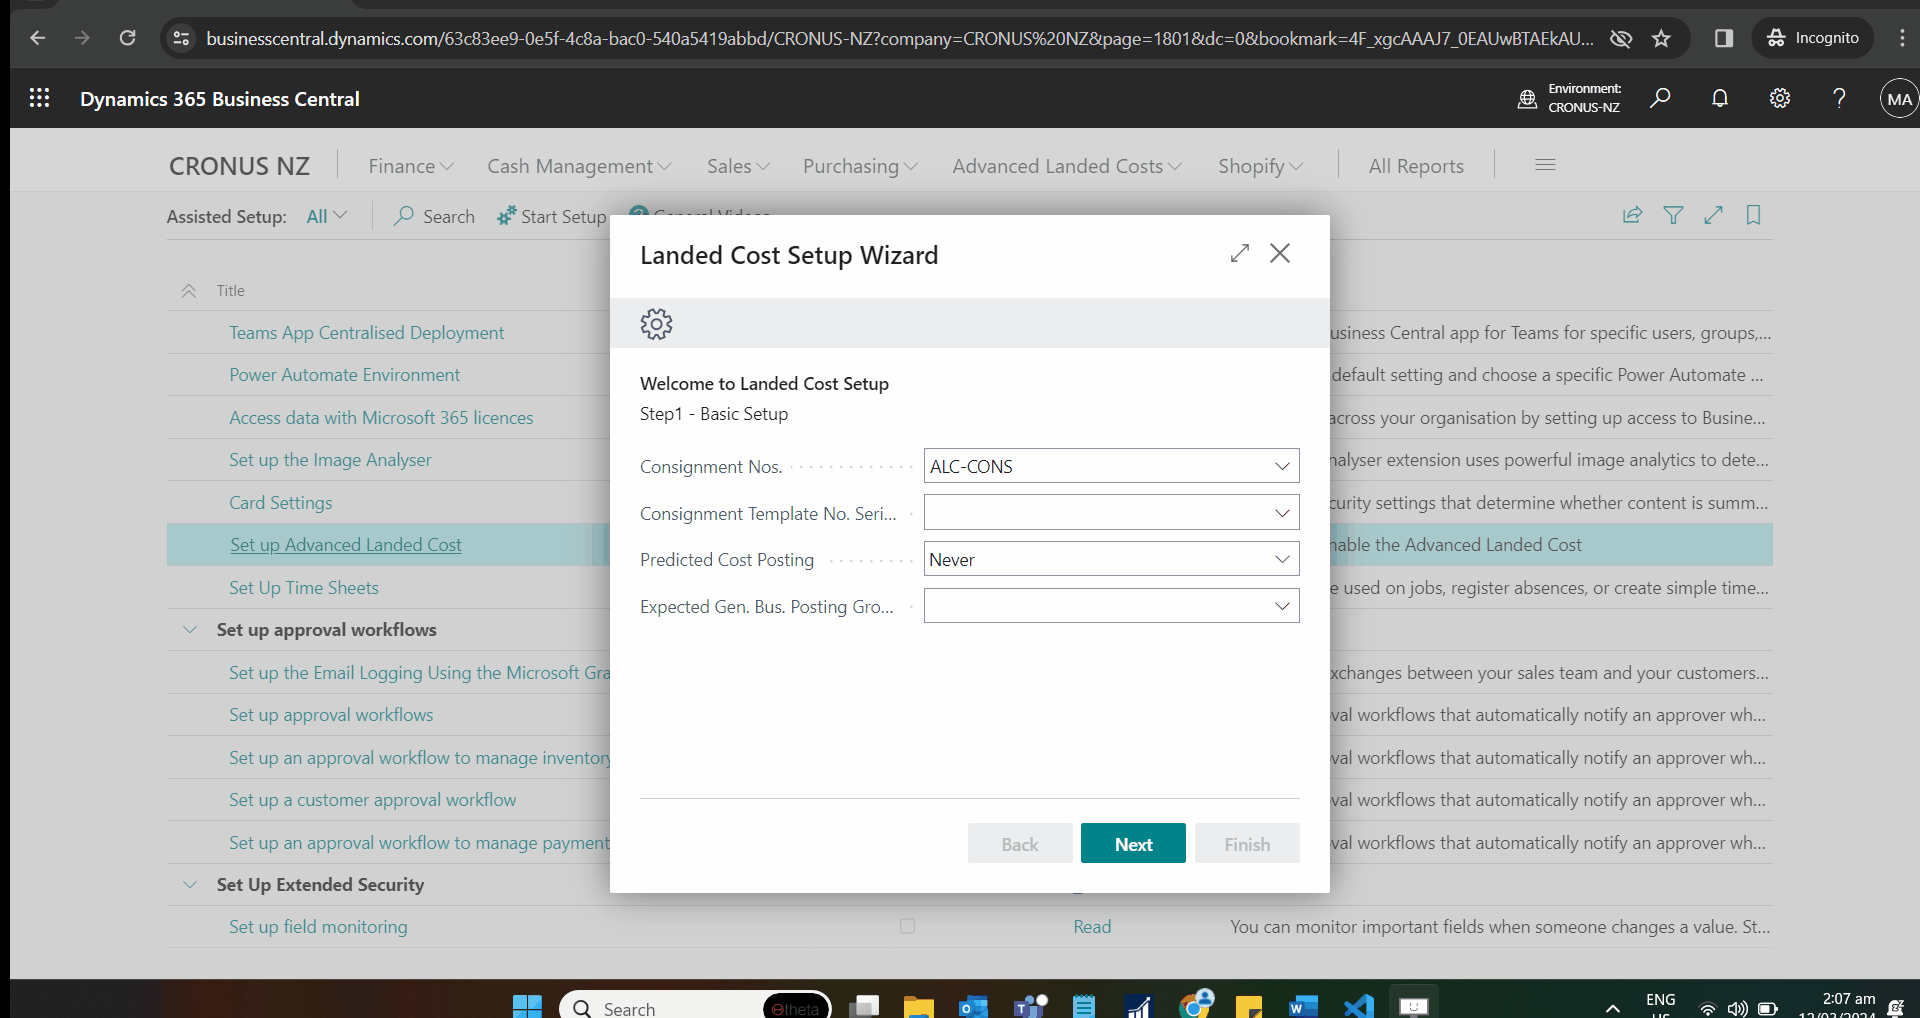
The primary step is to set up the default No. Series codes for Consignments documents and Consignment Templates under the setup wizard.
Click on the lookup button under Consignment Nos. Selection.
Select the No. Series from the list to use for Consignment documents. You can click on +New to create a new No. Series code.
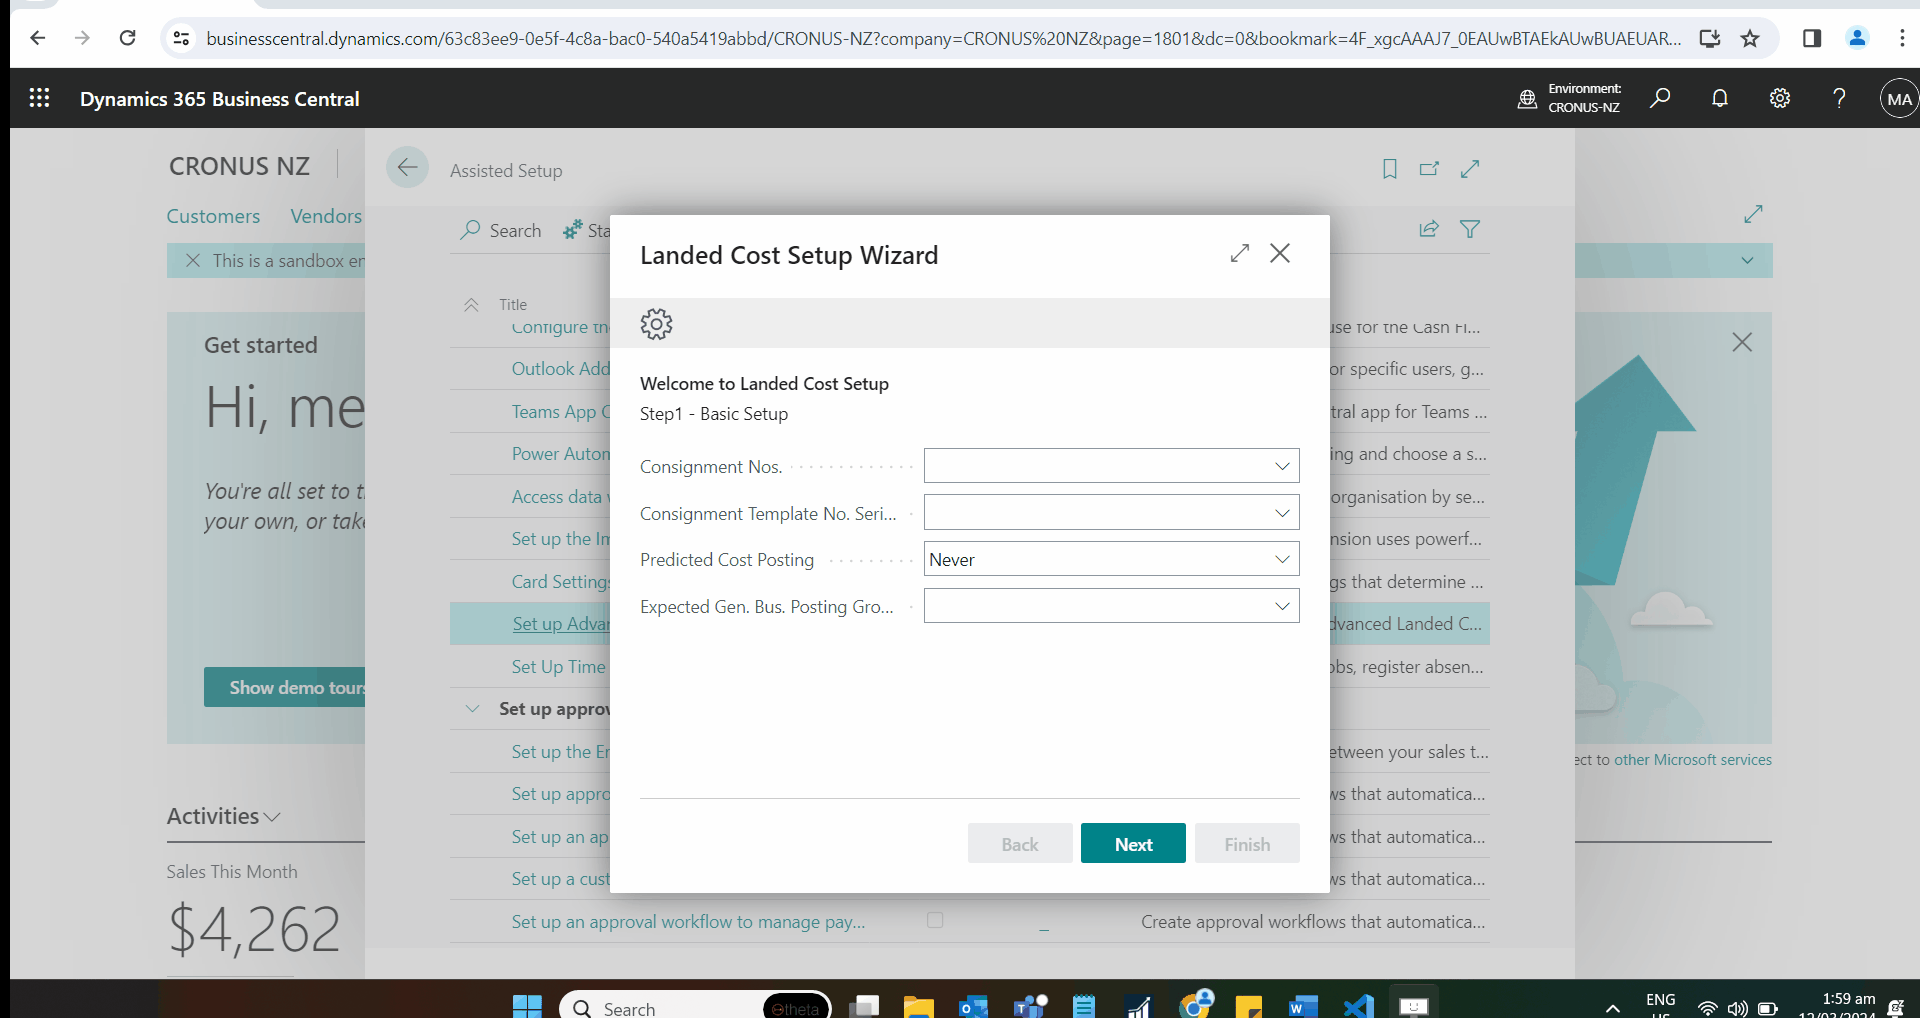
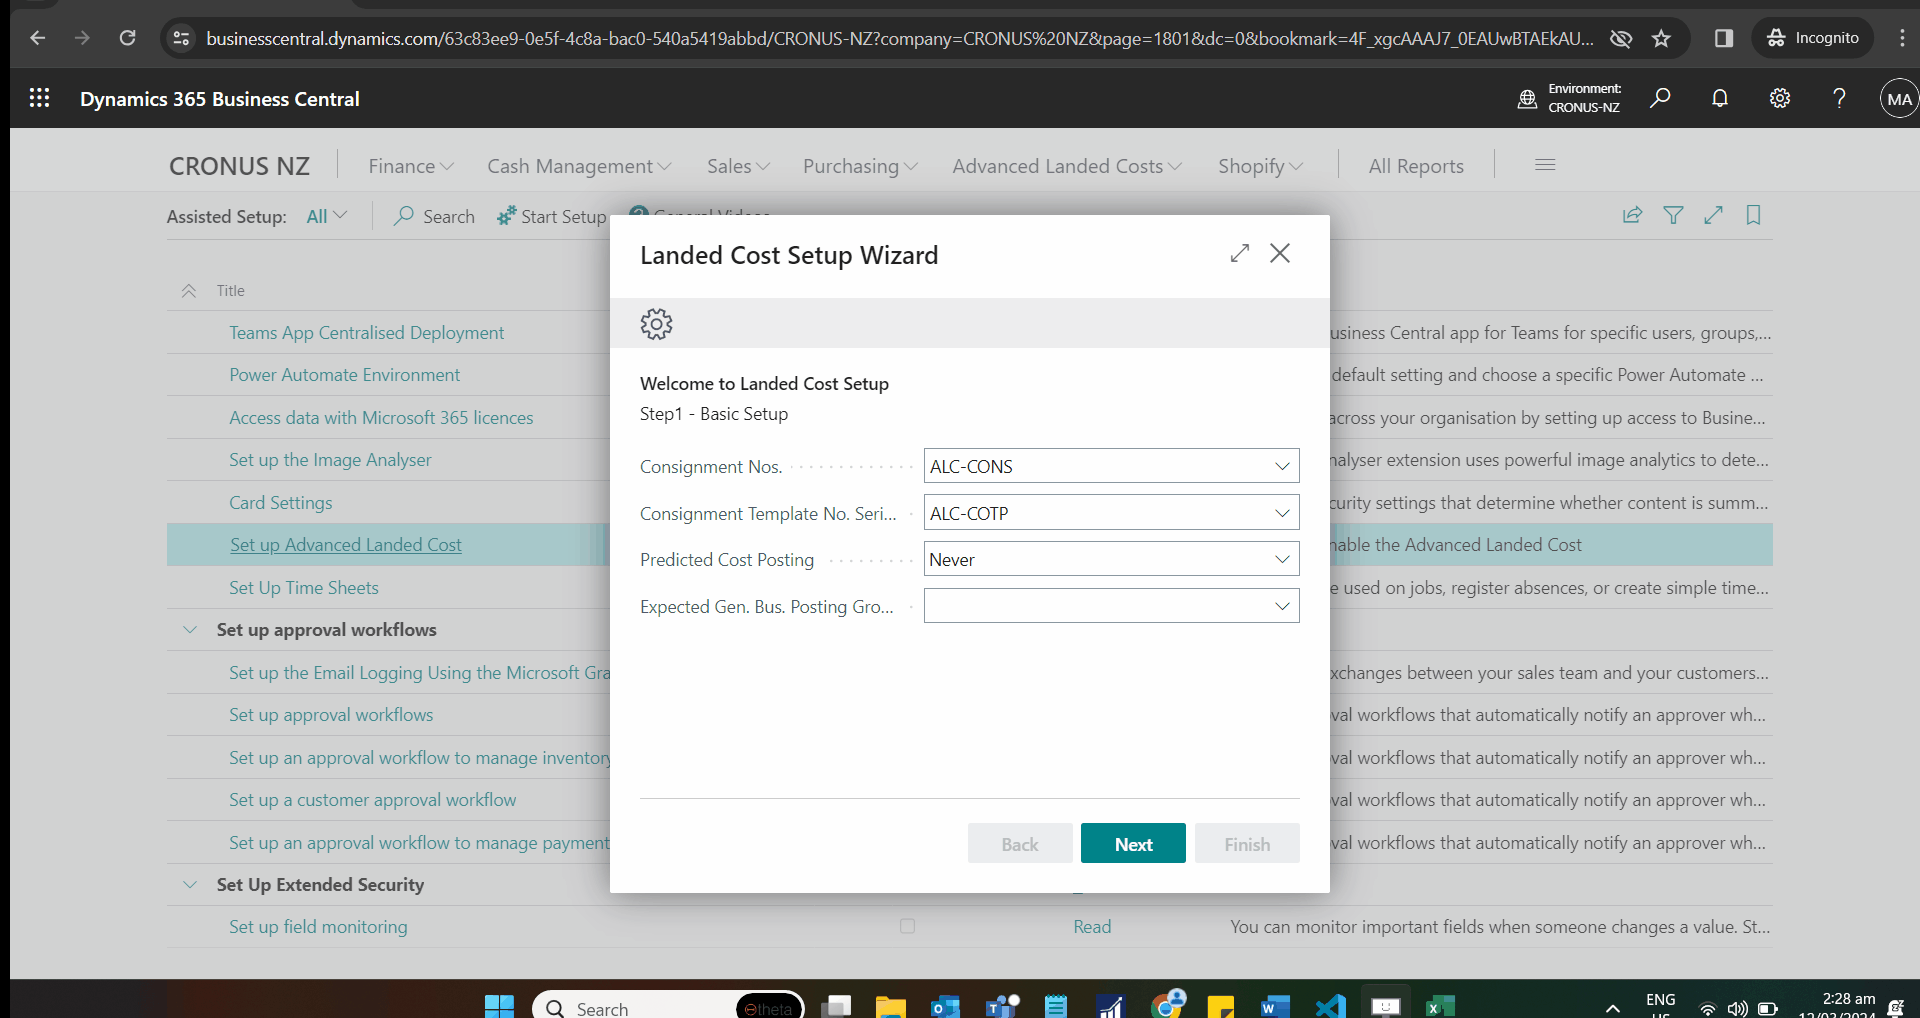
Click on the lookup button to select Consignment Template No. Series.
Select the relevant No. Series for Consignment Template
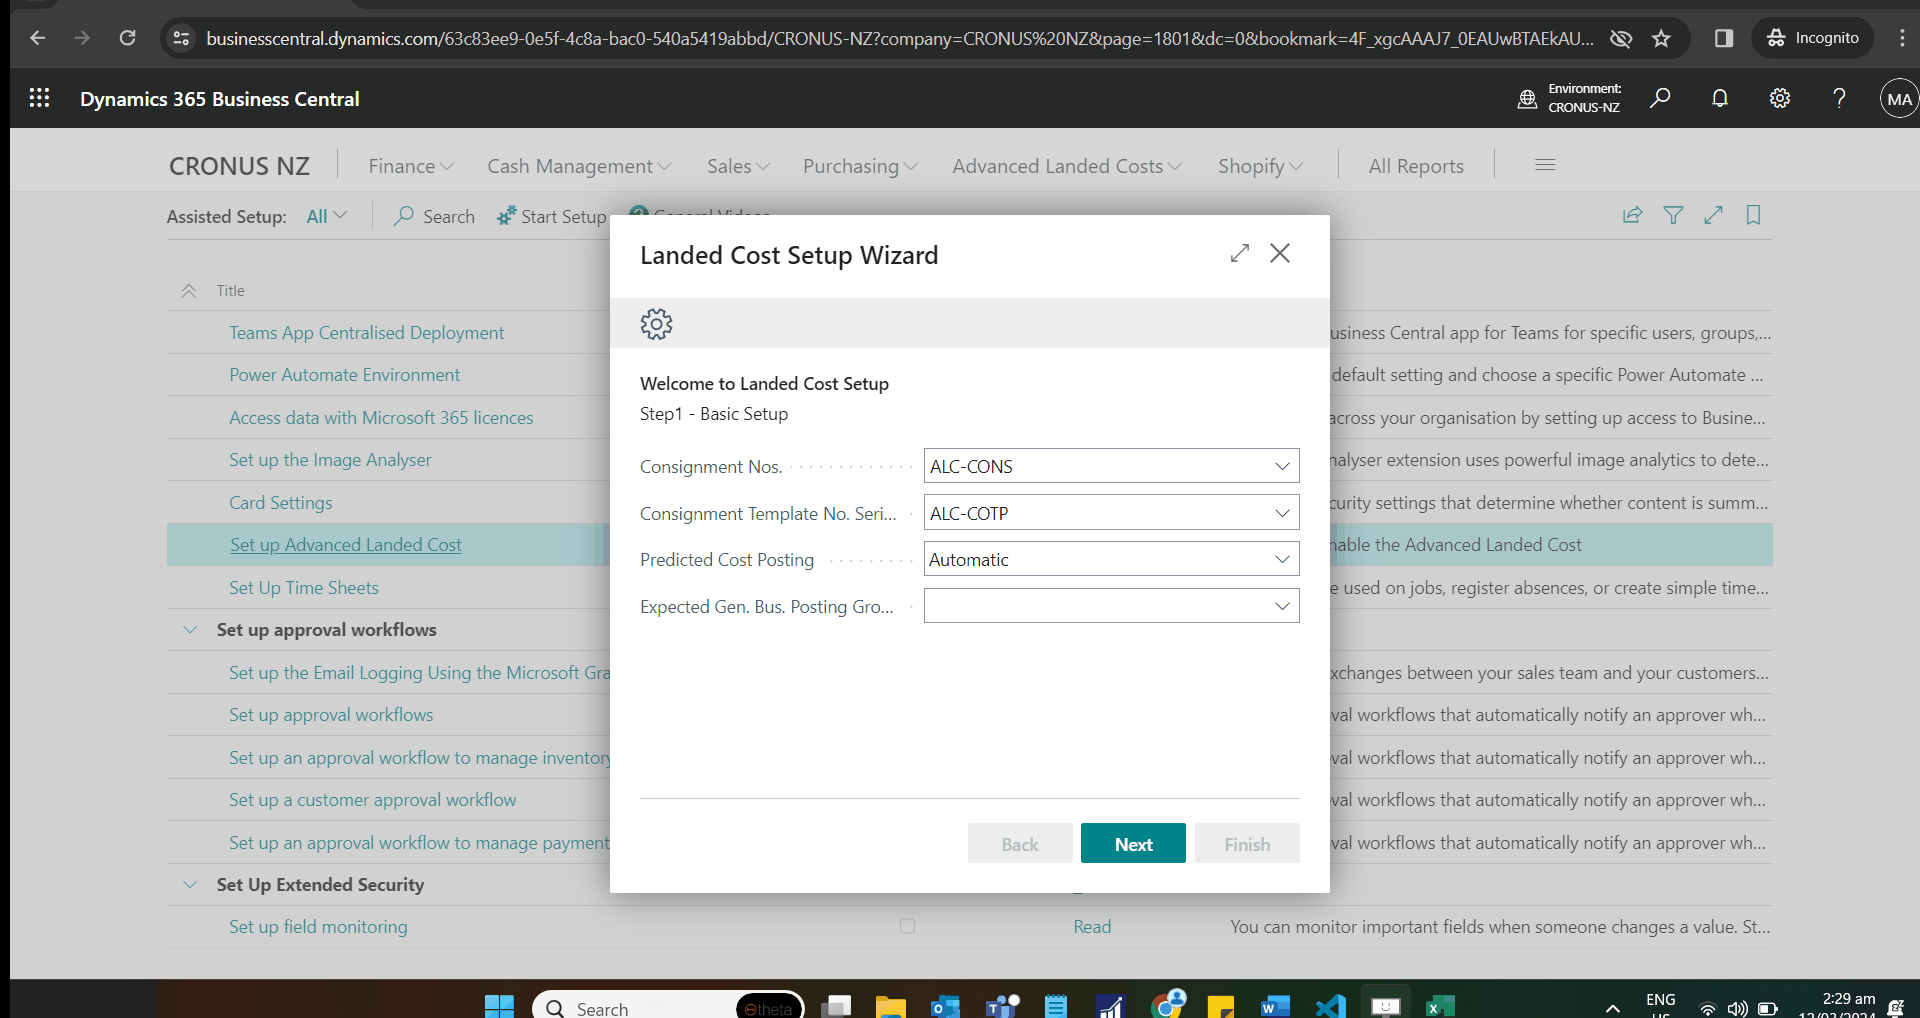
You can turn on Predicted Cost Posting to run automatically or manually using a Job Queue Entry.
| Option | Description |
|---|---|
| Never | No posting of Predicted Costs |
| Automatic | To immediately post Predicted Costs |
| Manual | To delay the posting until manually actioned or through the job queue |
Click on the field Predicted Cost Posting.
Select the Predicted Cost Posting type.
Advanced Landed Cost supports Predicted Cost Posting for expected landing charges (when set to Manual or Automatic). If it is used, you must specify the Expected Gen. Bus Posting group to post these expected landing charges.
Click on the lookup button for Expected Gen. Bus. Posting Group.
Select the relevant Expected Gen. Bus. Posting Group.
Click on the button Next
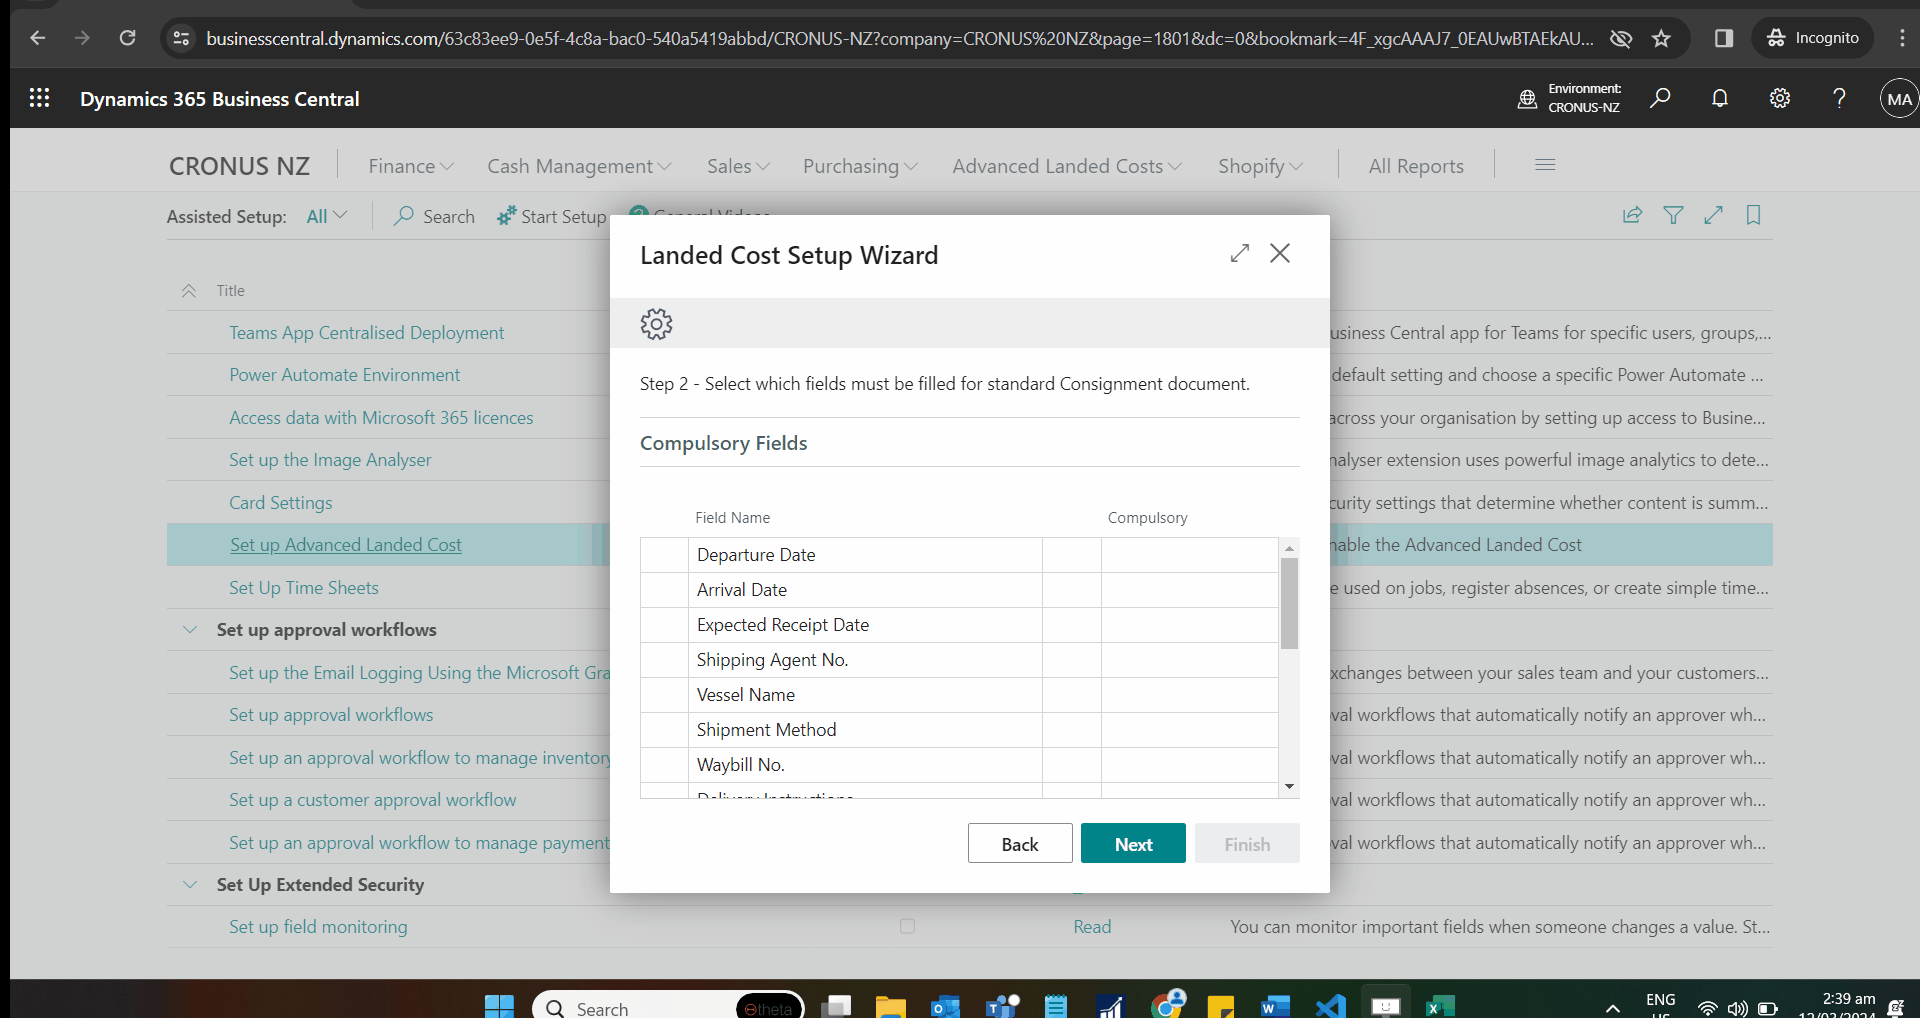
Compulsory Field Selection
Next, set up which standard fields on the Consignment Card you would like to be compulsory.
If a field is to be compulsory, you select the earliest point to validate that the field has been entered. Later, validation points will be rechecked for that field containing a value each time.
Leaving the Compulsory field blank leaves that field as optional.
Click on the cell Compulsory on any row.
Click on an option from the list.
Repeat for all compulsory fields, then click on the button Next.
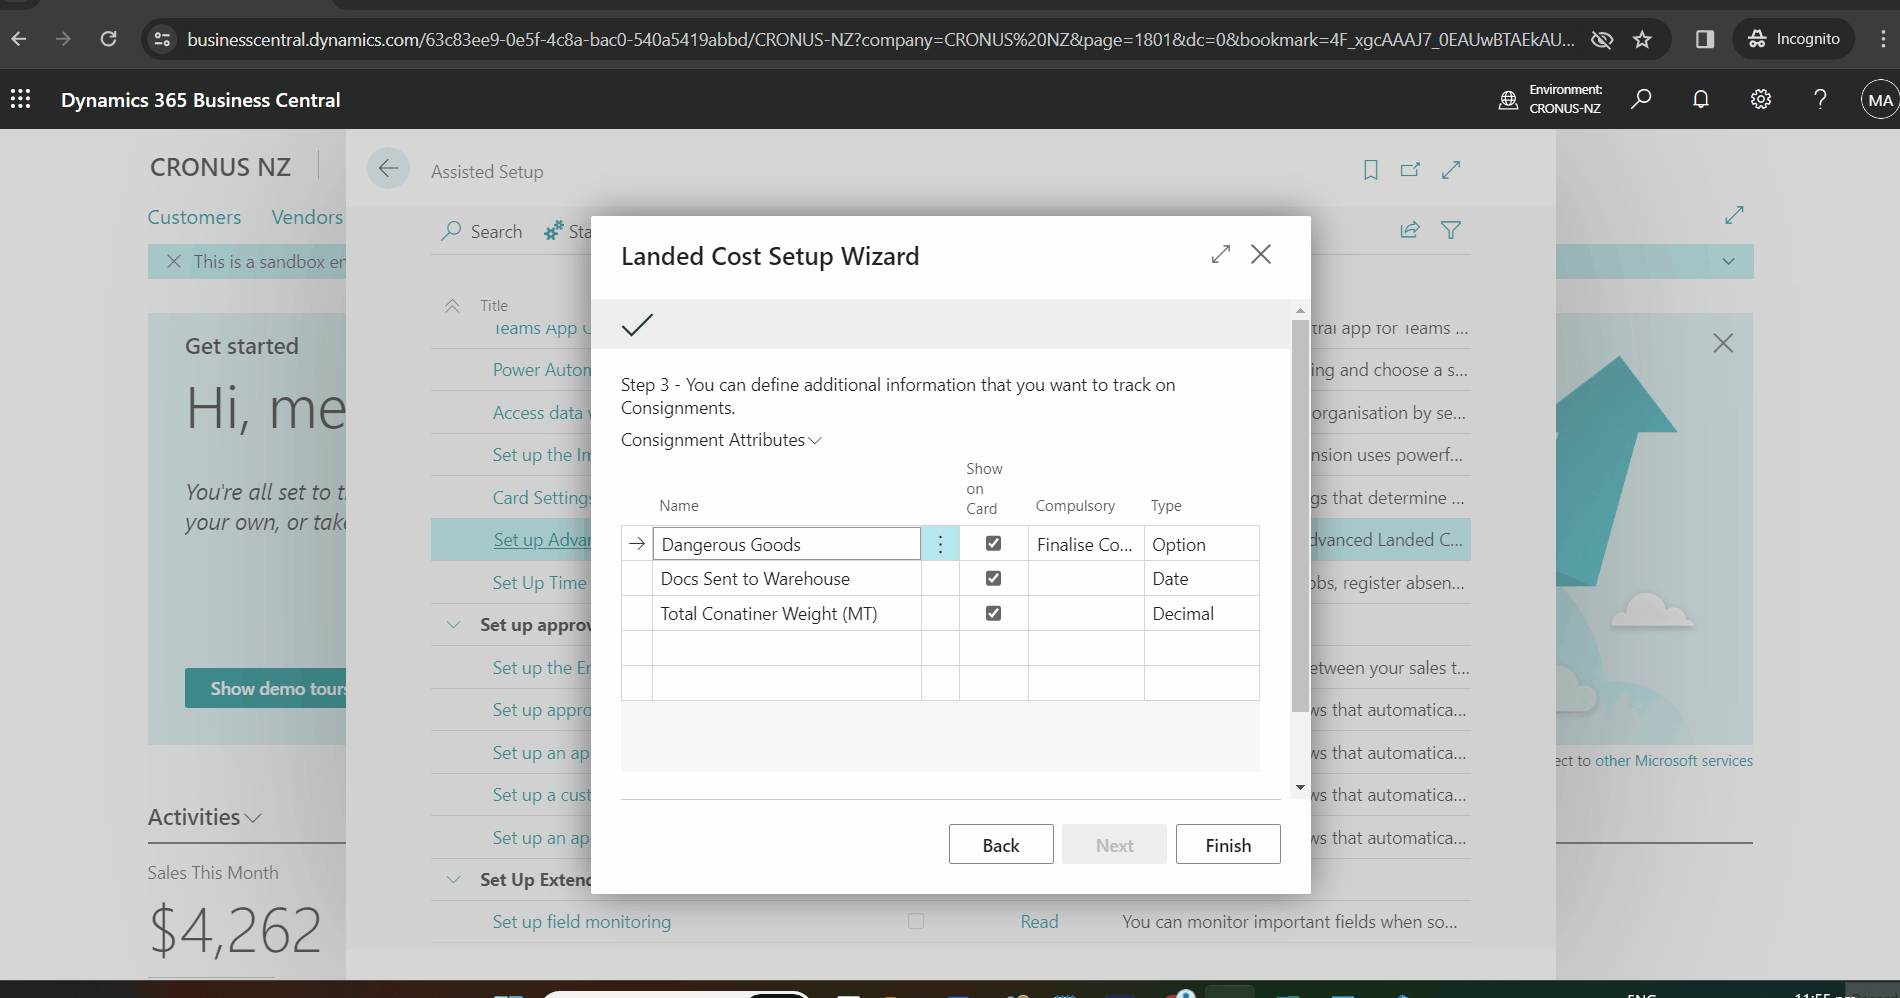
Consignment Attributes
Consignment attributes are fields you can specify and add to your consignments, allowing you to capture customisable information.
You can set up to 5 attributes to show on the Consignment Card; the rest will be available on the Consignment Attributes secondary page accessed from the Consignment Card.
An attribute can be one of the following types:
| Data Type | Description |
|---|---|
| Text | This allows the user to type free text, allowing up to 100 character |
| Integer | Whole numbers only, positive and negative |
| Decimal | Numerical values with decimal places |
| Date | Date format and will display the date picker |
| Option | Option drop list, in which you specify each option |
This will use the 'Consignment Attribute Values' table to hold each option.
Enter the Attribute Name under the Name column.
Click Show on Card to display this attribute on the main Consignment card page.
Select the Validation point under the Compulsory column. You may leave it blank if you wish to make the attribute optional.
Choose the appropriate data type for this attribute by clicking the option.
Click on the Consignment Attributes action and select Consignment Attribute Values, where attributes are defined as options.
Enter the relevant values for the Type option.
Close the screen and move back to the Attributes list.
Specify all the Attributes and their values and click on Finish.
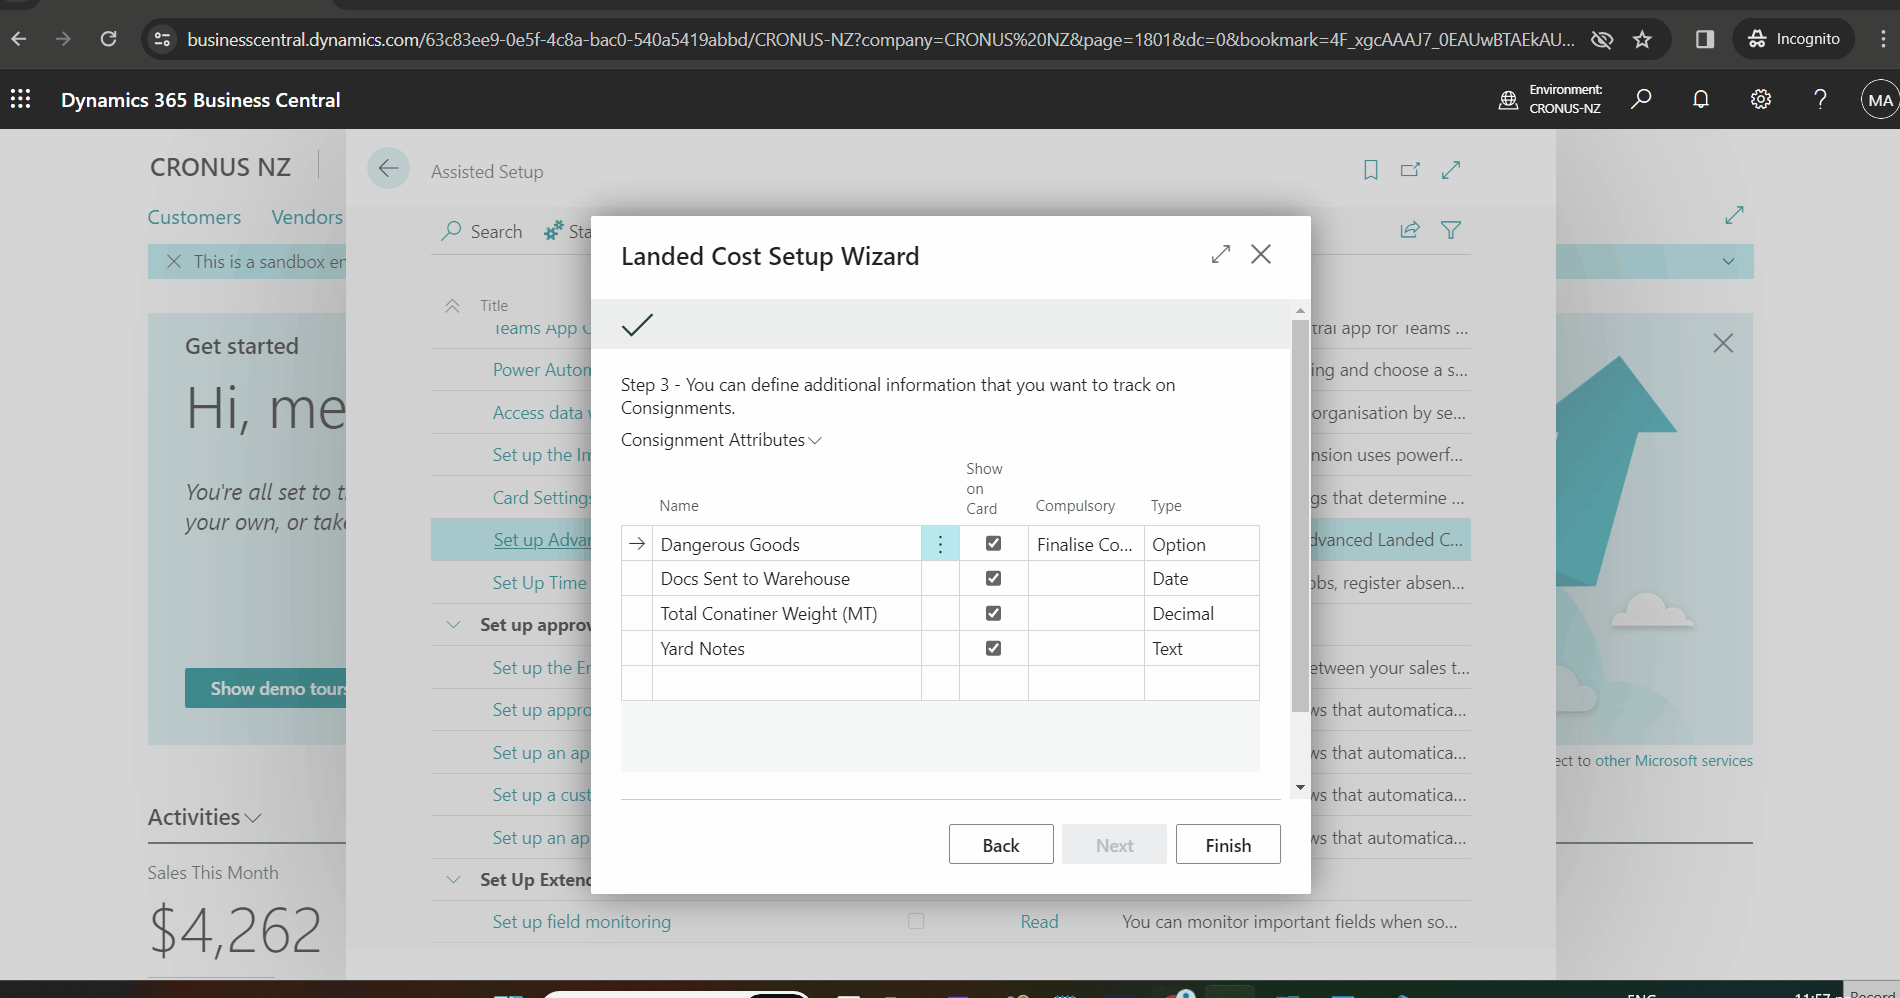
This setup can be configured later, and further attributes can be added if required.
Advanced Landed Cost Setup
The Advanced Landed Cost setup page can be used anytime for further administration and configuration.
Choose the search icon, enter Advanced Landed Cost Setup, and choose the related link.
Configuration settings using the setup wizard can be viewed and updated here. It also has the option to create job queue entries for manually predicted cost posting.
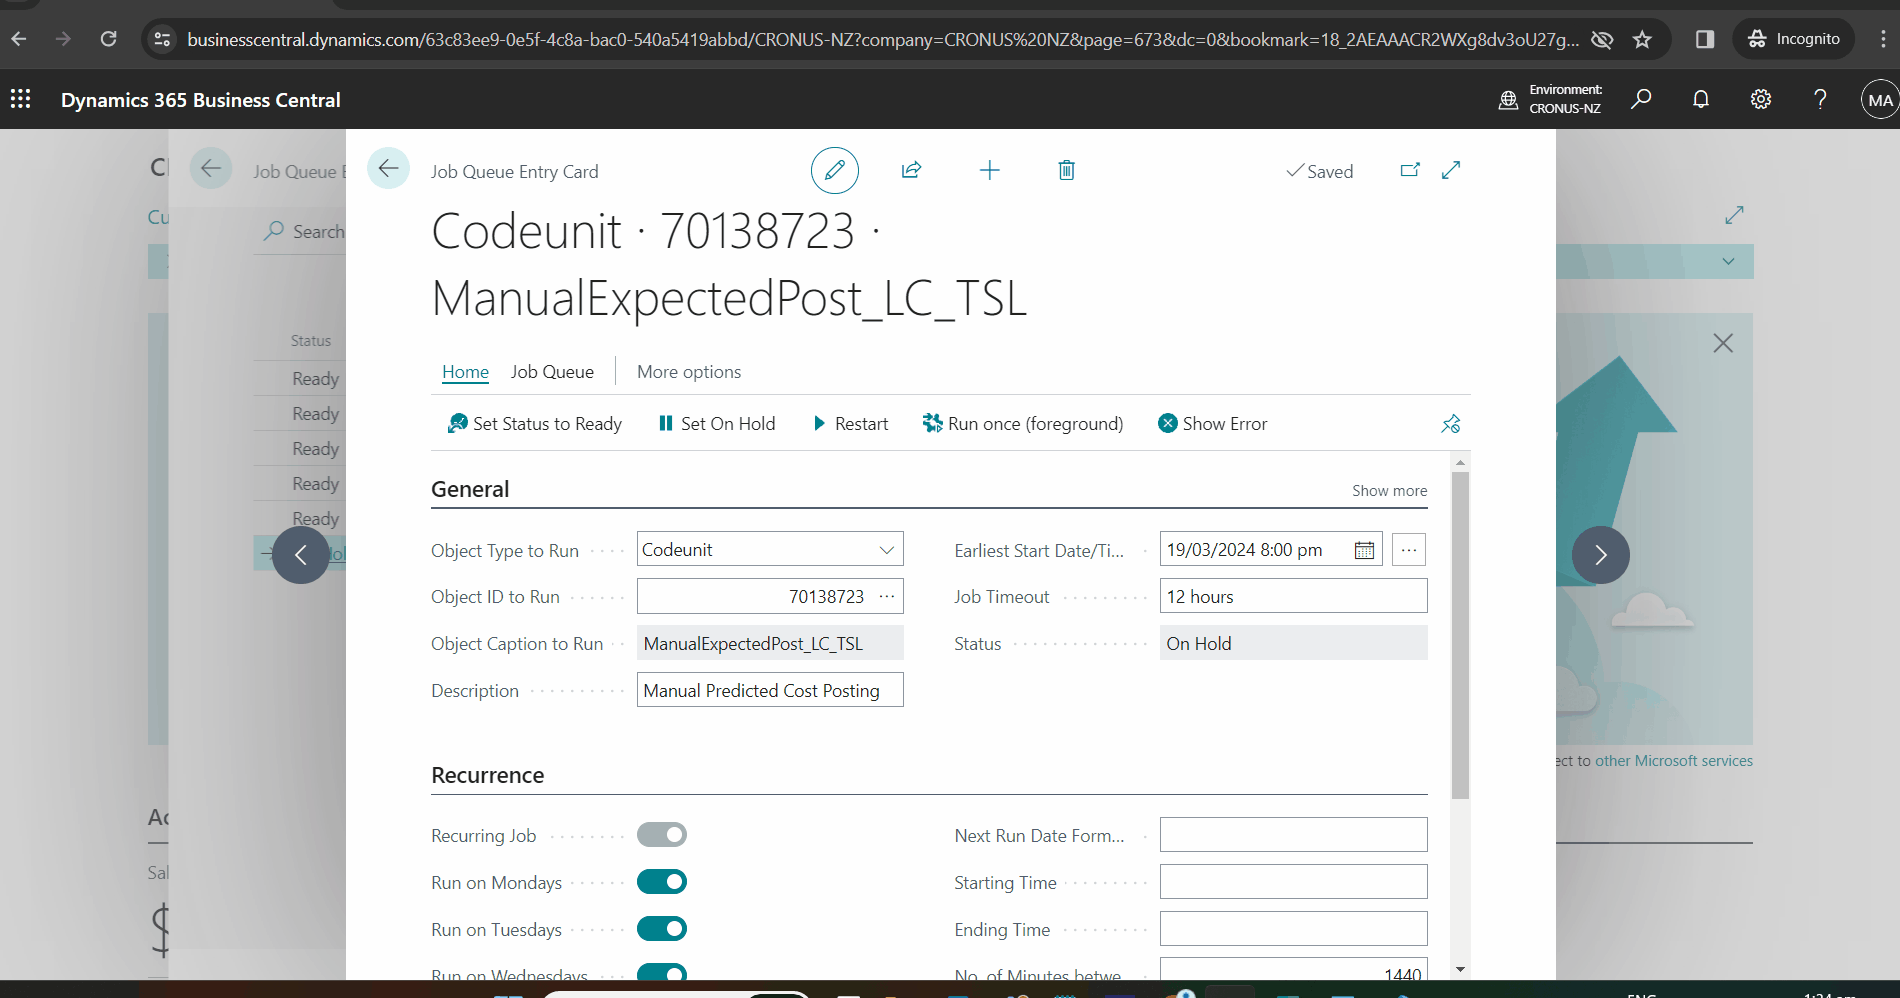
Post Predicted Cost Manual option - Job Queue
If the Predicted Cost Posting is Manual, it can create a Job queue entry to schedule the Posting on the Advanced Landed Cost Setup page. It will help to create a job queue; later, we can activate it when required.
Click the Create Job Queue Entry button on the Landed Cost Setup page. It will create the Job Queue entry and put the status On Hold.

Run through the Job Queue Entries list:
Choose the search icon, enter Job Queue Entries, and then choose the related link.
Select the job queue entry having Description with the value Manual Predicted Cost Posting.
Click on Edit.

The below step will run the Manual Predicted Cost Posting to post entries in the foreground. You may Skip this if you want to run in the background or to set the entry to any schedule or recurrence.
Click on Run once (foreground) under Home.
Choose Yes on confirmation.

Alternatively, we can set the Job Queue on schedule (recurrence) and change the status of the job queue entry.
Click on Set Status to Ready to update the status to Ready.
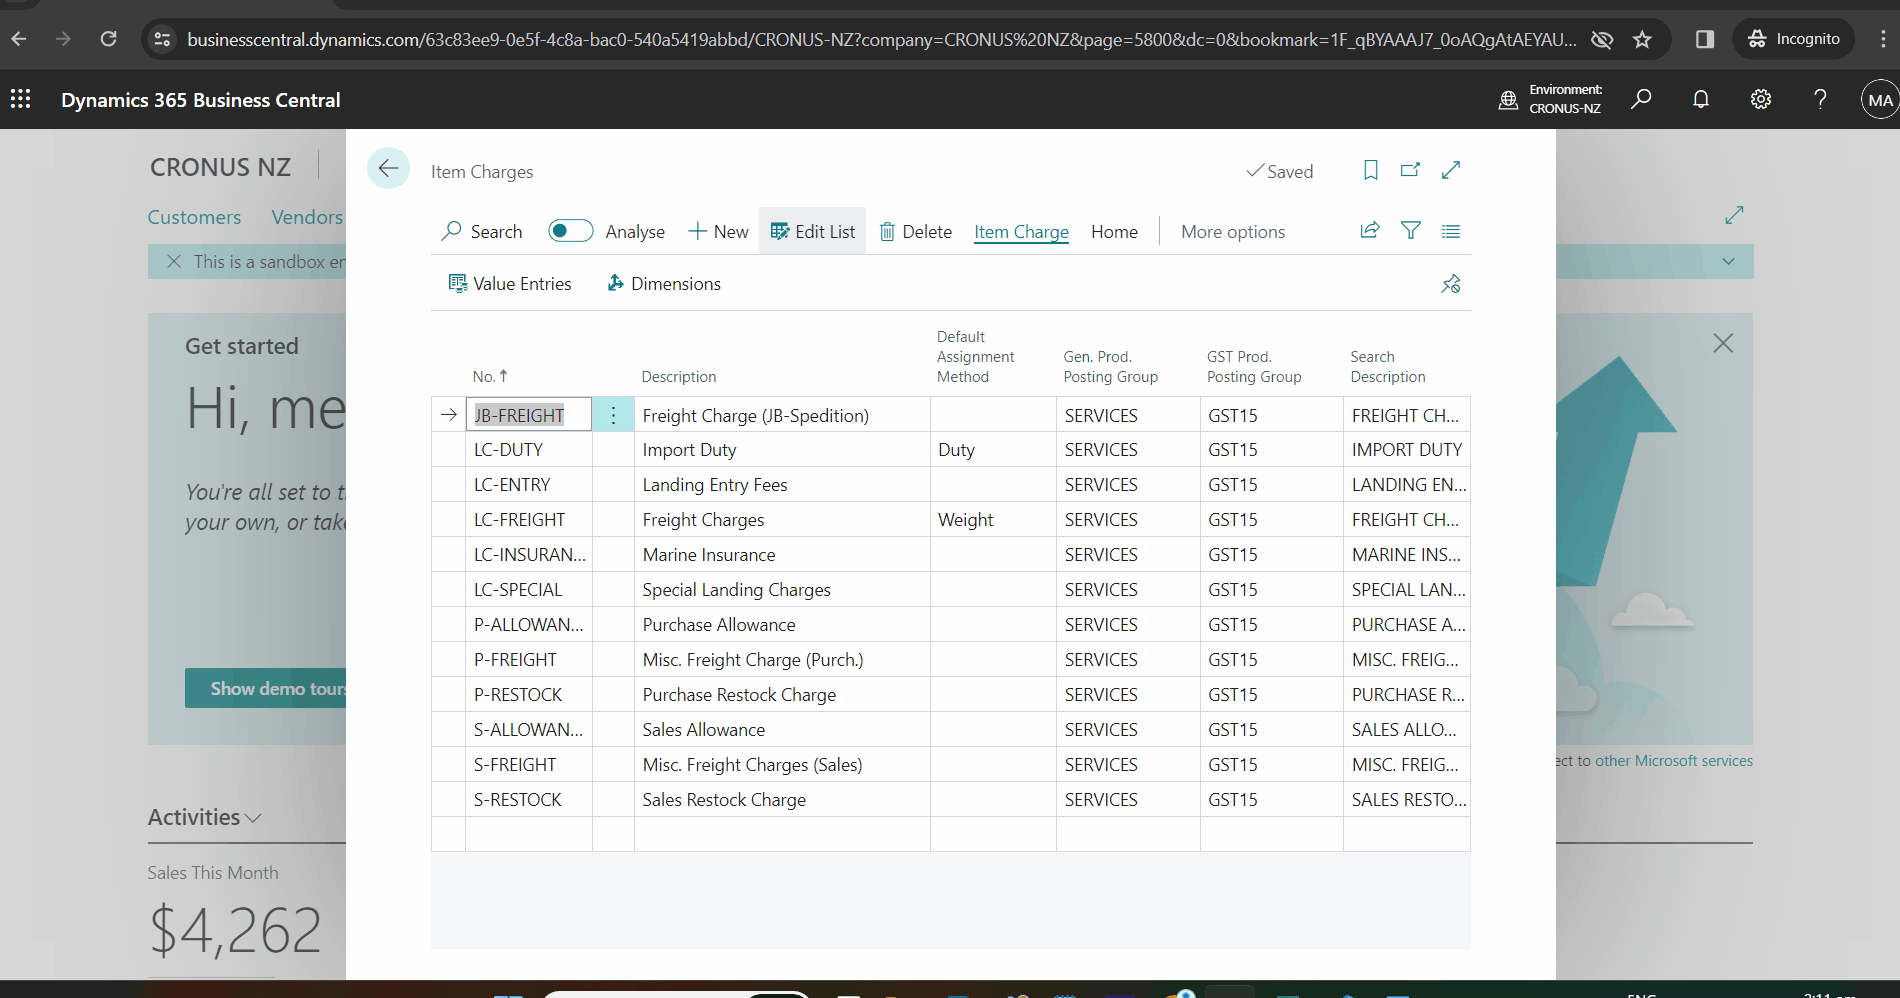
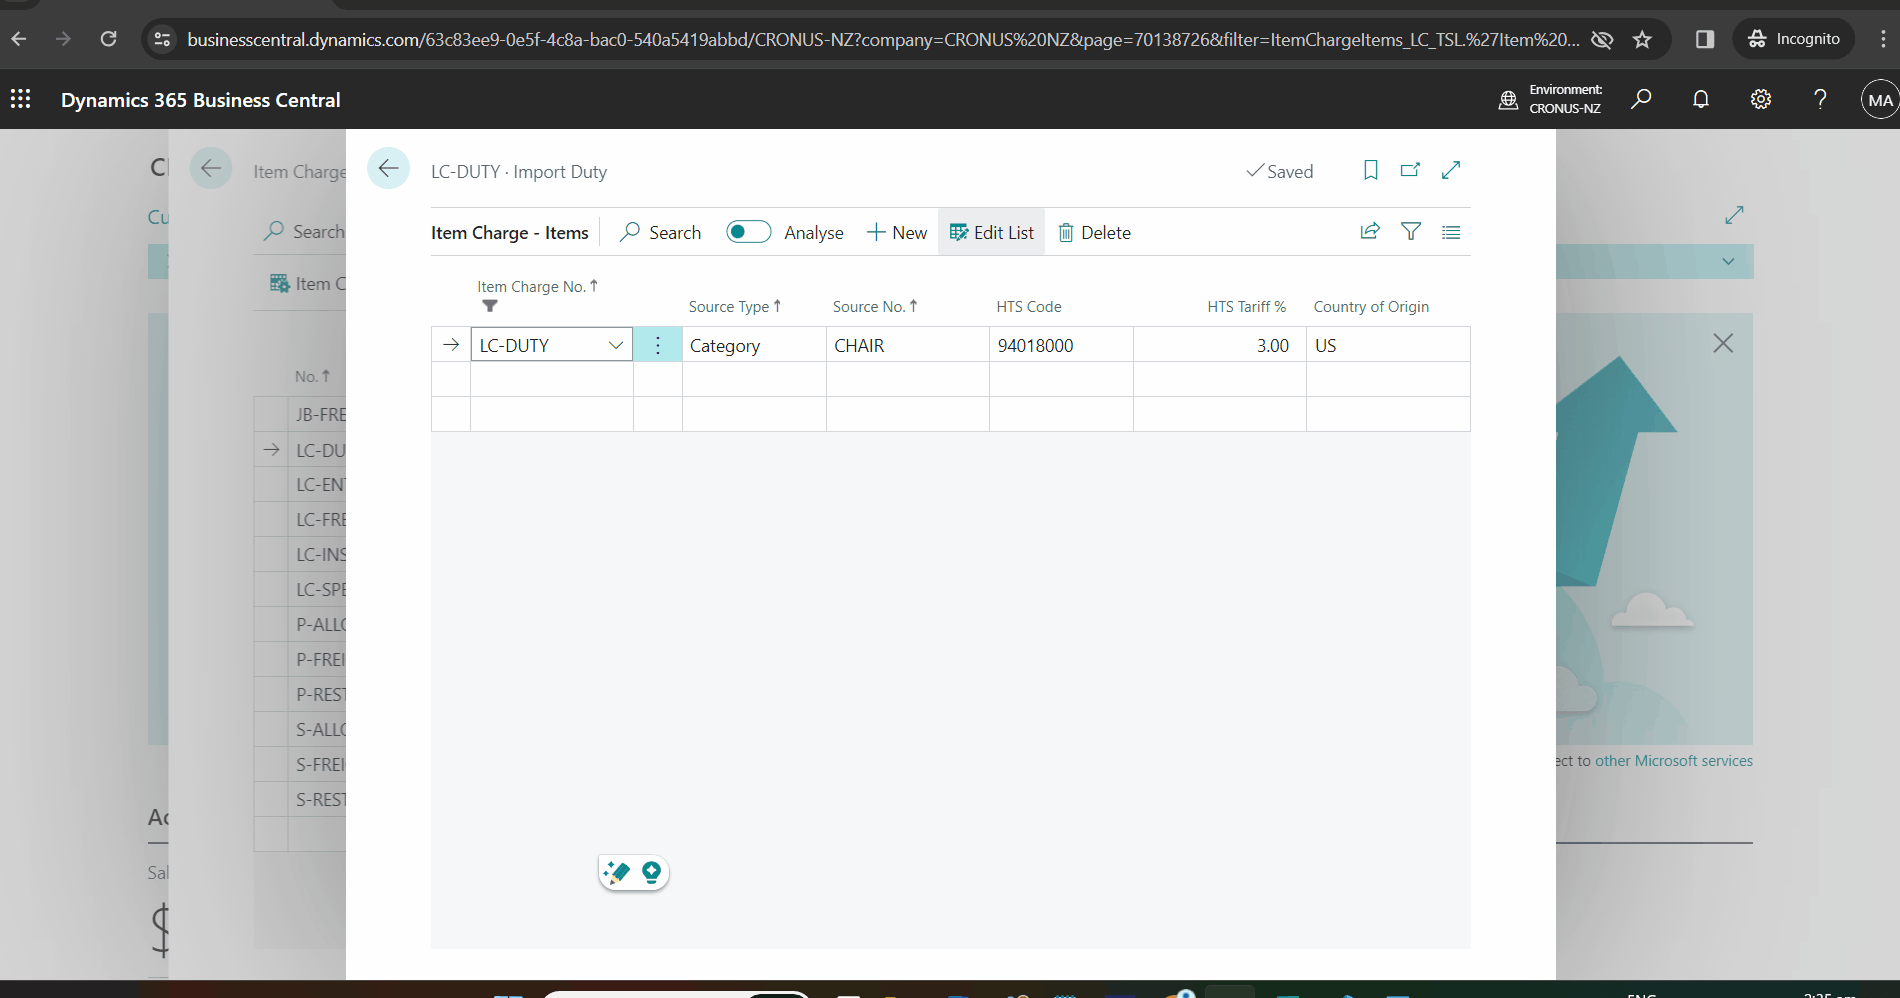
Item Charges - Items
The Item Charges – Items must be set up where there are Duty-related charges. It could be set up per Item or Item Category with its related HTS code (Harmonised Tariff Schedule) and tariff percentage for each Item Charge to be apportioned by Duty or Amount + Duty.
These can be defined as per Item or per Item Category and can be set from the standard Item Charges setup or using the Advanced Landed Cost menu to Item Charges - Item.
Choose the search icon, enter Item Charges, and choose the related link.
Select the Item Charge to assign Item HTS codes; it must be applied when using the Duty Assignment Method.
Select the Item Charges line where Duty and/or HTS codes need to be assigned.
Click on the Item Charge - Items under Home.
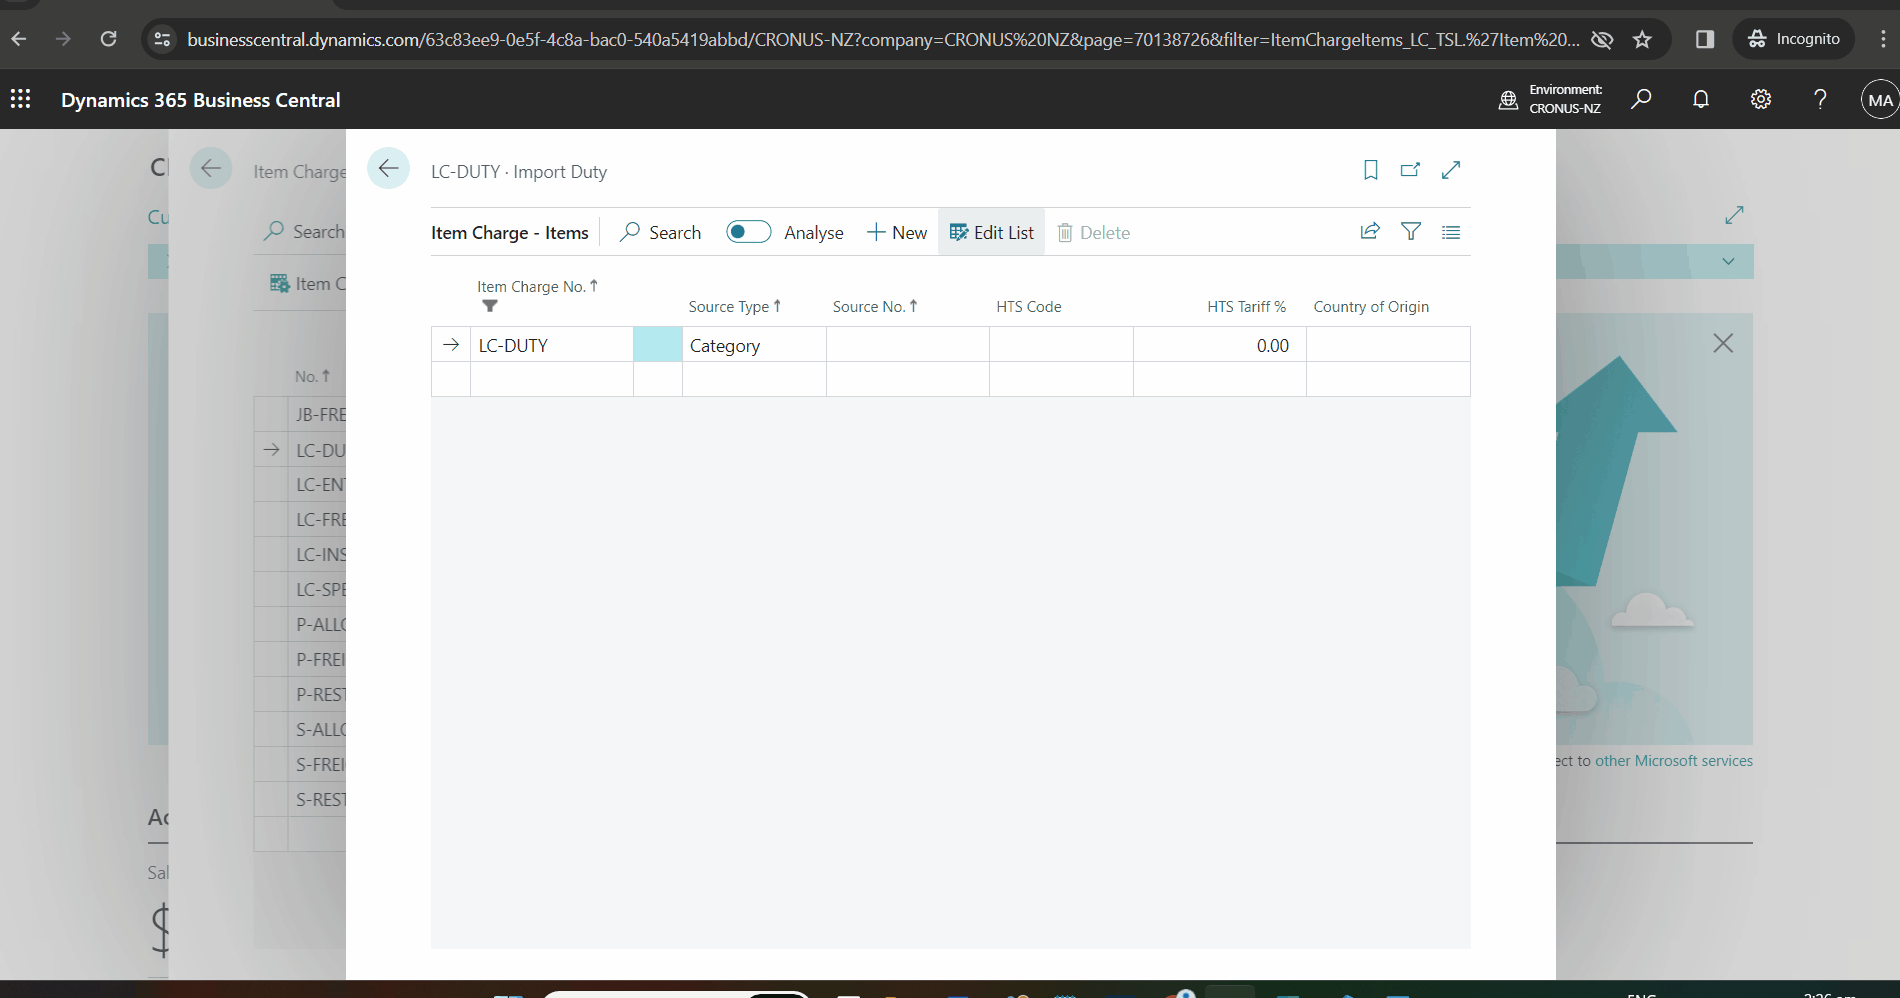
Define Duty against Item Category Code
On the Item Charges - Items screen, choose Source Type as Category
Lookup the Source No. and select the relevant Item Category Code.
Click on the HTS Code column and enter the HTS Code.
Enter the HTS Tariff %.
Select the relevant County of Origin.
Define Duty against Item Code
On the Item Charges - Items screen, choose Source Type as Item
Lookup the Source No. and select the relevant Item Code.
Click on the HTS Code column and enter the HTS Code.
Enter the HTS Tariff %.
Select the relevant County of Origin.
All the defined HTS codes can be accessed under the Advanced Landed Cost menu items.
Click on the Advanced Landed Cost under the action bar in the role centre screen.
Select the Item Charge - Items.
It allows to add, delete or edit Item Charge – Items here.
Apportionment will only respect the HTS Tariff % for the same Item Charge No charges. Therefore, repeat the HTS Code and % for all Item Charge Nos. that use Duty or Amount + Duty apportionment.
Click on the Edit List option to make any changes.
Compulsory and Customisable Consignment Fields
Customisable Fields
This the part of Advance Landed Cost Setup in this extension. This setup allows you to define more consignment related fields (attributes), which are more specific to a company. The Advance Landed Cost app can display up to ten of these attributes on the consignment card, but there is no limit to how many attributes you can add.
Compulsory Fields
The setup in the app, lets you define which consignment fields are compulsory/ mandatory in the process. And also the earliest point at which you must capture these values. This helps the companies to follow and implement the business rules on the advance landed cost process.
In the Advance Landed Cost Setup page, you can find the Compulsory Fields. Currently, in the App, more than 15 data fields are available to you to capture data, according to your requirements. It allows you to choose the relevant field and make it compulsory for the data capture as per your requirement.
When you define Compulsory, there are four options available to you. Each Compulsory field can be set up with different options.
Order Validate: This enables you to capture the data at the Purchase Order level and make it mandatory before Releasing the Purchase Order.
Predicted Cost Post: If you select this option the app will validate this field before Predicting the Cost Post at the time of posting the Receipt of the Purchase Order.
Finalize Consignment: If the user selects this option for the relevant compulsory field, the app will validate this field before Finalizing the Consignments.
Please refer to Consignment Card-->Change Status-->Finalize
Actual Cost Post: You can select this option to make the compulsory field mandatory before you post the Actual cost through the posting of Service vendor invoices.
Click on the Search Icon in Business Central, type Advance Landed Cost Setup and click on the Search Button. In the Advance Landed Cost page, move to the Compulsory Page Tab. This app will display many fields under the column Field Name. Please use the Compulsory field name to update the Compulsory option for he following fields.
• Expected Receipt Date: Order Validate
• Vessel Name: Predicted Cost Post
• Shipment Method: Predicted Cost Post
• Waybill No. : Finalize Consignment
• Container No: Finalize Consignment
• Country of Origin: Order Validate
• Location Code: Actual Cost Post
• Document Date: Actual Cost Post
• Duty Calculation Method: Finalize Consignment