Processing Advance Payment Reconciliation
Importing the Bank Statement File
To process Advanced Payment Reconciliation, you will first need to import a bank statement file into a Bank Account Reconciliation.
You can import a bank statement file by following the below steps:
Open the Bank Account Reconciliations list.
Create a New Bank Account Reconciliation for your chosen bank account.
Import a bank file through Import Bank Statement under Bank on the Navigation menu.
Set the Statement Date in advance, or select Yes if prompted to accept a statement date.
You can find the full set of instructions on how to import a bank file here.
Running Automatic Matching in Payment Reconciliation
You can run the Automatic Match from the Payment Reconciliation page.
Follow the below steps:
- From the Bank Acc. Reconciliation Card, select the message Click here to open the Payment Reconciliation.

You can also open the Payment Reconciliation by clicking Matching and then clicking Payment Reconciliation on the navigation menu.
- On the Payment Reconciliation navigation menu, click Process and then click Automatic Match.

- Select Yes to run the Payment Reconciliation. If you have matched entries before you run the Automatic Match, you will receive the option to either only match the unmatched entries, or to remove all applications and run the match again. Select the desired option and then click OK.

If you have updated your Automatic Matching Rules and would like to see them applied, you should select Unmatch all previous matches and then match again.
You can find more information here on Automatic Matching Rules.
The Blue/StrongAccent shows we have a match that is not applied to an account type that can be applied. For Example, Vendor or Customer payments. You can see the rule used to match this line under the Matching Details.
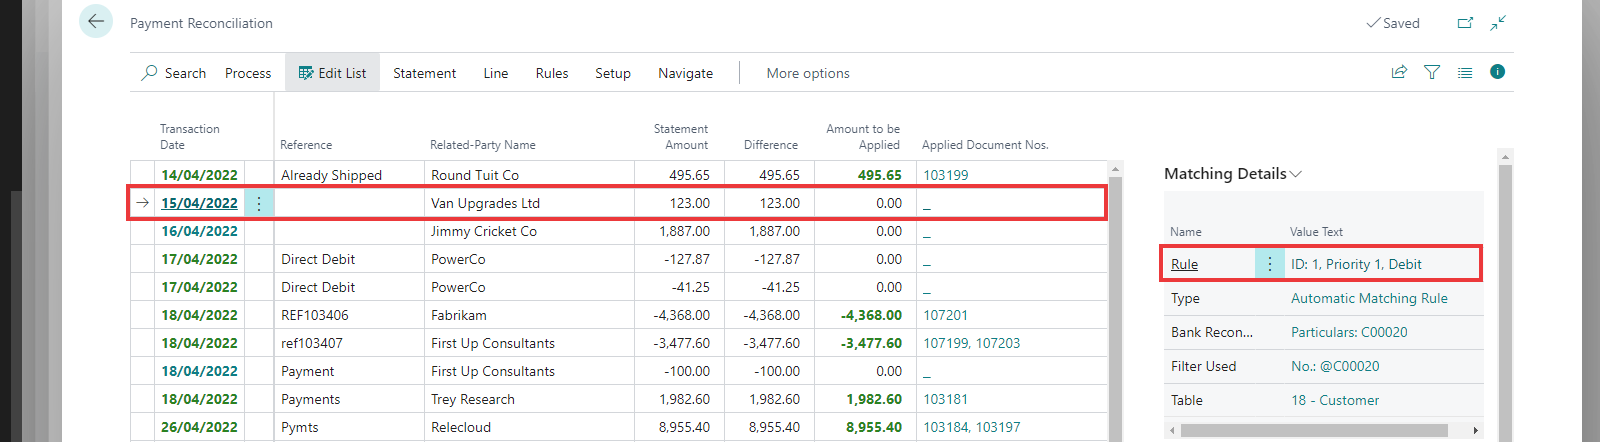
The above shows the rule used to match is ID:1 being Automatic Rule with ID 1, which has been set with Priority 1, and only for Debit transactions.
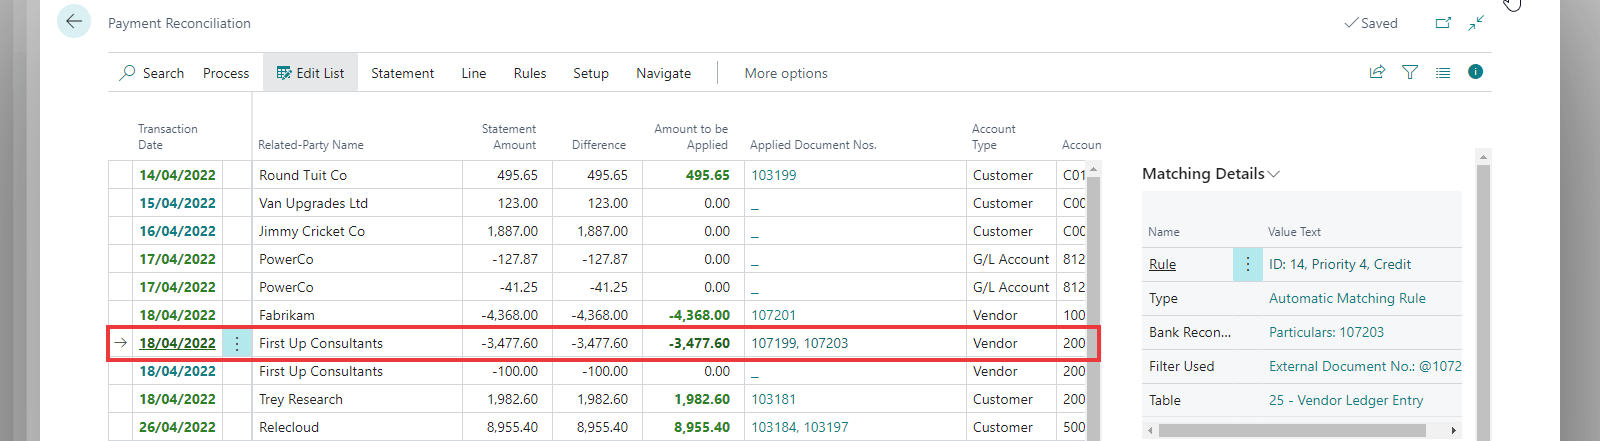
Green/Favourable shows that you either have a match that is applied to an account type and can be applied in full, or a match that does not need to get applied. This includes General Ledger matches, e.g. Bank Fees.
Below you can see that the line is fully applied.
For customer and vendor transactions, there is the possibility that you allow for payment discounts or payment tolerances. The app considers this will trying to automatically apply entries. You have the following possible scenarios here:
- Green/Favourable indicates that the entries are fully applied to the amount when taking the payment discount into account and there are no differences. You will notice that where a payment discount is anticipated the applied amount will be higher than the statement amount. You can view the payment discount on the Line Details fact box.
- Yellow/Ambiguous indicates that the entries are fully applied to the amount when taking the Payment Discount but there is a difference within the tolerance limits on the applied entries. You can view the Maximum Payment Tolerance on the Line Details fact box.
- Red/Attention indicates that entries will be applied but transactions will not get fully applied when taking payment discounts and tolerances into account.
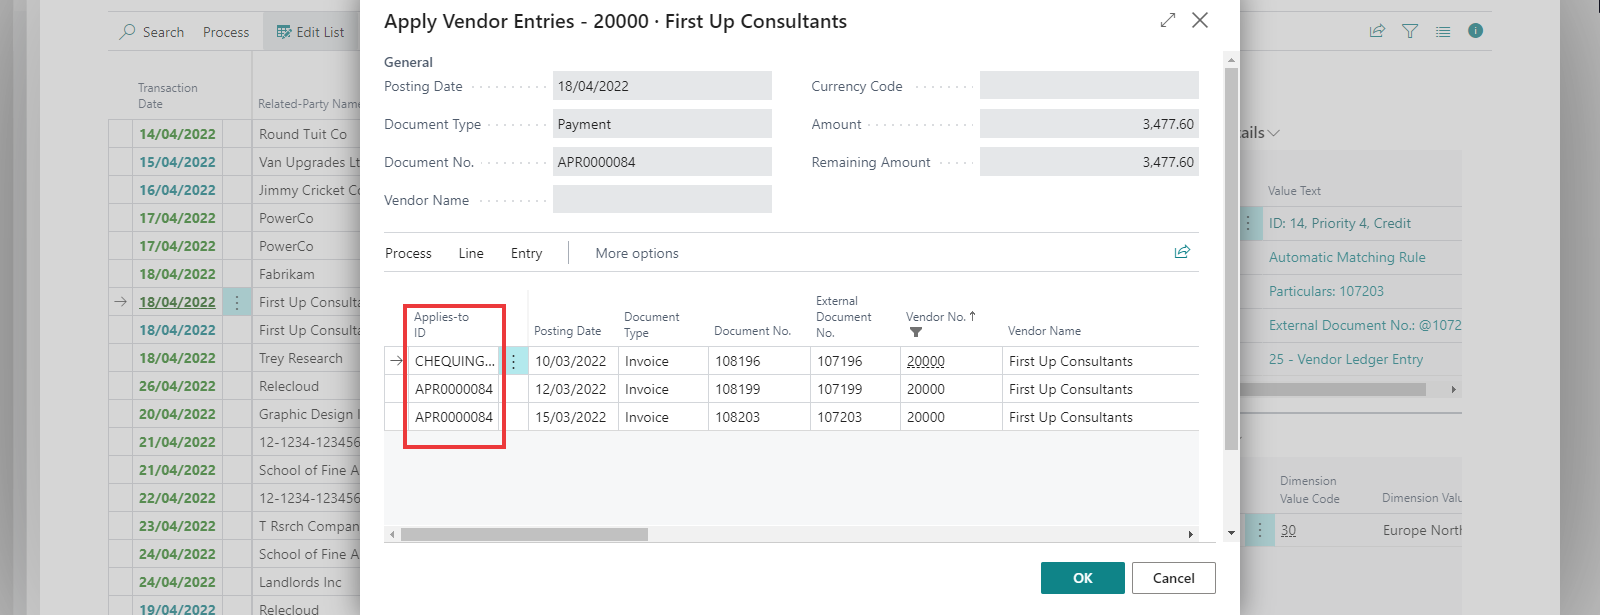
If you click on the value of the Applied Document Nos. you can manually update the application if required by adjusting the Applies-to ID field, as per standard Business Central.
Transfer to Journal and Posting
When you have applied all your transaction lines, you can transfer the Payment Reconciliation lines to the defined General Journal Template and Batch for posting. You can do this by following the below steps:
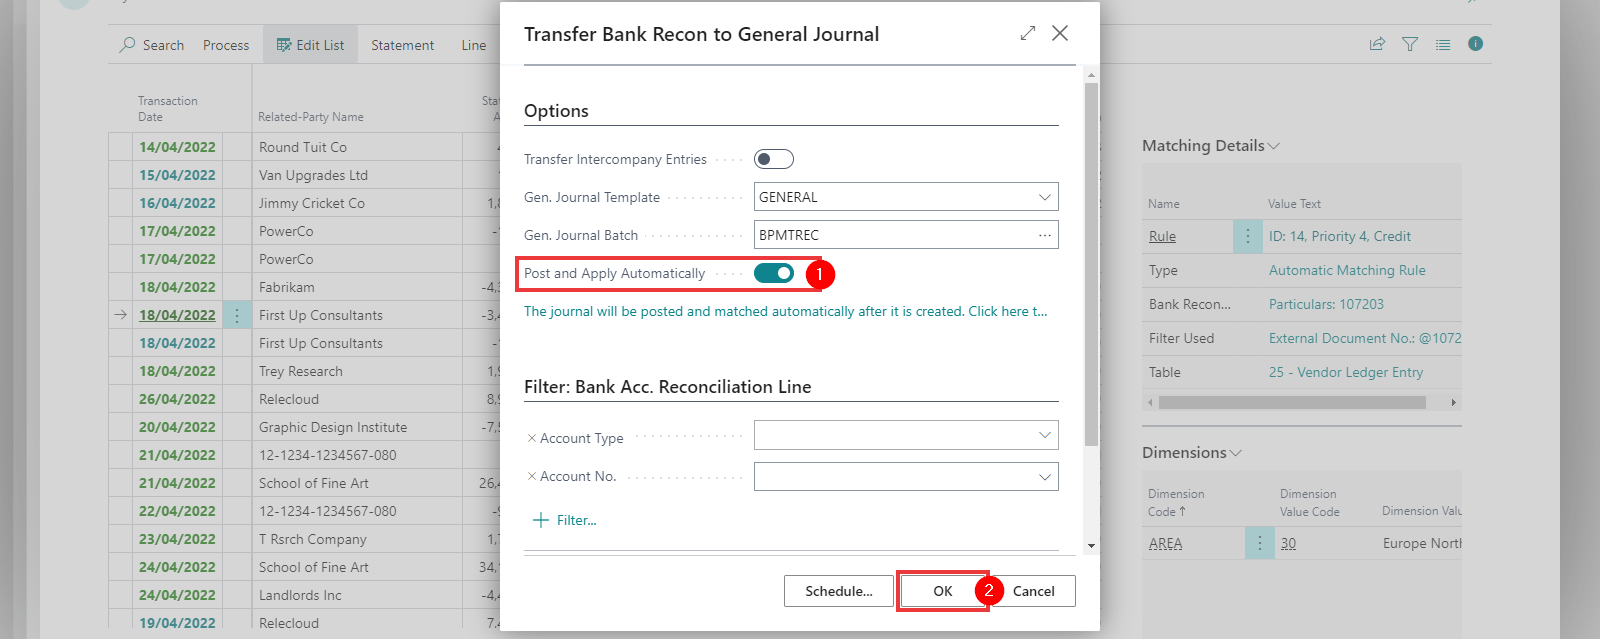
- On the Payment Reconciliation navigation menu, click on Process then Transfer to Journal.

- Engage the Post and Apply Automatically to automatically post and apply the journal on creation. Click OK.
- All Payment Reconciliation lines are now posted if automatic posting was engaged. If not engaged, you will need to post the journals directly from the defined Journal Batch. Return back to the Bank Account Reconciliation page.
If you select the link The Journal will be posted and matched automatically after it is created. Click here... it will give you the option to update the default setting for automatic posting on the Payment Reconciliation Setup. You will still need to enable the Post and Apply Automatically toggle for your current journals to be posted automatically. The default settings will then apply to all future journals.
- You will now see the result of your Payment Reconciliation journal. If you had reconciled all lines, you can now complete the standard Business Central Bank Account Reconciliation.
Configure Journal Descriptions
The app will transfer the description of the bank reconciliation line to the journal by default. This description may contain many references and look untidy - especially if the description gets shown on outbound documents like your customer statement. The app provides a setup per bank account to allow you to configure how to default the description.
Journal Description Setup
This setup is available on the Payment Reconciliation, Bank Account List, and Bank Account Card pages.

On this page you can specify with conditions the descriptions that should get copied to the journal. The description can include fixed text and tokens that get replaced with field values from the bank reconciliation line.

| Field | Purpose |
|---|---|
| Condition | Specifies the conditions in which the description should get copied to the journal. |
| Enabled | Specifies that this rule is enabled. This value will default to yes, but you can turn it off if you do not want the rule used for any reason. |
| Priority | Specifies priority assigned to this rule. In a scenario where multiple rules are applicable, the rule with the lowest value in this field gets applied. |
| Translate to Description | Specifies the description that the app should copy to the journal. The field can include fixed text and tokens. Tokens get replaced with the values from the fields mapped to them in the Token Mapping. |
Token Mapping
Here you configure the tokens that you use in the Journal Description Setup.

| Field | Purpose |
|---|---|
| Table Caption | Specifies the caption of the table. |
| Field ID | Specifies field that you wish to use for this token. |
| Field Caption | Specifies the Field Caption. |
| Format String | Specifies a format string that can influence how values are formatted. Click here for more details on how to specify the format string. |
| Token | Specifies the token that gets used as a placeholder for the field. The token must start and end with % and usually have a meaningful name. For example, %REFERENCE% or %TRANS_DATE%. |